Customer statements
Customer Management
When creating an account for a customer in Fred NXT Dispense, you must flag this customer as a Debtor. A Credit Limit and Term of Payments must also be recorded in the Customer record before a customer account can be charged at the point-of-sale. A customer can have multiple accounts at different store. Each account is associated with one store.
Accounts and patients can only be linked if the account is created in Fred NXT Dispense. If you edit account records in Fred NXT Head Office, these changes will be sent back to the store.
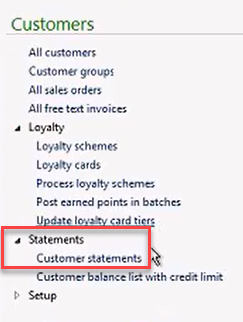
- On the Dashboard, go to the Customers group and click Statements.
- In the Customer statements window, select from the following parameters:
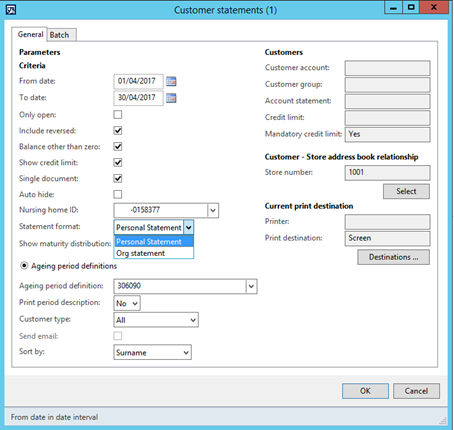
Field Description From Date Select the starting date of the transactions to include on the statement. By default, the report displays the opening balance in each currency for which transactions exist, as of the date in the From date field.
To Date Select the ending date of the transactions to include on the statement. By default, the report displays the closing balance in each currency for which transactions exist, as of the date in the To date field. Only open Select this check box to include only transactions that are not settled. This option helps reduce the time that is required to generate statements, because the reports include only open transactions, instead of all transactions, for each customer. Include reversed Include transactions that have been reversed or corrected. Balance other than zero Only generate statements for customers who have a balance that is not zero.
This option helps reduce the time that is required to generate statements, because statements are not generated for customers who have a balance of 0.00. Show credit limit – Print credit limit on statement.
Show credit limit When selected, the credit limit ($x.xx) prints on the statement. Single document By default, Fred NXT Head Office generates one statement per customer, and opens one browser window per statement.
- When Single document is set, the batch of customer statements opens in the same window (instead of one window per statement).
- When Single document is set and a Print destination is selected, a single file is saved to the selected folder.
Auto Hide When Auto hide is set, any Cancel or Edit action performed on auto charged scripts within the open statement period is automatically hidden:
- Cancelled scripts - Both the original and the credit are hidden. No visible line on the statement.
- Edited scripts – Both original and the reversal are hidden. Only the updated transaction is visible line on the statement.
- Transactions that have been reversed or corrected at the POS on the same day.
Nursing home ID Restrict to one Nursing home. Statement format The Statement Format option is available only if a Nursing Home is selected.
Organisation statements
- Organisation statement are Invoiced to the Nursing home and not the patient.
- Patient transactions are printed a single list, without page break between the patients
- A Grand total, printed at the bottom of the report, displays the amount owed to the nursing home.
- Total GST prints in the footer section.
- A GST Subtotal is also included for each patient listed on the statement.
Personal statements
- The Personal Statement template is the default option.
- Personal statements are invoiced to each individual customers, each separated by a page break.
- BPAY reference details for each individual customer are printed on the statement.
- This statement does not include a Grand Total.
Show maturity distribution When set, the maturity distribution is printed at the bottom of the statement.
You can select this check box only if you have entered dates in the From date and To date fields. Amounts are included in the maturity distributions based on the due date for each transaction.
Ageing period Definitions Select this option to show the maturity distribution according to ageing period definitions that have been specified for your legal entity. Set to 306090 (by default).
Ageing definition calculations use a hidden field within AX that is not visible.
Customer account Enter an account number or a range of account numbers. Customer group
Select the specific customer group (for example, Work Cover) to generate statements for.
It is recommended to select Customer Group as it may take considerable time to generate statements for all Customer Groups at once.
To check Customer Store Address Book > Criteria.
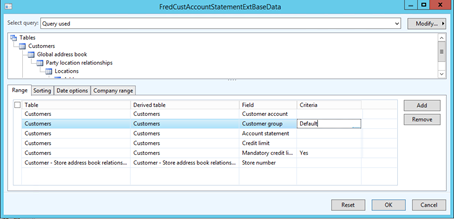
Store number Select the specific store(s) to generate statements for, or leave blank for all stores.
It is recommended to select specific stores as it may take considerable time to generate statements for all stores at once.
Credit Limit Enter the required value $x.xx Mandatory Credit Limit By default, set to Yes, to ensure the statement batch includes only Debtors (customers with a credit limit). Store number Select the specific store(s) to generate statements for, or leave blank for all stores.
It is recommended to select specific stores as it may take considerable time to generate statements for all stores at once.
Print destination Print to screen or set a file location.
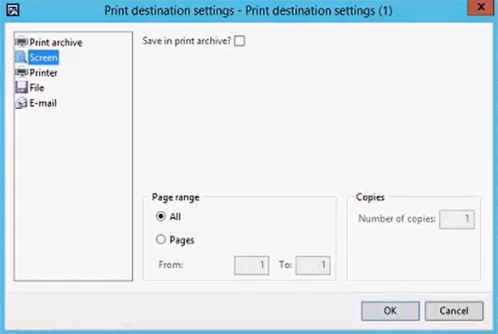
Sending statements by Email will be addressed in a forthcoming release.
- Tap OK to generate the batch.
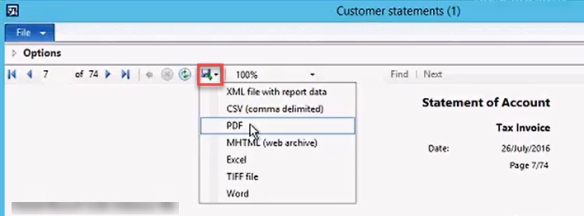
When statements are generated to Screen, they can be saved to file location as PDF files. The saved document can be retrieved and re-issued to the customer, if required.
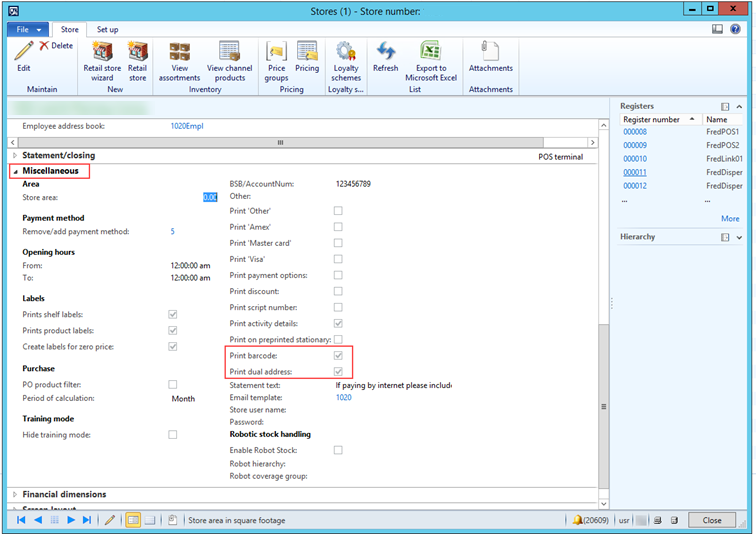
The Print barcode parameter can be enabled for Retail stores wishing to print a barcode in the remittance section of customer statements.
In order to render the barcode correctly, make sure the True Type fonts BC 128 (Narrow, Medium, Wide) and C128HDM,C128HDN,C128HDW are installed on your Terminal in C:\Windows\Fonts
- Navigate to FredNXT Head Office > Organisation > Retail stores.
- In the Miscellaneous tab, enable Print barcode.

When this barcode is scanned at the POS, the relevant customer is retrieved, ready to process the payment.
See Fred NXT POS > Account payments
The Print dual addresses parameter can be enabled for Retail stores wishing to print the address of the patient as well as the address of the person who will pay the invoice.
- Navigate to FredNXT Head Office > Organisation > Retail stores.
- In the Miscellaneous tab, enable Print dual address.
- When this parameter is enabled, the second address printed on the statement is the address of the patient/customer linked to the account.
- When a nursing home is selected, the second address printed on the statement is the address of the facility where the patient being invoice is a resident.
This functionality applies to personal accounts only, providing the account is linked to a single patient in the Fred NXT Dispense database.
See Fred NXT Office > Accounts
- From the Fred NXT Head Office Dashboard, navigate to the Customers section, then All Customers.
Each line displays an address and contact details.
- Double-click a line to open a Customer record.
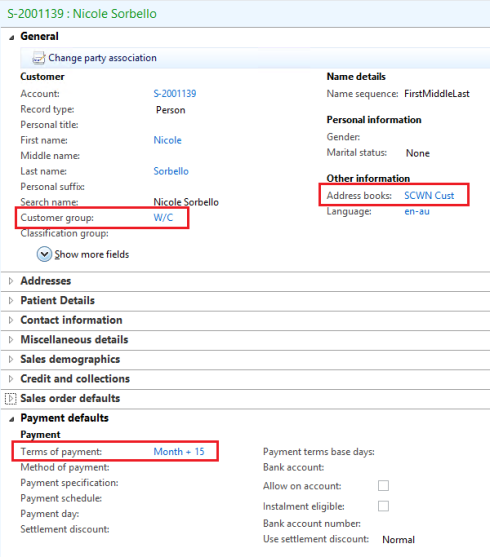
The customer record displays the address and contact information for this customer.
- Expand Credit and Collections and set the Credit Limit.
By Default, it is set to $0.00 (for non-debtor customers).
- Expand Payment Default, then click Terms of Payment.
By default, Terms of Payment is set to Cash (for non-debtor customers).
- Click Cash, and select a different Term of Payment setting.
For example, 15 days.
- Expand General and click Customer group to associate each Customer record with the relevant account type.
For example, a customer can have a TAC account, a WorkCover account as well a non-specific account for personal purchases.
This link allows the pharmacist to charge the correct account type when processing a transaction at the point of-sale.
- Close to save your settings.
Add the Customer Group column to the grid:
- From the Fred NXT Head Office Dashboard, navigate to the Customers section, then All Customers.
- Click the filter drop-down, then click More ...
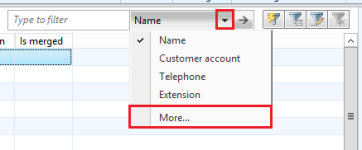
- Expand the Customers node and select Customer Group, then click Add.

The Customer Group column is now added to the grid and filter.
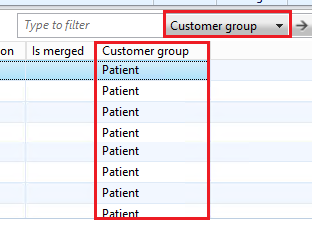
You can now filter or sort Customers by Customer Group (Work cover, TAC etc.).
- Navigate to Customers > All customers to display the All customers grid.
- Select a customer and click Transactions (in the ribbon) to display a list of this customer's transactions.

You can issue two types of Customer Statements:
- Interim Statements
- End of Month Statements
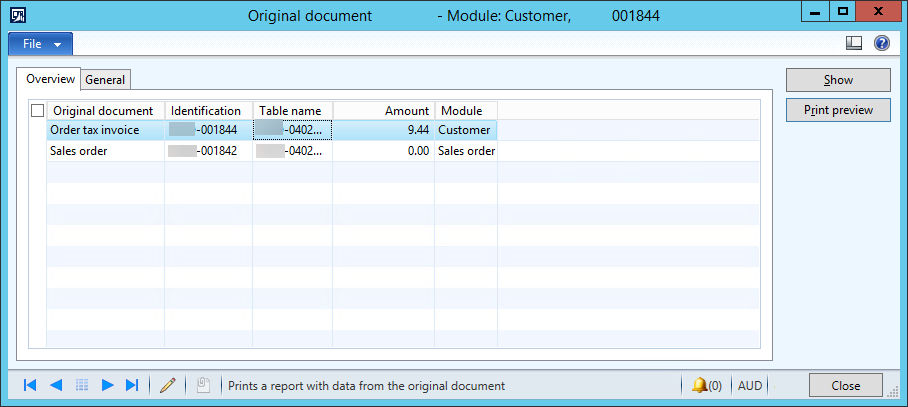
- In the Transactions grid, select a transaction.
- Clock Original Document, then Print preview.

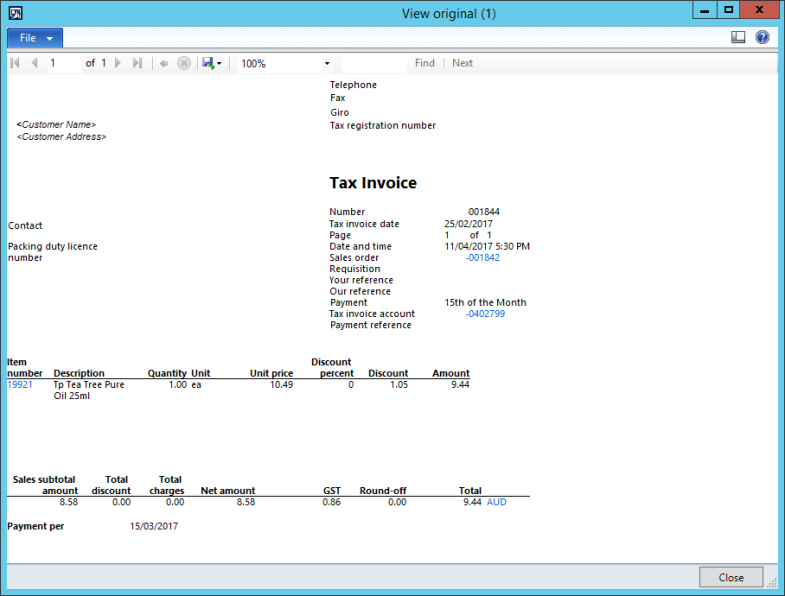
- Navigate to Customers > All customers to display the All customers grid.
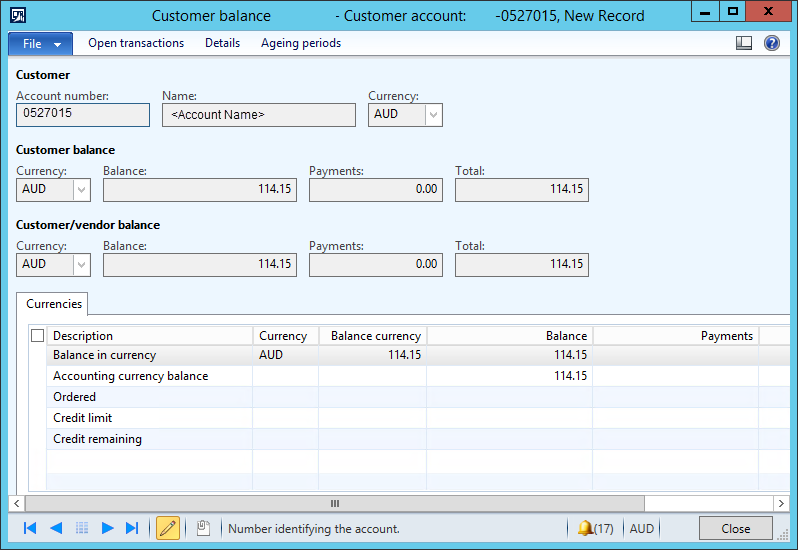
- Select a customer in the grid.
- From the Customer tab, click Balance to see the Balance due.

This function will generate the selected statement record or batch for the current batch period. It will also overwrite the permanent (linked) record.
It is not possible to generated an interim statement from the Customer screen.
 Fred Learning Pathways