Print labels
Inventory and Purchasing
- Under Merchandising Hierarchies > Released Products.
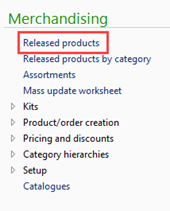
- Search for a product, then double-click to open it.
- In the ribbon, click Edit > Manage Inventory tab > Bar code.
- Select Print next to the barcode which should default to print on the label for the product.
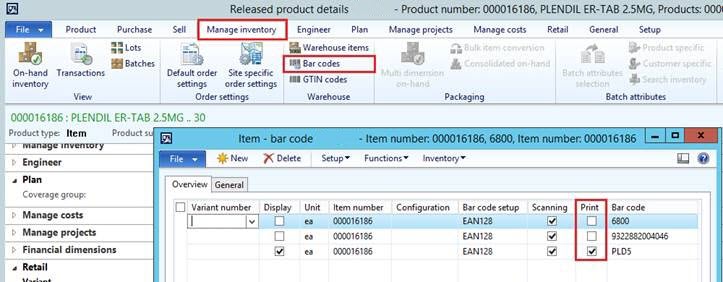
- When done, close to save your changes.
- Configure a discount using any of the available methods (Manual, DIEF import).
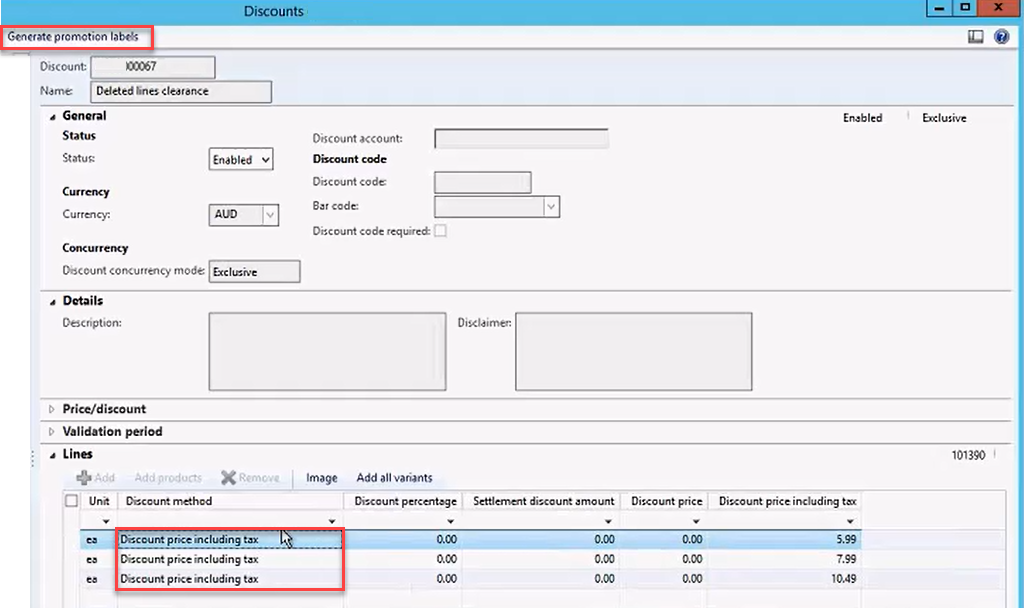
The Discount method must be set to Discount price including tax.
When Discount price including tax is set, the promotional price is printed on the label, instead of the retail price (default).
- Set a Validation period (if configuring a promotion ahead of time)
- Set the Status set to Enabled.
- Click Generate promotion labels.
If any other discount method is set, this button is not displayed.
- Select the appropriate promotion label template.
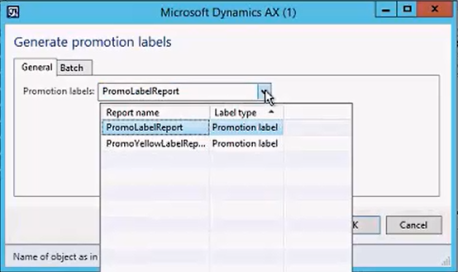
- Click OK to send to the label queue (based on the promotion date) to the store(s).
The label queue is displayed as a tile in the app in Fred Office.
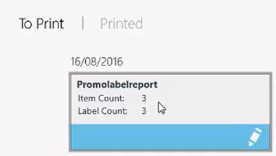
When logging into Fred NXT Office, a message is displayed to inform the store that new labels are now waiting, ready for printing.
- On the FredNXT Head Office dashboard, navigate to Merchandising > Pricing and Discounts and click Price/Discount agreement journals.
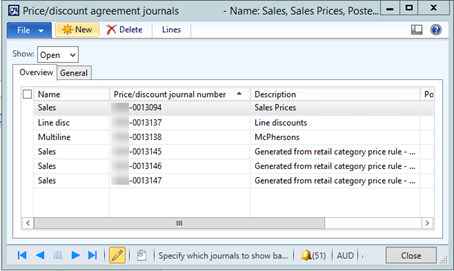
By default, the view displays the Open journals.
- Switch the view to Posted and click the Name header to sort the entries by Name.
- Once you have located the Sales journals, click Print labels to re-send the labels to all stores associated Price group(s).
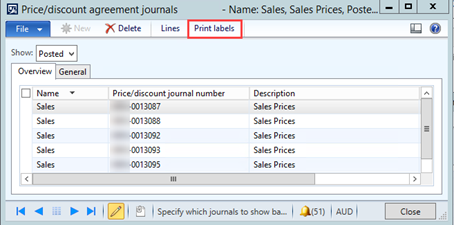
An Infolog message will display to confirm the labels have been sent.
 Fred Learning Pathways