Inventory and Purchasing
This method requires more manual navigation and data entry. It is therefore not recommended, as important fields required for product creation may easily be missed. Whenever possible, use import templates and DIEF. Once products have been created, they are available at store(s) based on the hierarchy selection and assortment settings associated with the products. Typically, this assortment task batch job runs every 10 mins. You can manually push this down to stores ‘now', if required.
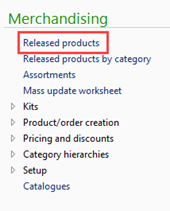
- From FredNXT Head Office, navigate to Merchandising > Released Products.
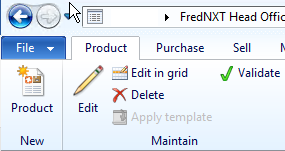
- In the Product tab, click Product
- New.
Make a note of the item product number. This will be needed later for other field entries.
- Select Product Type and Product Subtype.
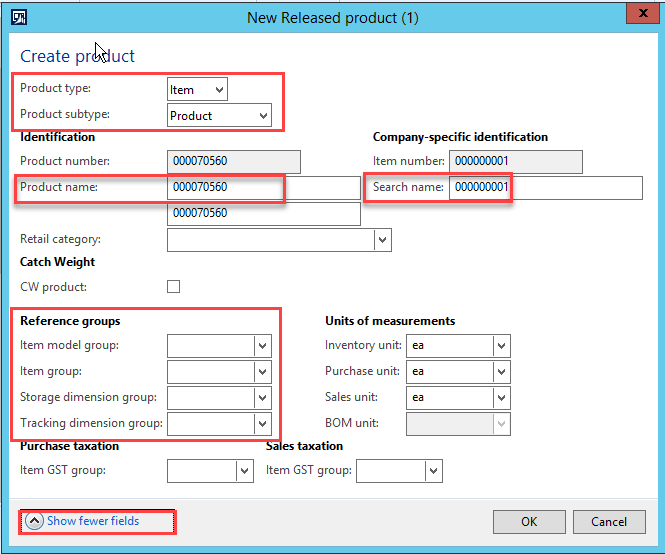
- Edit the Product name and Search name fields.
The next Product number is assigned by default.
- Click Show more Fields, and enter all product details required.
The following Reference Groups fields are required by the system and must be set as follows:
- Item model group: MAVG or Service
- Item Group: FOS, MOS or Ethical
- Storage dimension group: as appropriate. For example, SiteWH.
- Tracking dimension group: None
- Inventory Unit: EA or PACK
- Purchase Unit: EA or PACK
- Sales Unit: EA or PACK
- Item GST Group (Purchase): GST or Free
- Item GST Group (Sales): GST or Free
- Click OK to close.
The new product is now created.
- From the Dashboard, go to Merchandising Hierarchies > Released Products.
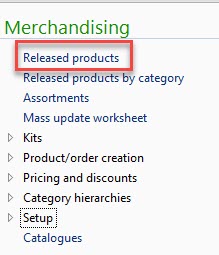
- Search for the product you want to edit, then click Edit (or double-click the line entry).
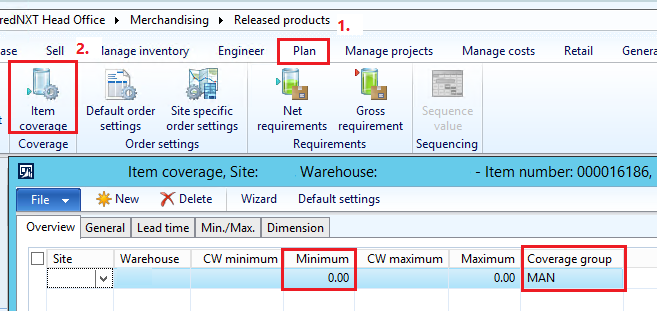
- To change the Coverage group (if required): In Plan tab > Item Coverage > , click New, the set the following.
- Site: <Store Number>
- Warehouse: <Store Number>
- Group Coverage: MAN
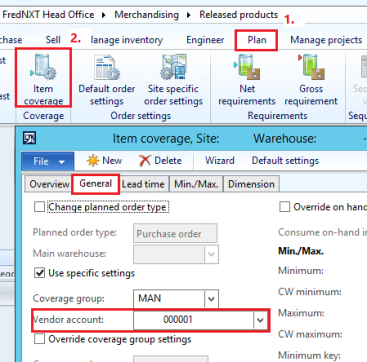
- In the General tab, set the following:
- Group Coverage: MAN
- Vendor account: Main Supplier Account Code
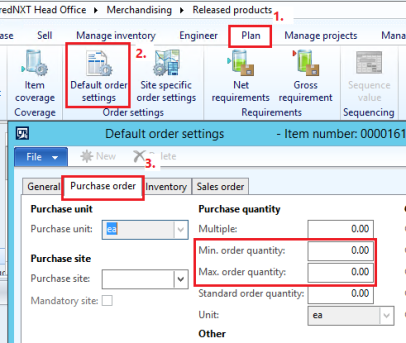
- To set minimum order quantities: Plan tab > Default Order settings > Purchase order tab > Min order quantity and Max. order quantity.
- Click Close to save.
See also: Add barcodes to a product (DIEF)
- In the Released product details window, select the Manage Inventory tab, then click Barcode > New.

- Enter all product bar codes.
- Select Print next to the barcode which should default to print on the label for the product.
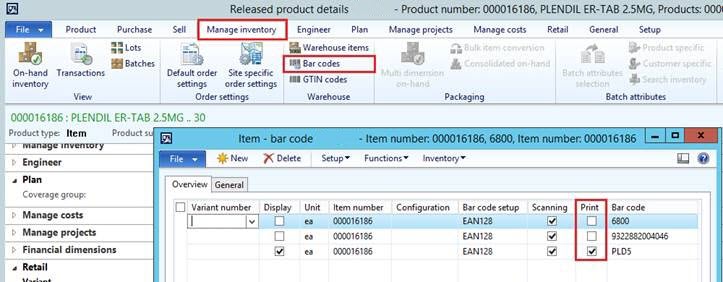
- When done, close to save your changes.
- Select the Purchase tab, then click External item description > New.
- Enter the reorder code details, then Close.

- In he Purchase tab, click Create trade agreements > New.
- Select Purchase > Lines.
Field Value Relation Price (purch.) Account Code - Table (set pricing for specific vendor), or
- Group (group of vendors) or
- All (set pricing for all vendors).
Item code Table, Group or All.
Table is the preferred setting.
Item relation Item product number Amount in Currency Cost price - Set all other fields as required.
- Click Post when done.
- Click OK, then Close.
Do not selected Batch mode.
- Click the Sell tab, and click Create Trade Agreements.

- Enter sales price details, then select sSell > Line.
Field Value Relation Price (sales) Account Code - Table (set pricing for specific vendor), or
- Group (group of vendors) or
- All (set pricing for all vendors).
Table is the preferred setting.
Item code Table, Group or All.
Table is the preferred setting.
Item relation Item product number Amount in Currency Retail price - Set all other fields as required.
- Click Post when done.
- Click OK, then Close.
You do not need to select Batch mode.
-
Click the Product tab and click Product Categories.

- In Product Categories, click New and add the following:
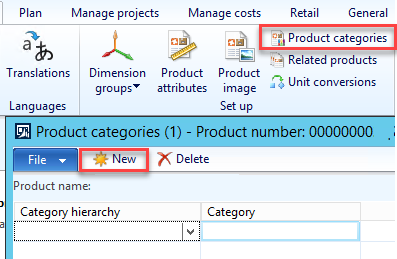
Field Value Category Hierarchy Managed Hierarchy Category Managed Hierarchy
This step also ensure hierarchy data has been applied on new items as well as updating the stores immediately.
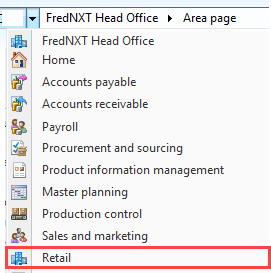
- Switch to the Retail Area page.
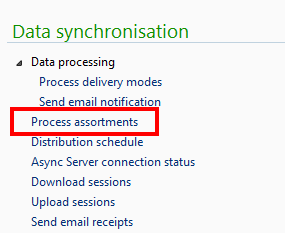
- Go to Data synchronisation > Process Assortments.
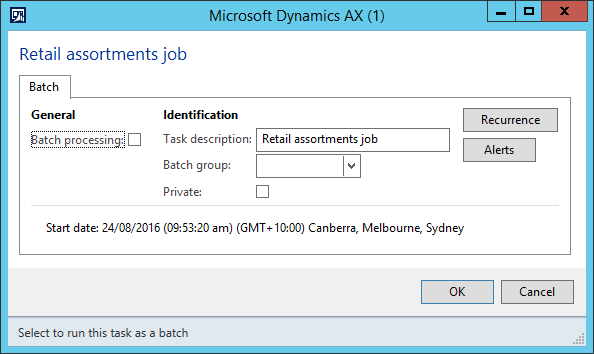
Do not selected Batch processing.
- Click OK to close.
-
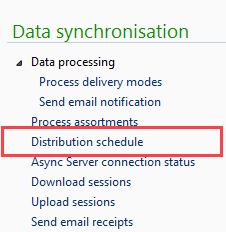
Go to Data synchronisation > Data Distribution > Distribution Schedule.
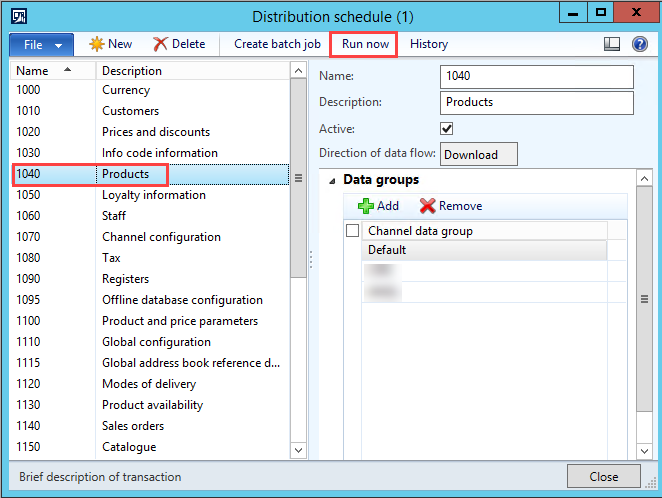
- Select the schedule, (for example, 1040) and click Run now.
- To check the schedule has run, go to Inquiries > Commerce Data Exchange > Download sessions.
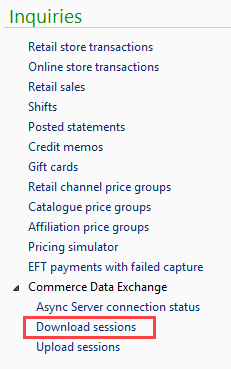
- In the Download sessions windows, locate the schedule.

The Status must be set to Applied.
 Fred Learning Pathways