Mobility
Fred NXT Mobility has four functions: Counting, Orders, Price Check and Queue Label.
DASHBOARD
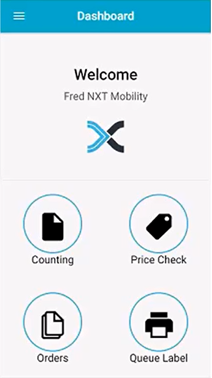
| Dashboard | Submenu |
|---|---|
| Counting |
Scan & Count |
| Stocktake | |
| Price Check |
|
| Orders | Drafts |
| Receive | |
| Queue Label |
SETTINGS
Credentials
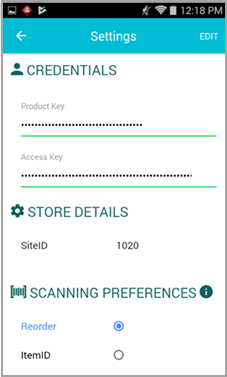
To authenticate with Fred NXT Mobility, you must enter your Product Key and Access Key.
- The Product Key uniquely identifies Fred NXT Mobility. The same Product Key can be used across multiple devices registered to the same store.
- The Access Key uniquely identifies your store.
These keys only need to be entered once. Login details are retained on the device.
Scanning Preferences
- Product scanning preferences — Reorder or ItemID —are configured globally or for each store by your Head Office, and take into account your preferred label format.
COUNTING
Scan and Count
- From the Dashboard, tap Counting, then Scan & Count.
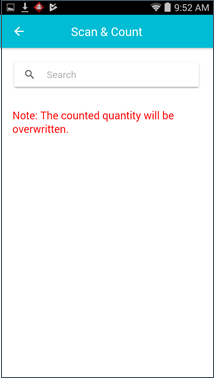
When counting a product line that has already been counted (for example, products located in multiple places in the store) , the new counted quantity will override the previously counted quantity.
- Scan the product barcode (or enter the product Id or Reorder Number), then enter the quantity in the Stock Count field.
The Stock Count field allows a maximum of 7 characters.
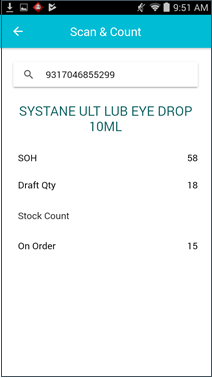
You must always enter a value in the Stock Count field, even if the newly counted Qty is strictly identical to the SOH value.
If you leave the Stock Count value blank, then press [Enter] in order to move on, the SOH is updated to 0.
- Tap Save to save your count and scan the next product.
Fred NXT Mobility creates a new counting journal for each scanned line.
Batch Stocktake
This method is used to add a product count to a counting journal created in Fred NXT Office. This is the preferred method for large scale stocktakes (end of financial year, change of ownership). Batches can be created to reflect specific store organisation, such as department, suppliers, shelf by shelf, etc ... It should be performed outside of trading hours to ensure there is no stock movement while counting.
Count with Batch Stocktake
- In Fred NXT Mobility, go o to Counting > Stocktake.
Batch Stocktake displays all the un-posted counting journals present in Fred NXT Office.
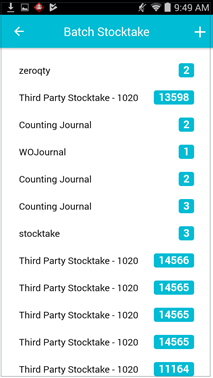
- Tap one line items to display more Details about a journal.
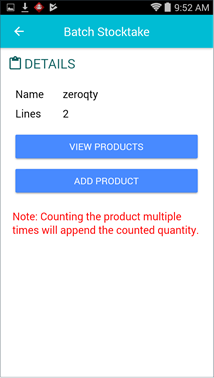
If a product is counted multiple times (for example, when additional quantities are found in another location), the new quantity is appended to the previous count.
An audible tone is played each time the Append function is invoked.
- Tap one of the following options:
 View Products
- Open the Product list and view the existing products attached to this journal.
The existing Counted qty is displayed for each product in the list.
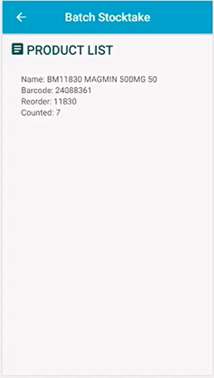
- Tap a product to update the stock count.
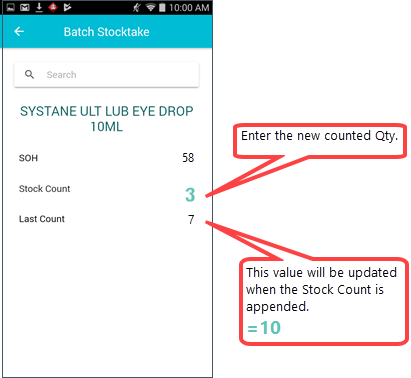
Field Description For example SOH Existing SOH, based on last Posted value.
This value will be updated when this batch is posted.
58 Stock Count Counted Qty.
Will be appended to the Last Count.
3 Last Count Previously counted Qty.
This value will be updated when the Stock Count is appended.
7
+ 3 = 10
 Add Products
- Search or scan a product to be added to the journal.
- To add a new product, scan (or manually enter) a barcode, product name or PDE number.
Lines added to the batch are automatically saved.
When the product is found, the Last Scanned section displays the previously Counted qty for the selected product.

- Tap the selected product to updated the counted qty (Stock Count).
The newly counted Qty is appended (added) to the Last Count.
The Stock Count field allows a maximum of 7 characters. An audible notification is played if this limit is exceeded.
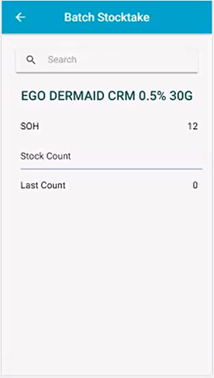
- Open the Product list and view the existing products attached to this journal.
Correct a counted Qty
Use the Keypad and enter a negative number that will be subtracted from the Stock Count (-2).
A validation check ensures the corrected value is never less than 0.
PRICE CHECK
Price Check
All fields in the Price Check section are read-only.
- From the Dashboard, tap Price Check.
- Scan the product you want to check (or enter the product Id or Reorder Number).
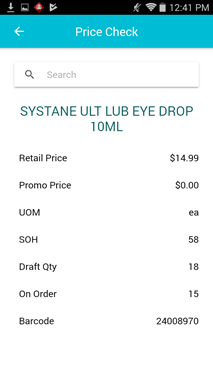
Fred NXT Mobility displays the available product information on-screen, including the Retail Price.
It also displays the current Promo Price, if available.
ORDERS
Drafts
The Drafts screen displays all the current draft header, which currently exist in Fred NXT Office.
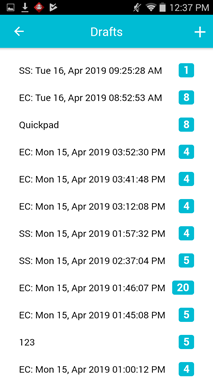
They are sorted by Date Created, with the newest at the top.
- Tap one line items to display more Details about a draft.
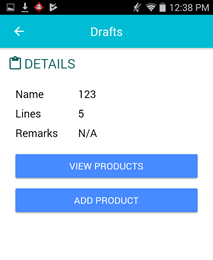
- Tap one of the following options:
- View products: view the existing products attached to this draft.
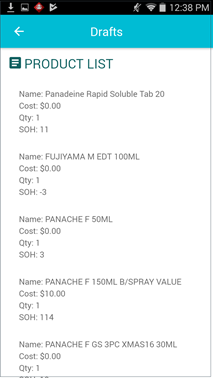
- Add products: search or scan a product to be added to the draft.
You can search on barcode, product Id or Reorder Number.
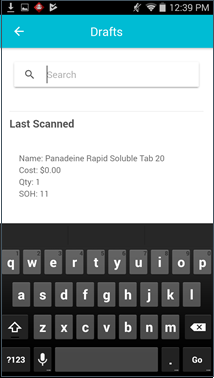
This screen also displays details about the last scanned product.
- View products: view the existing products attached to this draft.
- Once the product is displayed, update the Quantity, then press Go to return to the Details screen.
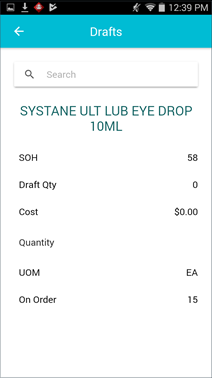
Lines added to the draft are automatically saved.
Drafts can only be finalised and sent from Fred NXT Office > Drafts.
Receive
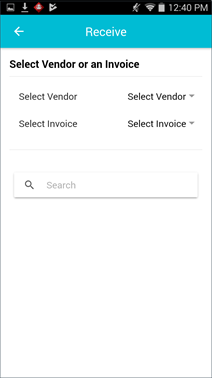
- In the Receive screen, do one of the following:
- (Optional) Set a Vendor.
If no Vendor is found, a message Product not found is displayed and you are returned to the scanning screen.
- (Optional) Set an Invoice number.
If the item is found, but there is no open purchase order, the message No open invoice was found for <Product Number> is displayed, and you are returned to the scanning screen.
- Search or scan a product.
You can search using barcode, Reorder Number or product number.
The Receive screen displays a list of open invoices.
- (Optional) Set a Vendor.
- Select the relevant journal to display all the lines on this journal.
- Start receiving, using Description, barcode, Re-order Number or Item number.
- For each product located, enter a Qty to be received, and set the Unit to EA.
- Press [Enter] to search for the next product to be received.
- When receiving is completed, tap Next to display the Summary of scanned items (in the order they were received).
Use this screen to correct any mistake. Swipe to the left to return to the Receive screen and delete or edit any incorrect line.
- When ready, tap Commit.
QUEUE LABEL
Queue Label
- From the Dashboard, tap Queue Labels.
- Scan a product barcode (or enter the product Id or Reorder Number).
- Once the product displays, enter number of labels to print in Qty.
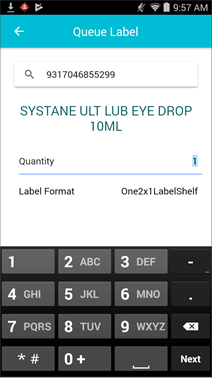
- Tap Next on the keypad to send your label queue to be printed.
 Fred Learning Pathways