Hierarchies
Hierarchies
Hierarchies allow you to group products together for different purposes, such as a promotion, or specific reporting purpose (for example, by brand, or by location in the store). Hierarchies can be used as an additional method to categorise products for use with requirements such as Brand, or managing seasonality. A product can exist in one or more hierarchy at the same time, in addition to the Retail hierarchy.
Create a new local hierarchy
- From
 , click Hierarchies.
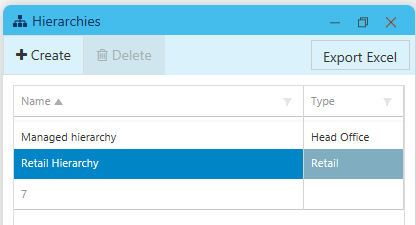
The Hierarchies grid display all existing hierarchies and their Type.
- Head Office
- Robotic
- Local
- Store

Hierarchies created by Head Office (Managed, Retail) cannot be edited by stores — all controls are disabled. Double-click a hierarchy to open it and view the products included. If required, export the contents of the hierarchy to a spreadsheet.
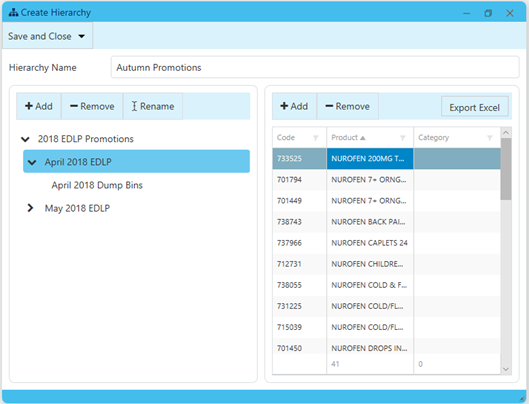
- Click Create to open a new hierarchy form, then enter a Hierarchy Name.
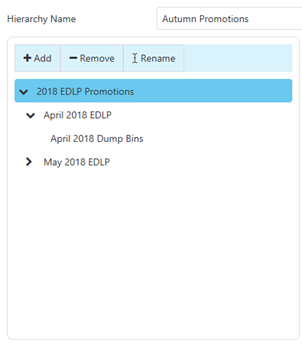
- Click Add and enter a Category Name.

- Repeat this process if you need to add a second level to your hierarchy.

Each new node is created under the currently selected node.
If you need to correct the name of the Category, click Rename to reopen the Create Category dialog and make the required adjustment.
- Click Remove (left) to remove the node and all the products.
- Click Remove (right) to remove selected lines.
Only Local hierarchies can be deleted.
- Click to select a node then, click Add (on the right) to open the Product Selection dialog.
- Search and add the relevant products to the hierarchy.
If managing local hierarchies, based on established Categories, it is recommend to add products using Add Product by Hierarchy and selecting one or more Categories.

This method ensure the contents of this Category (current and future) is always included in this hierarchy.
For additional tips or Product Selection methods, see Sort, Filter, Add Products
- Repeat
for each node.

- Save and Close.
 Fred Learning Pathways