Products
Supplemental hierarchies allow you to group products together for different purposes, such as a promotion, or specific reporting purpose(for example, by Brand, or by location in the store). Supplemental hierarchies can be used as an additional method to categorise products for use with requirements such as Brand, or managing seasonality. A product can exist in one or more supplemental hierarchy at the same time, in addition to the Retail hierarchy.
Create a Supplemental Hierarchy
- From the FredNXT Head Office area page, navigate to Merchandising > Category hierarchies, and click Supplemental retail hierarchies.
- Click Category hierarchy - New, then enter a Name and Description for the Supplemental hierarchy.

- Click Create.
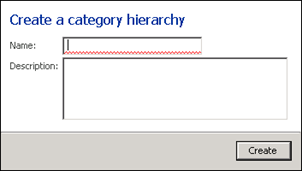
The new Supplemental hierarchy has been created. The Category hierarchy window opens in Edit mode.
- In the Category hierarchy form, click the Category hierarchy window node to create the Level 0 category node.
- Enter a Name and a Code (optional) for the new node.
In this example, name the new node as Brand.
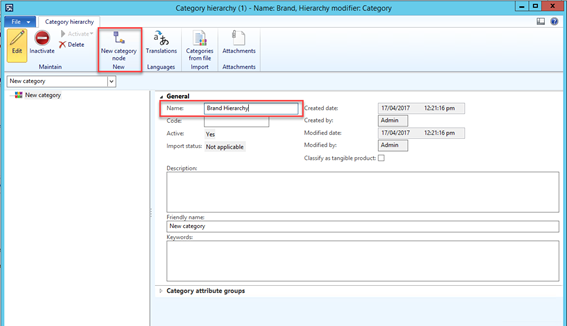
- Select the Classify as tangible product.
This indicates that products assigned to this category will be tangible products only, not service items.
- Click Create new category nodes – Level 1.
- Select the Level 0 node, then click New Category again.
- Repeat the above steps to create all the required Level 1 category nodes.
Each Level 1 node will be a brand.
- For each new node, enter a Name and a Code (optional), then select Classify as tangible product.

- Close the Category hierarchy form and confirm the newly created Supplemental hierarchy exists in the list of category hierarchies.
Supplemental hierarchies may also be used to group products for Seasonal promotions.
- Click Category hierarchy.

- Enter a Name (Fro example, spring promotional) and Description for the Supplemental hierarchy.

- Click Create.
The new Supplemental hierarchy has been created and the Category hierarchy window opens in Edit mode.
- Create the Category nodes. Follow the instruction in the section above.
The Supplemental Hierarchy will display similar to below.

- Close the Category hierarchy form and confirm the newly created Supplemental hierarchy exists in the list of category hierarchies.
This hierarchy is used by stores to add settlement costs (discounts, fees) to invoices.
- Navigate to FredNXT Head Office > Merchandising > Category hierarchies> , and click Supplemental retail hierarchies.
- Create a new Other Costs hierarchy.
- Add a products to match the most commonly applicable settlement costs.
For example, DD Fees, Freight, Discount.
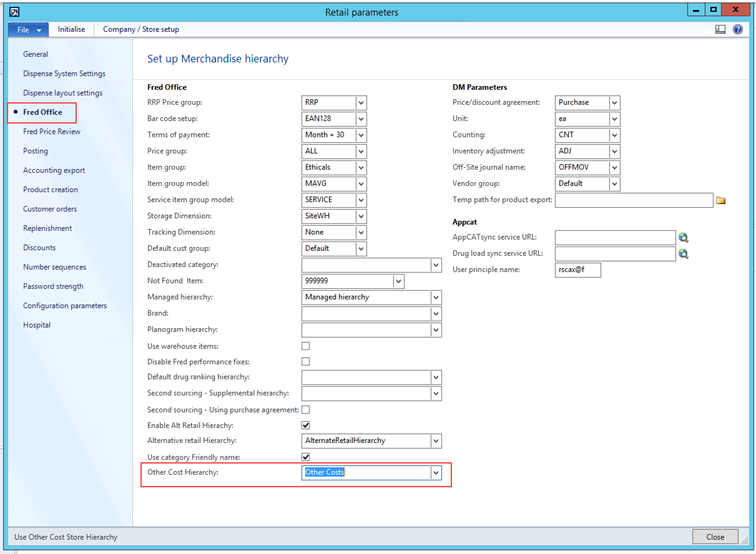
- Navigate to FredNXT Head Office > Retail Retail Parameters.
- In the Retail Parameters form, display the Fred Office tab and set the Other Cost Hierarchy parameter.
This hierarchy is now visible at store level and the products can be added to invoices.
See Fred NXT Office> Invoices
- From the FredNXT Head Office area page, navigate to Merchandising > Category hierarchies, and click Supplemental retail hierarchies.
- Click Category hierarchy - New, then enter a Name and Description for the Supplemental hierarchy.

- Click Create and enter the name for the hierarchy, using this pattern: <Store Name> - All Robots .

The new Supplemental hierarchy has been created. The Category hierarchy window opens in Edit mode.
- In the Category hierarchy form, click the Category hierarchy window node to create the Level 0 category node.
- Enter a Name and a Code (optional) for the new node.
In this example, name the new node as:
- Name:<Store Name> Robot 1
- Code:<Store Name> - Robot
Refer to Robotic stock
- From the FredNXT Head Office area page, navigate to Merchandising > Category hierarchies, and click Supplemental retail hierarchies.
- Click Category hierarchy - New, then enter a Name and Description for the Supplemental hierarchy.

- Click Create and enter the name for the hierarchy, using this pattern: <Store Name> - Drug Ranking.

The new Supplemental hierarchy has been created. The Category hierarchy window opens in Edit mode.
- In the Category hierarchy form, click the Category hierarchy window node to create the Level 0 category node.
- Enter a Name and a Code (optional) for the new node.
In this example, name the new node as:
- Name:<Store Name> Drug Ranking
- Commodity Code: <1>
Assign Products to a hierarchy
Products may be assigned to one or more Supplemental hierarchies, to allow classification for Seasonal promotions, Brands etc.
Products may be assigned to one or more category node in Supplemental hierarchies.
- Click and select the required Supplemental Hierarchy from the Category hierarchy list.
- Click Edit category hierarchy.
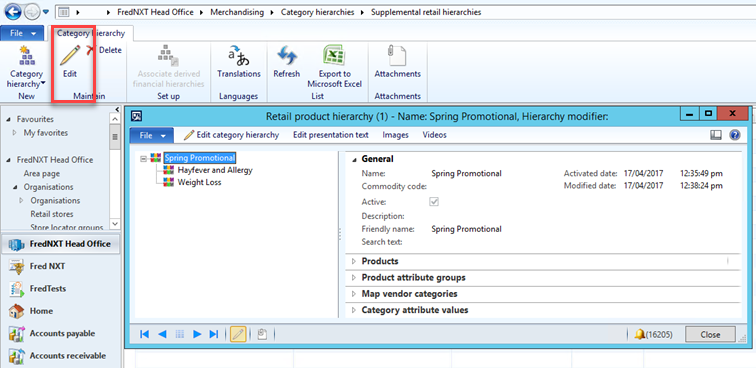
- Select the category node that product are to be added to and expand the Products fast tab on the Supplemental retail hierarchy form.
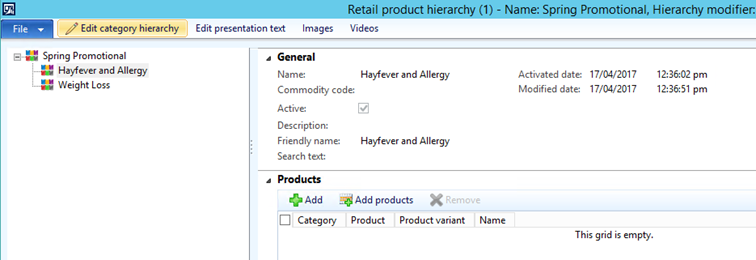
You are now ready to add product to the new hierarchy.
Products can be added to a category node either individually, or as by filtering by category node in the Retail hierarchy.
- Filter for products from an existing category node on the Retail hierarchy, click Add.

- Select the required Category and from the list.
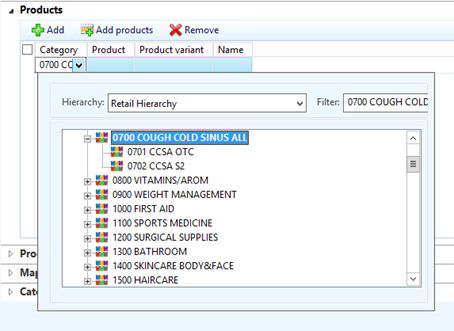
- Select the required Product from the list.

- Continue to Add individual products by selecting the required category and then the required product (as explain above).
- Click the Add products button.

All products currently assigned to nodes in the Merchandising hierarchy are displayed.
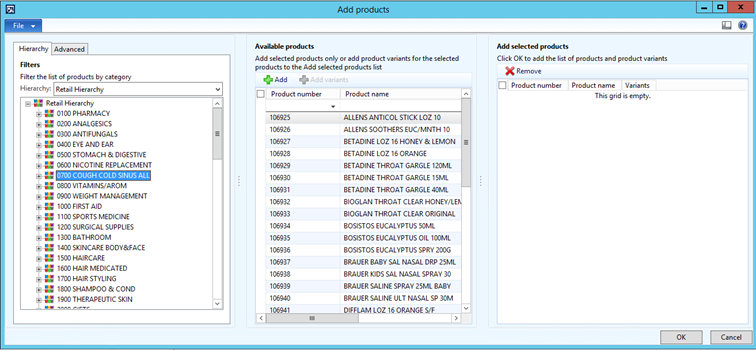
- Navigate to the required category node and select the products to be added to the Supplemental hierarchy, then click
 .
. Products can be selected and added individually or in multiples.
- Click OK.
Make sure the products have been added to the Products fast tab on the selected category of the Supplemental hierarchy.
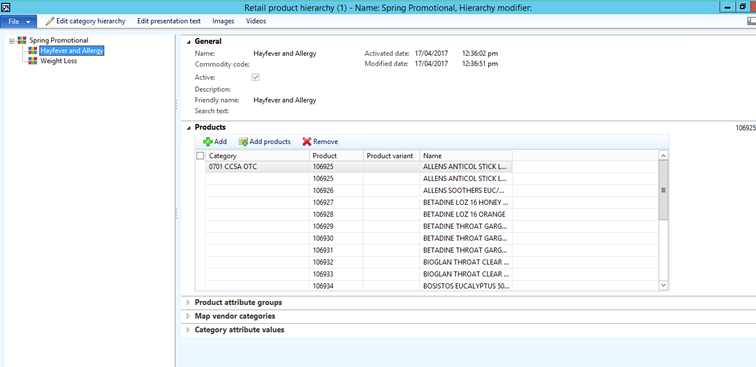
When all required products have been added, click Close.
Create the .CSV file from the template
- Open the required template: GroupsHierarchyProducts.xlsx
- Edit the spreadsheet as follows:
Header Value EcoResCategory_Name SUBNode Description EcoResCategoryHierarchy_Name NAMENode Description Product_DisplayProductNumber Product ID - Click File > Save as and save as .csv file in an easy to find location.
For example, your Desktop.
- Click File > Exit to close your file.
The file must be checked before being imported in Fred NXT Head Office.
- Navigate to the file, then right-click the file and choose to Open with Notepad.
- Remove any blank lines at the end or spaced commas at the end of the file.
- Press File > Save.
The file is now ready for importing into Fred NXT Head Office.
For details about the import process, refer to DIEF Import process
Products may also be removed from a node on a Supplemental hierarchy, if not required.
- Select the Supplemental Hierarchy you wish to remove products from and click Edit .
- Select the required category node and expand the Products fast tab.
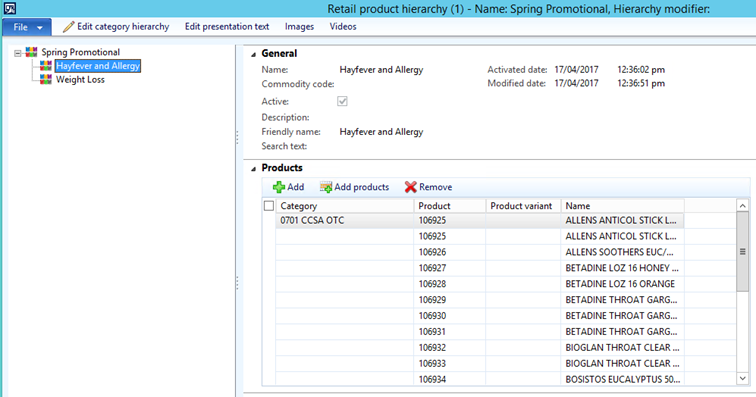
- Select the product that you wish to remove and click Remove .

A confirmation message is displayed.

If multiple products assigned to a category node are selected for deletion, the following message is displayed.

- Click Yes to confirm.
Confirm the products have been removed from the Product fast tab.
- Close the Category hierarchy form.
Editing Product Hierarchies
Category hierarchy nodes on either the Merchandising hierarchy or Supplemental hierarchies can be inactivated, if they are no longer required.
The process is the same whether editing the Retail product hierarchy or Supplemental hierarchy.
This example describes how to edit hierarchy nodes on a Supplemental hierarchy.
- Click and select the Supplemental Hierarchy from the Category hierarchy you wish to edit.
- Click Edit category hierarchy.

- Ensure the correct category node is selected.
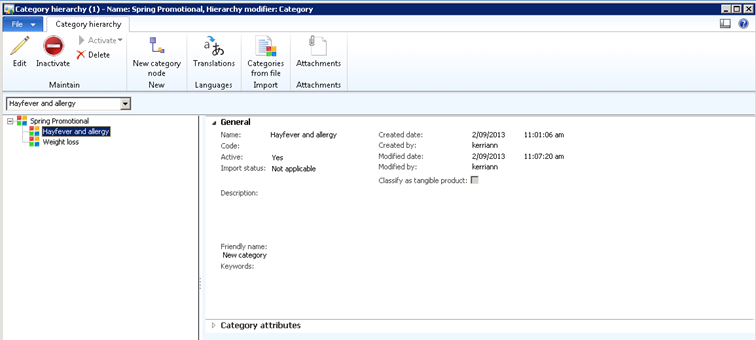
- Click Inactivate.

The following warning message is displayed.

- Click Yes.
This category node is now inactive and products may no longer be assigned to it.
Inactive category nodes are flagged with a red ‘no entry’ symbol and Active is set to No in the General fast tab.
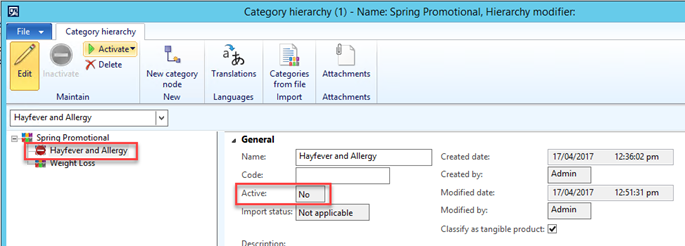
Category hierarchy nodes on either the Merchandise hierarchy or Supplemental hierarchies can be inactivated and activated.
This process is the same whether editing the Retail product hierarchy or Supplemental hierarchy.
This example describes how to edit hierarchy nodes on a Supplemental hierarchy.
- Click and select the Supplemental Hierarchy from the Category hierarchy you wish to edit.
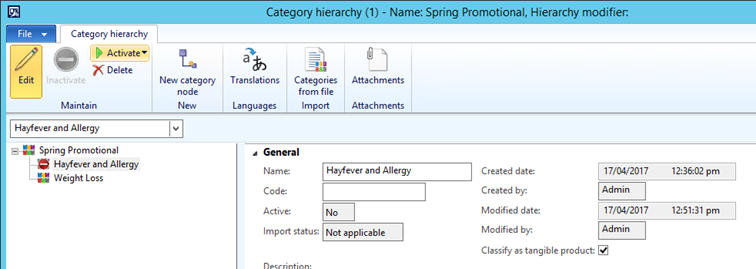
Ensure the correct category node is selected.
- Choose to activate either This category or This category and its subcategories (as applicable).
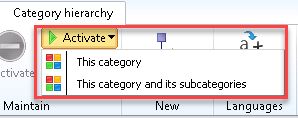
If the selected category does not have any sub-categories, only This category is available.
- At the prompt, click Yes to confirm the activation of the category (and its subcategories, if applicable).

The selected category hierarchy and its sub categories should now be activated again.
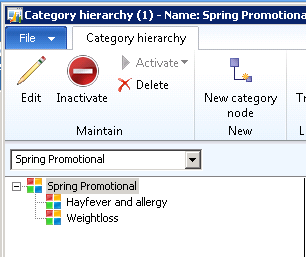
If a category node is to be removed completely, it can be deleted from the product hierarchy.
This process is the same whether editing the Retail product hierarchy or Supplemental hierarchy.
This example describes how to edit hierarchy nodes on a Supplemental hierarchy.
- Click and select the Supplement Hierarchy from the Category hierarchy you wish to edit.
- Click Edit category hierarchy.
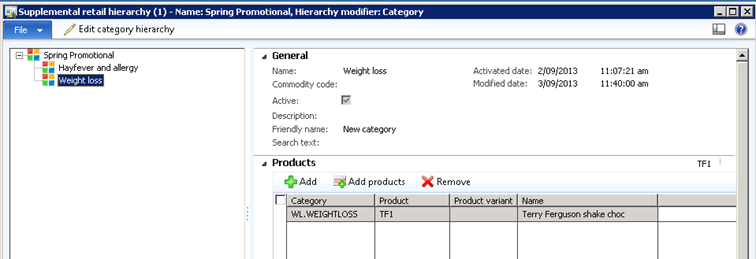
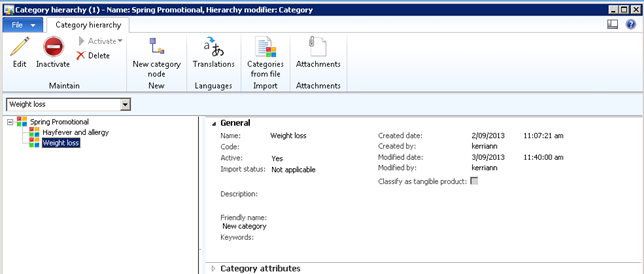
Ensure the correct category node is selected.
- In the Category hierarchy tab, click Delete.
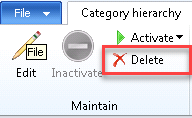
A confirmation message is displayed.
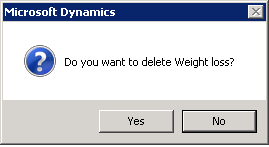
- Click Yes at the prompt to confirm the deletion.
If products are still assigned to the category hierarchy, the following message is displayed.

All products currently assigned to the selected category node must be assigned to a different category node before this node can be deleted.
Head Office can manage which supplemental hierarchies are visible to stores in Fred NXT Office.
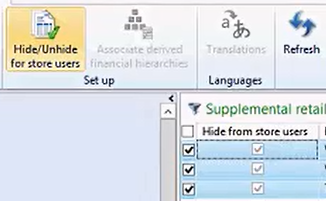
In FredNXT Head Office > Merchandising > Category hierarchies > Supplemental retail hierarchies, the grid includes a new column Hide from store users.
Select the relevant hierarchies, then click Hide/Unhide for store users.
This is a global setting which is applies to all stores within the group.
 Fred Learning Pathways