Products
The Robotic functionality is enabled by Fred's Deployment team at the time of installation. If you required this functionality at a later date, contact Access support via your Fred Help Portal . In order to use robotic stock handling, Head Office must add products to the Robotic hierarchy.
When dispensing (normal mode or question mark dispensing), the robotic stock is displayed in the Drug selection window with a Robot  flag.
flag.

Maintenance: While stores are able to add (or remove) physical stock to (and from) their robotic dispenser, it is imperative that they notify their Head Office of any changes, so that the Robotic hierarchy is kept up to date in Fred NXT Head Office. Any stock not included in the Robotic hierarchy is not flagged in the Brand Selection form in Fred NXT Dispense. The lack of regular data maintenance in the Robotic hierarchy will also impact all apsects of reporting, ordering, and the creation of accurate counting journals for the purpose of stocktaking.
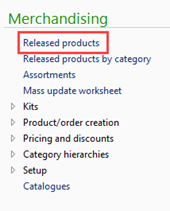
- From the FredNXT Head Office area page, navigate to Merchandising > Category hierarchies, and click Supplemental retail hierarchies.
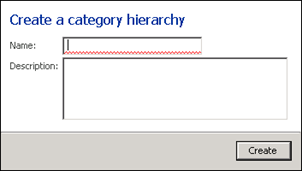
- Click Category hierarchy - New, then enter a Name and Description for the Supplemental hierarchy.

- Click Create and enter the name for the hierarchy, using this pattern: <Store Name> - All Robots .

The new Supplemental hierarchy has been created. The Category hierarchy window opens in Edit mode.
- In the Category hierarchy form, click the Category hierarchy window node to create the Level 0 category node.
- Enter a Name and a Code (optional) for the new node.
In this example, name the new node as:
- Name:<Store Name> Robot 1
- Code:<Store Name> - Robot
- From the FredNXT Head Office area page, navigate to Merchandising > Released products.

- In the Products grid, search for the relevant product.
- Double-click the search result to open the product card.
- In the product card, click Product categories.
- In the Product categories grid, click New.

- Assign this product to the relevant Category hierarchy <store name> - All Robots, then assign its relevant category <store name> Robot 1.
- Open the required template: GroupsHierarchyProducts.xlsx
- Edit the spreadsheet as follows:
Header Value EcoResCategory_Name SUBNode Description EcoResCategoryHierarchy_Name NAMENode Description Product_DisplayProductNumber Product ID - Click File > Save as and save as .csv file in an easy to find location.
For example, your Desktop.
- Click File > Exit to close your file.
The file must be checked before being imported in Fred NXT Head Office.
- Navigate to the file, then right-click the file and choose to Open with Notepad.
- Remove any blank lines at the end or spaced commas at the end of the file.
- Press File > Save.
The file is now ready for importing into Fred NXT Head Office.
For details about the import process, refer to DIEF Import process
- From the FredNXT Head Office area page, navigate to Merchandising > Released products.

- In the Products grid, search for the relevant product.
- Double-click the search result to open the product card.
- In the Plan tab, click Item Coverage and check the Coverage Group is correctly set to ROBOT.

- Open the required template: GroupsItemCoverage.xlsx
- Edit the spreadsheet as follows:
Header Value ItemId Product ID VendId Vendor ID MinInventOnhand Safety Stock Qty InventLocationId Store ID InventSiteId Store ID ItemCovFieldsActive Always set to 1 - Save as .CSV file in an easy to find location. For example, your Desktop.
- Navigate to the newly created file, then right-click the file and choose to Open with Notepad.
- Remove any blank lines or spaced commas at the end of the file.
- Save your file again.
The file is now ready for importing into Fred NXT Head Office with DIEF.
For more details about Coverage Groups, refer to Manage coverage groups (DIEF)

 Fred Learning Pathways