Price groups and category price rules
Pricing
Price groups are used to create and manage different prices and discounts for your products. They are used as a way for the user to identify the different price options you want to configure against the same Product. Price groups provide the link between the different prices, discounts and the Stores. Category price rules can be applied when creating Trade Agreement or reviewing pricing in Price Review Journals.
- From the Dashboard, go to Merchandising > Set up > Price and Discount Setup, then click Price groups.

- In the Price Groups dialog, click New and create the following three Price Groups:
- A price group for each store that is used for local store products.
- One or more price groups for pricing managed products, essentially a price group for each different level of pricing you need. For example. Competitive, Non- Competitive or you may use location type pricing Metro, Country, Remote.
- (Optional) You may also create a price group(s) to manage pricing for private dispensing.
- Vic-Metro and Vic-Regional are the head office managed Price groups for retail pricing.
- All is an optional price group we can use to set private pricing for dispense to apply to all stores.
- <STORE NAME> is the store specific price group for this store.
For example:
- Close the window to save your changes.
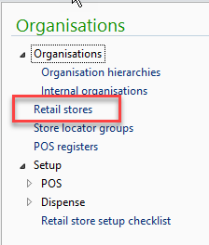
- From the Dashboard, go to Organisations > Retail Stores.

- Select a store, then under the Store tab, click Price groups.

- In the Retail channel price group window, click New, then attach the applicable Price Groups to this store.
A store can have multiple price groups attached.
- Close the Retail channel price group window to save your changes.
- From the Dashboard, go to Merchandising > Set up > Price and discount Setup and click Category price rules.

- In the Category price rules screen, click New.

- Set the following:
Column Value Account code - All: all stores and customers.
- Group: a specific Price Group which is set in the Account Selection field.
- Table: a specific customer which is set in the Account Selection field.
Category Select the relevant category you wish to set this rule for. - Set all remaining field (if applicable).
- Click Generate trade agreements to start the Trade Agreements wizard.
- In Product selection, select All Items, then click Next.
- In Trade agreement options, set the From and To date (to delay the Trade Agreement's effective date).
- Recommended: Select Find next to ensure the best price is located.

Expire previous trade agreements can be ignored as it is included in the default processing logic.
- In Price summary, confirm your setting and optionally select Run as batch job (if this is a large batch).

- Click Finish to create the price/discount agreement journal.
- Review the line items, then click Post to apply the new prices to your products.
- Navigate to FredNXT Head Office > Merchandising > Setup > Price and Discount Setup and click Price groups.

- In the Price groups window, select the relevant price group, then from the Trade Agreements dropdown, select View sales prices.

- In Price (sales) screen, filter the To date column (CTRL + G) to check current prices.

- Copy this data into a spreadsheet for easy editing.
 Fred Learning Pathways