Configure and email statements (bulk)
Fred Office can be configured to automatically email statements after the statement batch has been generated. Alternatively, once statements are generated, they can be emailed in bulk manually, or sent individually. Before they can be emailed however, Fred Office Plus and the accounts must be configured for email sending.
Prerequisite: Configure emailing
There is no limit to the amount of templates you can set up.
-
From Contacts, select Statements, then click Statement Options from the toolbar.
The Account Options screen is displayed.
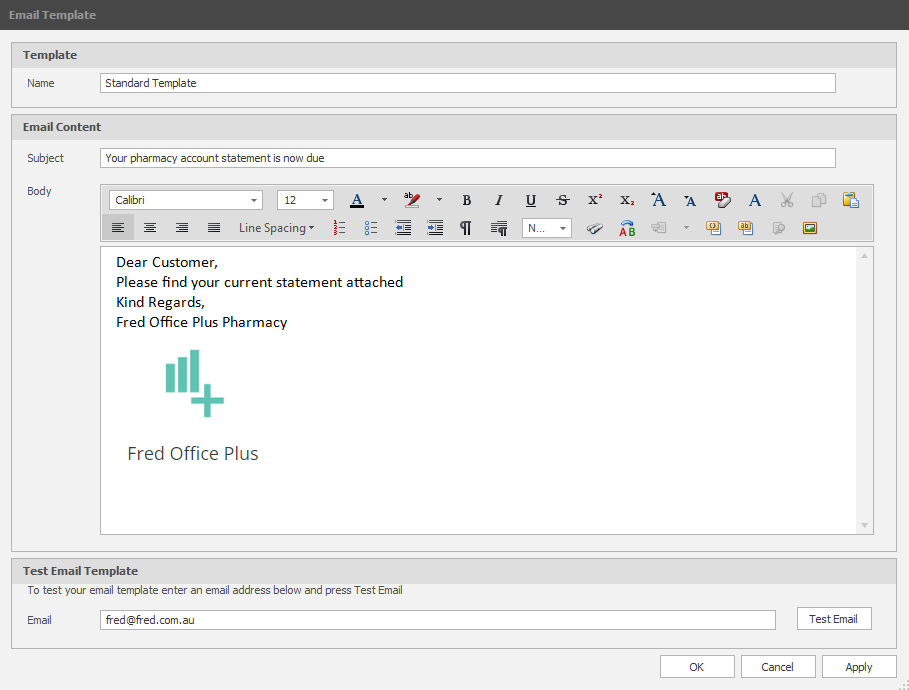
- In the Email Templates tab, select Add to display the Email Template screen.
- In the Name field under Template, enter an appropriate name for your email template.
-
Under Email Content, compose the body of your email.
You can cut and paste your pharmacy logo.

- To finish, select OK.
- Click on OK once more to return to Fred Office Plus.
An account must be marked to send statements via email, with an email address entered into the correct section.
- From Contacts, select Accounts.
- Search for and open the account.
- Go to the Statements tab.
-
Under Send Statement Option, select the Email Statements to check-box and enter an email address.

A customer's statement can be sent to multiple email addresses by separating them with a semicolon [ ; ].
- Click Save and Close.
Before setting this option, ensure that customer email addresses have been set up.
- Select the accounts to email statements to.
- Right-click the highlighted account cards, and then select Perform Quick Action.
-
Quick Action Wizard is displayed.
- In the Select Action window, expand Statement Settings, choose the Set Email statement option, and then click Next.
- In the Configure Actions window, select Send Statements By Email, and then click Next.
- In the Preview Changes window, select the accounts to email statements to.
- When finished, tick to Confirm, then click Next.
- In the Finished window, click Finish.
This Quick Action can be performed from wherever a list of accounts can be selected. For example, from the Main Contacts or the Accounts screens, or from a report.
-
From Contacts, select Statements.
-
Under the Statement Schedules section do one of the following:
-
Select Add...to create a new scheduled run.
- or - -
Select a schedule and click Edit...to modify an exisiting scheduled run.
-
-
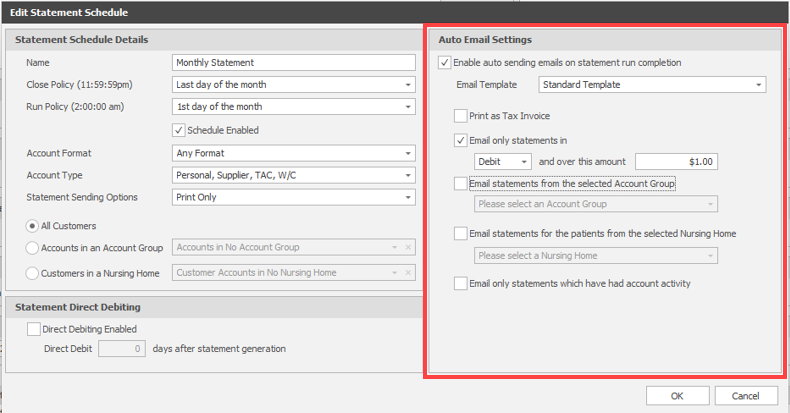
Under Auto Email Settings tick Enable auto sending emails on statement run completion.
-
Select the Email Template and apply any email options you want.

-
Select OK.
If emailing a large number of statements, it is recommended to schedule them to send outside of business hours.
- From Contacts, select Statements, then select the Statement Batch you want to email then tap Email ... to open the Email Statement screen.

- Select the accounts you wish to email statements to.
-
Configure your Email Options:
Item Description Statement Restrictions Restrict which accounts should be included for emailing.
Focus on a specific account group such as accounts in a Nursing Home or a user-defined account group.
Email Settings Choose a predefined email template.
Schedule when to send the email.
- When ready, select Send.
- From Contacts , select Statements .
- Within the Statement Email Summary section click Summary ... to open the Email Summary screen.
- Select the statement you want to re-send from the list.
- Click Re-send (on the right-side of the Summary screen).