Configure emailing
Fred Office(4.9 and later) supports email authorisation for Microsoft Office 365 Users in addition to the existing (Basic) email authorisation.
Before you start, ensure you have email account details on hand. If you do not know these details, contact your email provider.
-
Click the Tools menu, then click System, then click Options.
-
Click the Email tab.

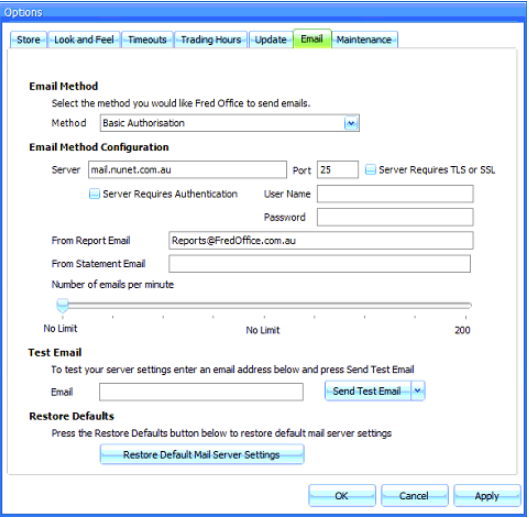
- In the Method dropdown list, select Basic Authorisation.
-
In the Server field, enter your email account’s server details to enable Fred Office Plus to connect to your email account.
It is highly recommended to use Authentication to ensure all emails sent via Fred Office Plus are successfully sent
-
In the From Report Email field, enter the email address that your reports will be sent from.
Using a real email address will allow recipients to reply to your scheduled emails.
Additionally, you may wish to let your recipients know which email address your scheduled reports/emails will be sent from, so that they can prevent them from being marked as spam.
-
Click Apply.
-
Send a test email to confirm you have entered the correct Email Server details:
-
In the Email field under the Test Email heading, enter the email address to send the test email to.
-
Click Send Test Email.
-
-
Check your inbox.
-
If the test email arrives, Fred Office Plus is correctly configured to send emails.
-
If the test email does not arrive, check and re-enter your Email Server details in Fred Office Plus, then click Apply, then try sending another test email.
-
- When you have confirmed that your Email Server details are correct, click OK, to save your changes and close the Options window.
-
Click the Tools menu, then click System, then click Options.
-
Click the Email tab.
-
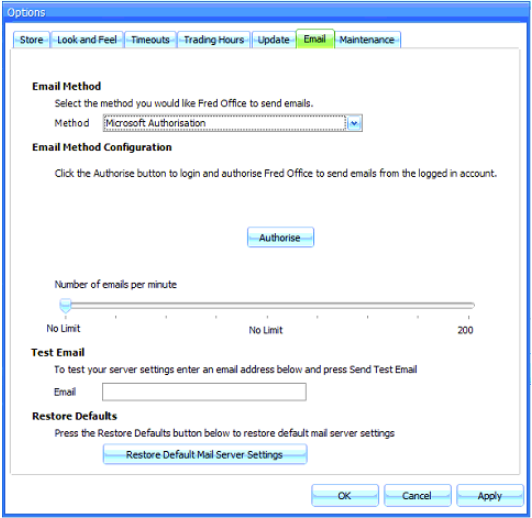
In the Method dropdown list, select Microsoft Authorisation.

-
Click Authorise.
-
Follow the prompts to sign into your Office 365 (O365) account.

-
In the Options window, click Apply.
-
Send a test email to confirm you have entered the correct Email Server details:
-
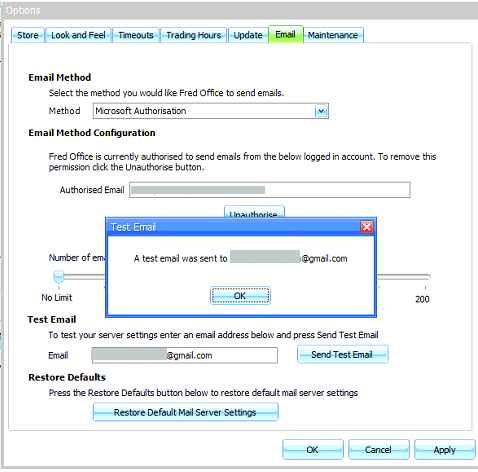
Under Test Email, in the Email field, enter the email address to send the test email to—for example a personal email account that is different from the O365 account.
-
Click Send Test Email.

-
-
Check your inbox.
-
If the test email arrives, Fred Office Plus is correctly configured to send emails.
-
If the test email does not arrive, check and re-enter your Email Server details in Fred Office Plus, then click Apply, then try sending another test email.
-
-
When you have confirmed that your Email Server details are correct, click OK, to save your changes and close the Options window.