Item Manager
Item Manager allows for bulk changes to items and has an import/ export feature. Found under the Assistants node, Item Manager extends on Quick Actions giving the ability to view and update item information in a worksheet format via the New columns. Colour coding and bold text also appear as details are changed to help you quickly see what has been updated. Once the detail has been changed, right-click functions allow it to be quickly applied to all items in bulk.
Some examples of how Item Manager can be used are:
-
Update item descriptions eg. so all are capitalised
-
Multi-store product management eg. export pricing from one store and import into another
-
Importing supplier product lists eg. create a new range of items in bulk
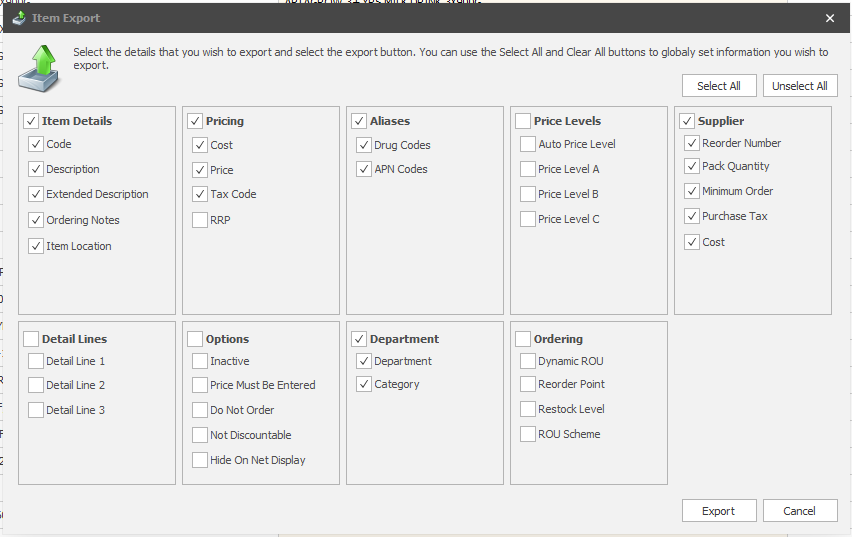
Once items have been updated or adjusted as required, you then have the option to Export the worksheet to a file from Fred Office Plus. This allows the file to be further updated in Excel (if required) or even sent to another store who in turn can import it using Item Manger to update their items. Once Export is clicked (from the toolbar), you are presented the list of fields to choose to Export.
The Import Wizard (similar to the Promotions and Stocktakes data import wizard), allows CSV, XLS and XLSX files to be imported into Fred Office Plus. The Import Wizard can be used not only to import item information from another store, but to import a Supplier's product list, which can create or update items in bulk with information such as item descriptions, PDE, pack size, supplier cost, retail prices and minimum order quantity.
In order to keep a consistent workflow and ensure pricing accuracy, any price changes made via the Item Manager feature are automatically sent to a Pricing Review.
-
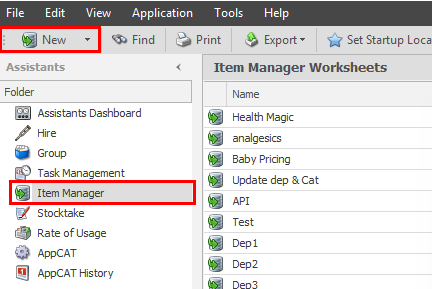
Go to Assistants, then select Item Manager.
-
Click New.
-
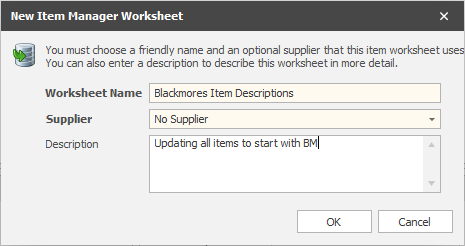
Enter a Worksheet Name. If you want to update Supplier information (such as reorder numbers, pack quantity, minimum order quantities, purchase tax cost or retail price) select the supplier from the dropdown otherwise leave on No Supplier. (Optional) Enter a description.
-
Click Ok.
-
Click Add Item.
-
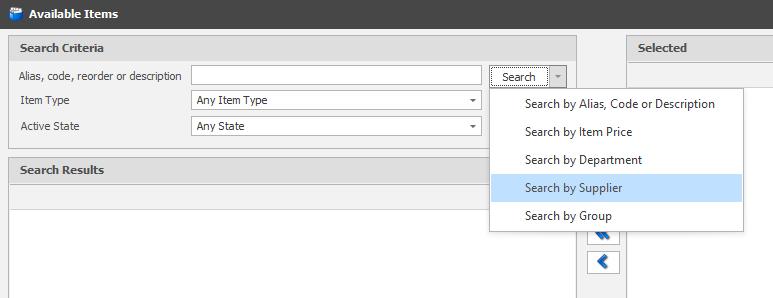
Search for items using either:
-
Alias, code, reorder or description
-
Item Price
-
Department
-
Supplier
-
Group
-
-
Select the items from the search results you want to add to Item Manager.
-
 Will add the items that are highlighted
 -
 Will add all the items from the search results
To select multiple items, use any of the following keyboard shortcuts:
-
Press <CTRL> and click each item you want to include.
-
Press <CTRL + A> to select all items at once.
-
Press <SHIFT> then click the first and last items to select consecutive items.
-
-
-
Click OK. The items will now be loaded in Item Manager.
On the right hand side of Item Manager are the different areas of the Item which can be updated. Select the area you want to update. 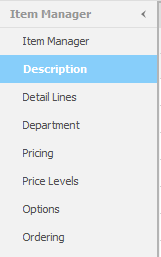
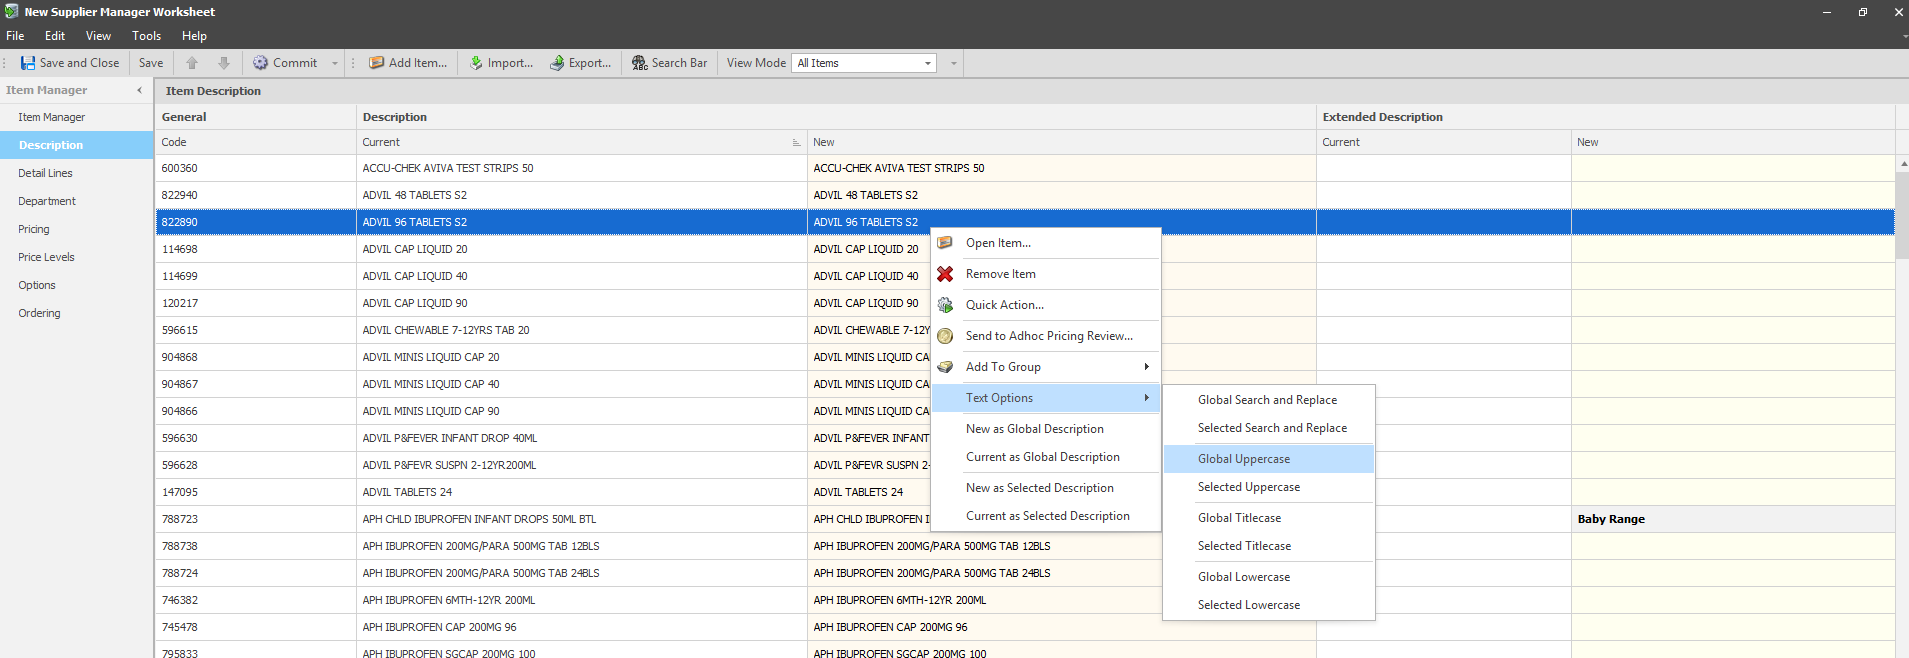
Each item field contains a Current column and a New column. Click within the New column and enter your changes. Fields that have been updated will appear in bold. 
Information in bold displays changes based on the spreadsheet. You have the option to accept these or right-click in the New column and select Current as selected description to maintain Current Description.
Right clicking on a New column field provides options to apply changes in bulk, including:
-
Text options: search and replace, uppercase, lowercase, titlecase
-
Descriptions, extended descriptions, and detail lines
-
Departments and categories
-
Pricing (cost, retail etc.)
-
Ordering (ROU scheme, ordering notes etc.)
-
Options (inactive, no discountable etc.)
-
Supplier (minimum order quantities)
Once all changes have been made, click Commit, then OK, which will apply the changes to the items.
Once an Item Manager worksheet has been committed it cannot be undone.
If Item Price has been updated in the Item Manager worksheet, a message will display indicating that those items have been sent to Pricing Review. Proceed to Pricing review to Accept and Commit the pricing.
-
Create a new Item Manager worksheet and add the items you want.
-
(Optional) Make any changes to the items.
-
Click Export.
-
Select the checkboxes against the item fields you want to export.
If you are planning on importing the exported Excel/CSV sheet into Fred Office at another store, it is recommended that you select Aliases (Drug Codes and APN Codes), and Reorder Number so that these fields can be used to match against.
If you are planning to make changes to the Excel/CSV export then import back into the same Fred Office database, ensure that the Item Code is selected to export as this is the ideal field to match against.
-
Click Export, then choose a file name and location you want to save the export.
-
Click Save.
-
Click Commit, to close the Item Manager worksheet and apply any changes made to the items.