Import into Item Manager and Commit the Sheet
Item Manager allows users to create or update items in bulk displaying the data in a worksheet format. It can be used for data maintenance, maintaining product ranges, or for creating new items from a wholesaler or head office.
You can only import files that are in CSV, XLS or XLSX format. Additionally, if new items exist in the file, the Create Item Wizard will launch at the end of the Data Manager Import Wizard to help you create these items.
Item Manager will require you to complete the following steps
-
Create the Item Manager worksheet.
-
Import the file using the Data Manager Import Wizard.
-
Review the details.
-
Commit the worksheet.
-
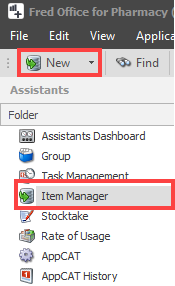
Select Assistants.
-
Select Item Manager.
-
Select New.
-
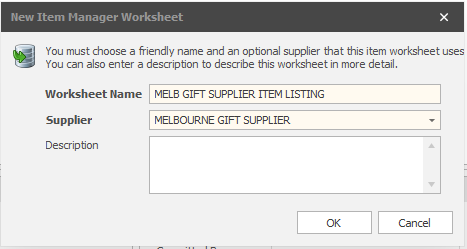
Enter a Name for the worksheet.
-
If you are importing supplier information such as reorder number (PDE), pack size, supplier cost price, retail price or minimum order quantity, then select theSupplier.
There is no need to select a supplier if supplier specific information is not being imported.
-
Select Import.

-
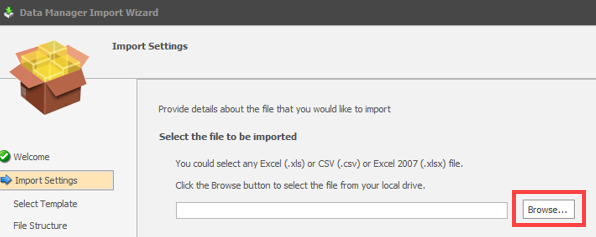
Select Browse.
-
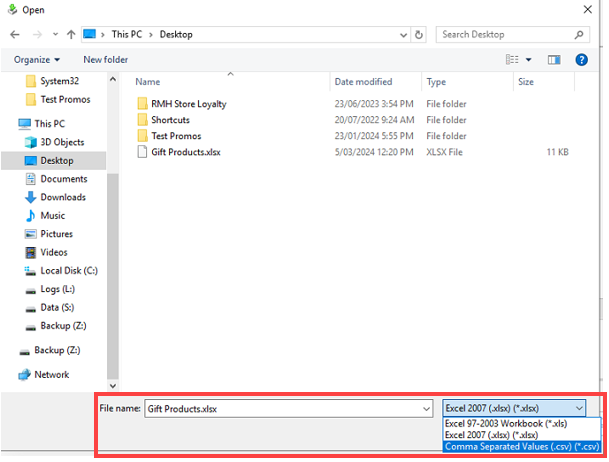
Navigate to the location of the file you want to import, select the file then click Open.

If your file does not display, you may need to click the drop down and select a different file type.
-
Select the worksheet (if required).
-
Select Next.
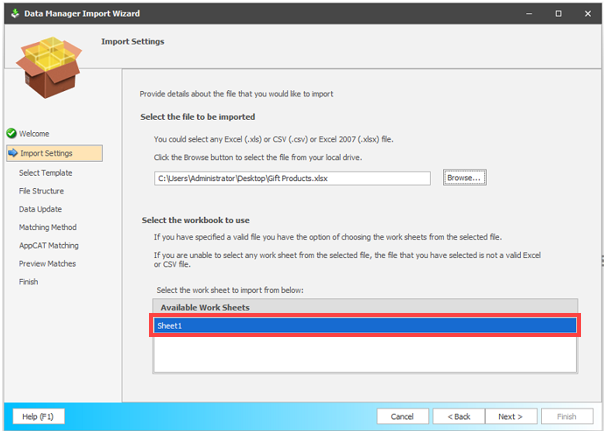
- Choose one of the following options and then follow the relevant steps below.
Load Saved Template
Let me map columns manually
 Load Saved Template
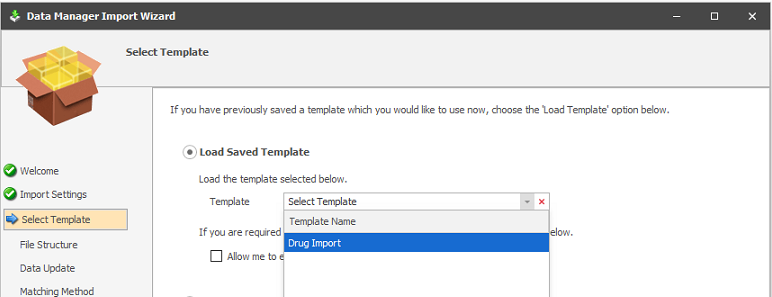
Select Load Saved Template. If you don't have a template, select Let me map columns.
Select Template from the drop down.
Select Next.
Confirm that the Column Headers match the data displayed.
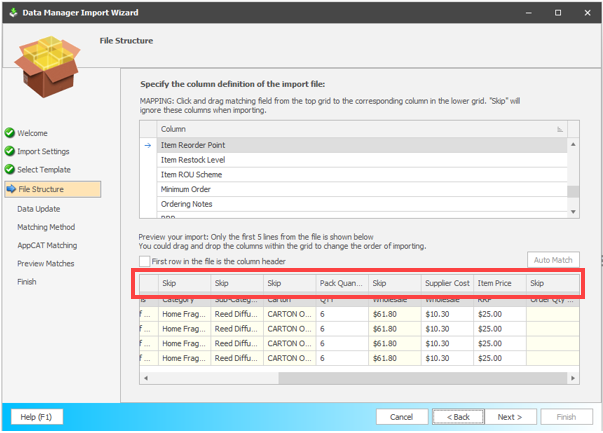
If you need to manually match columns, click and hold your mouse on a field from the Column section at the top of the screen. While still holding, move your mouse onto the header line of the column with the corresponding information in your data preview displayed below. When your mouse is over the correct column heading, release the mouse button. This will slot the column heading into the correct position.
After you have confirmed the column headers match the data, select Next.
 Let me map columns manually
Select Let me map columns manually, then click Next.
In the Column section at the top of the screen, click and drag a field into the bottom section.
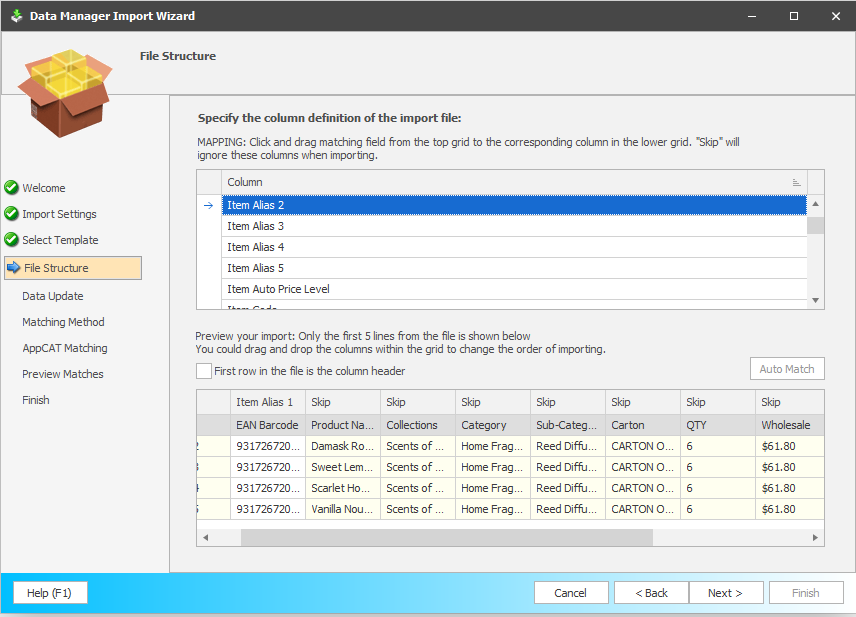
When your mouse is over the correct corresponding column heading, release the mouse button. The column heading slots into the correct position.
Repeat steps 2 to 3 until you have mapped all the required columns in the worksheet that you wish to import.
If your imported worksheet has column headings, select the First row in the file is the column header checkbox.
Click Next.
-
Select the checkboxes to confirm which columns of information to import and update.
-
Select the Confirm the above columns will be imported for data update checkbox, and then Next.
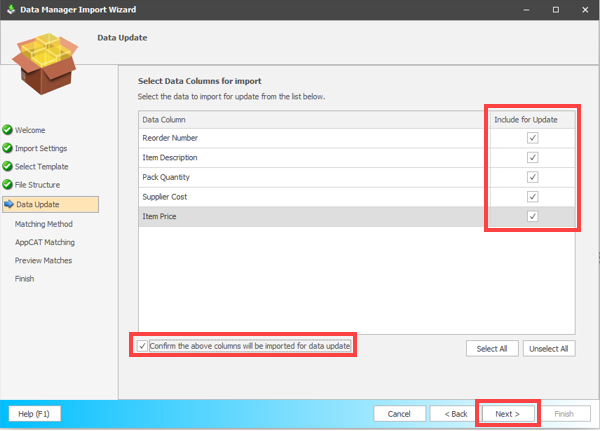
If Item Price will be updated in this import, proceed to Pricing Review after committing the worksheet to Accept and Commit new pricing.
-
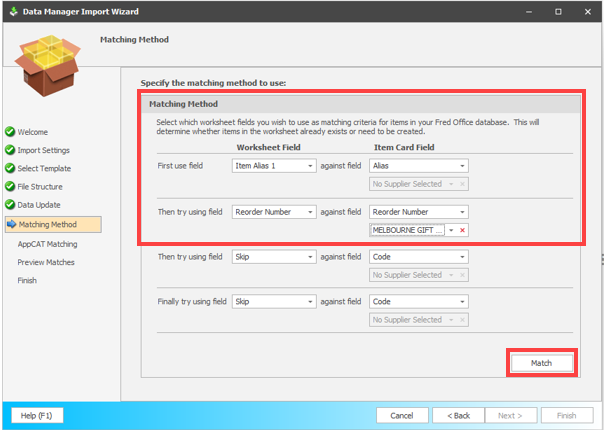
Choose the fields in the file (Worksheet Field) to use to match to fields in your own database (Item Card Field).
If using a previously saved Item Manager template the Matching Methods will be pre-loaded. Change the supplier of the worksheet field Reorder Number to match the supplier information you are importing. Other fields should be pre-set with the template.
-
Select Match.
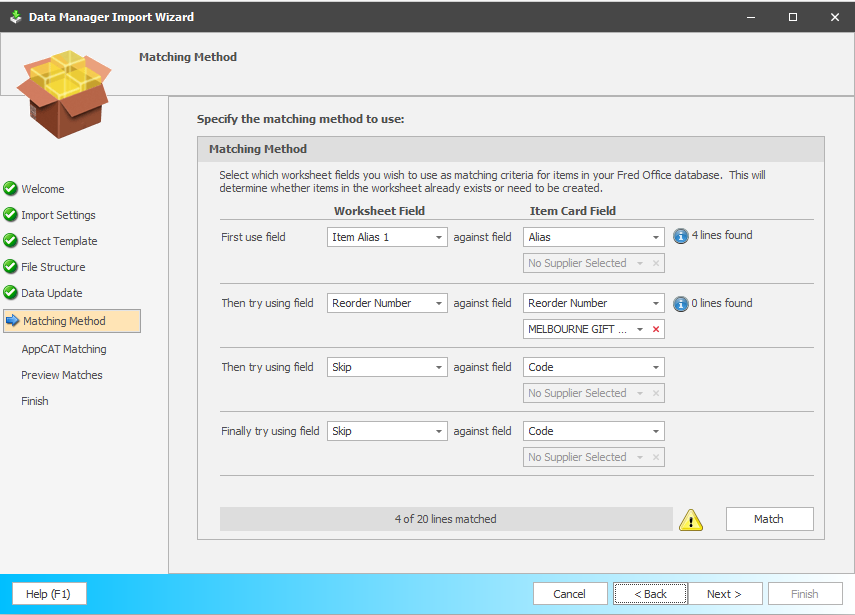
The number of items able to be matched will display. If you need to, you can refine the matching—adjust the fields above and select Match again.
-
Select Next.
-
Select Match.
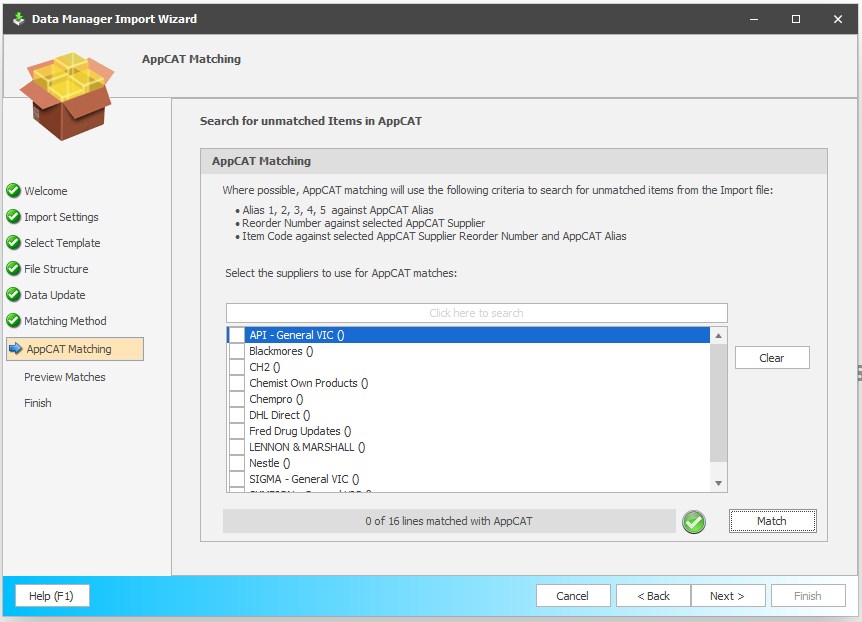
The remaining items are matched to AppCAT.
-
Select Next.
-
Review the matches found.
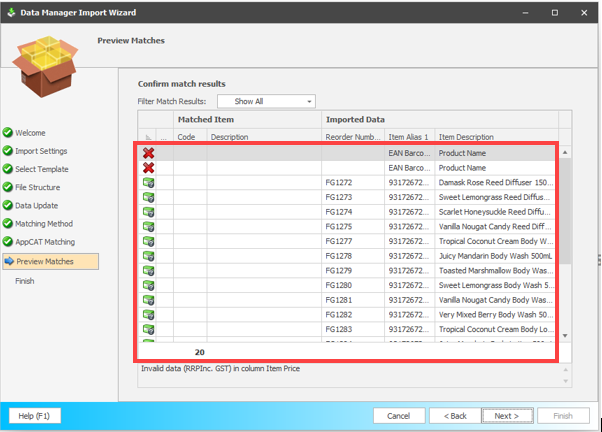
Right-click the mouse to perform actions.
-
Use the filter to restrict the view to show only relevant items to be reviewed. Below details each of these options:
Filter Match Results Description Show Matched
Item Exists in Fred Office Plus already.
Show Found in AppCAT
Is found in AppCAT but doesn’t exist in Fred Office Plus.
Show Unmatched
Item unrecognised in AppCAT and doesn’t exist in Fred Office Plus.
Show Errored
Is where data type is not recognised and no matching can be checked.
-
Select the filter and select Show Errored.
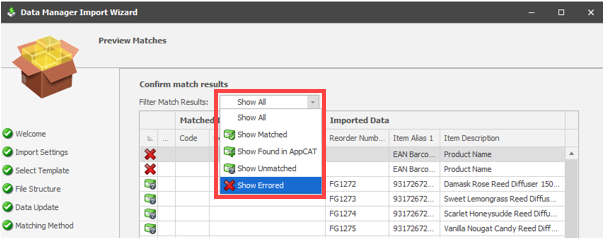
-
Right-click and remove these lines.
-
Select the filter and select Show Unmatched.
-
Review and manually match if required—right-click Match Item.
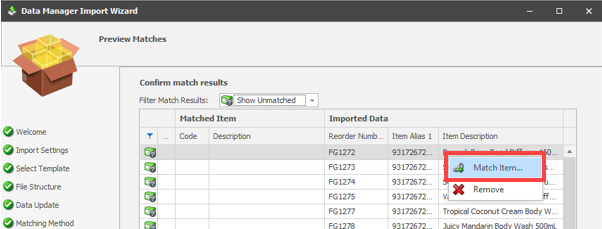
-
-
Select the item from the Search Results then click the forward arrow to move it to Selected.
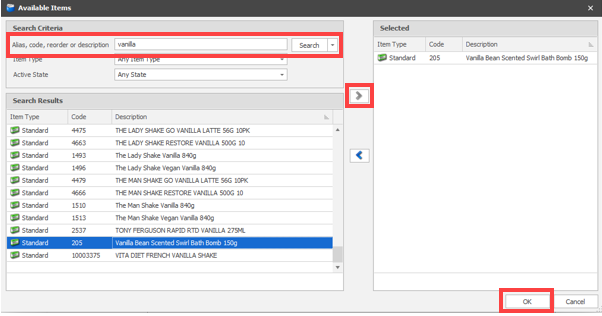
-
Select OK.
-
Repeat until items are matched.
Any items unable to be matched to a stockcard in Fred Office Plus will be created in the next step.
-
Select Next.
-
Select Yes.

-
Select Finish.
AppCAT Create Item Wizard
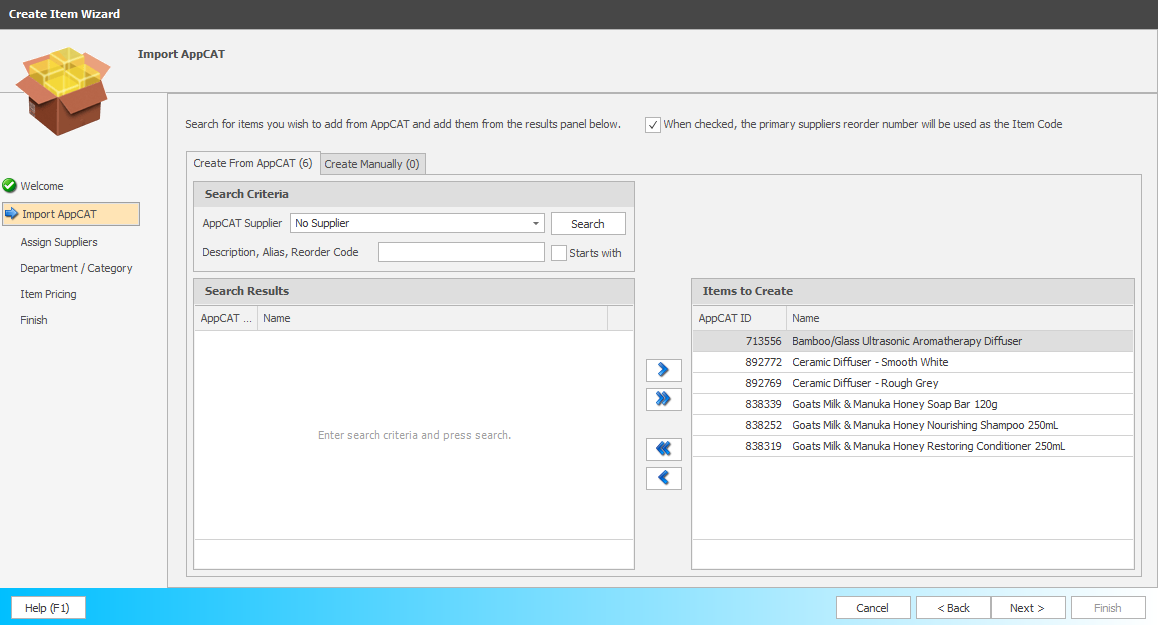
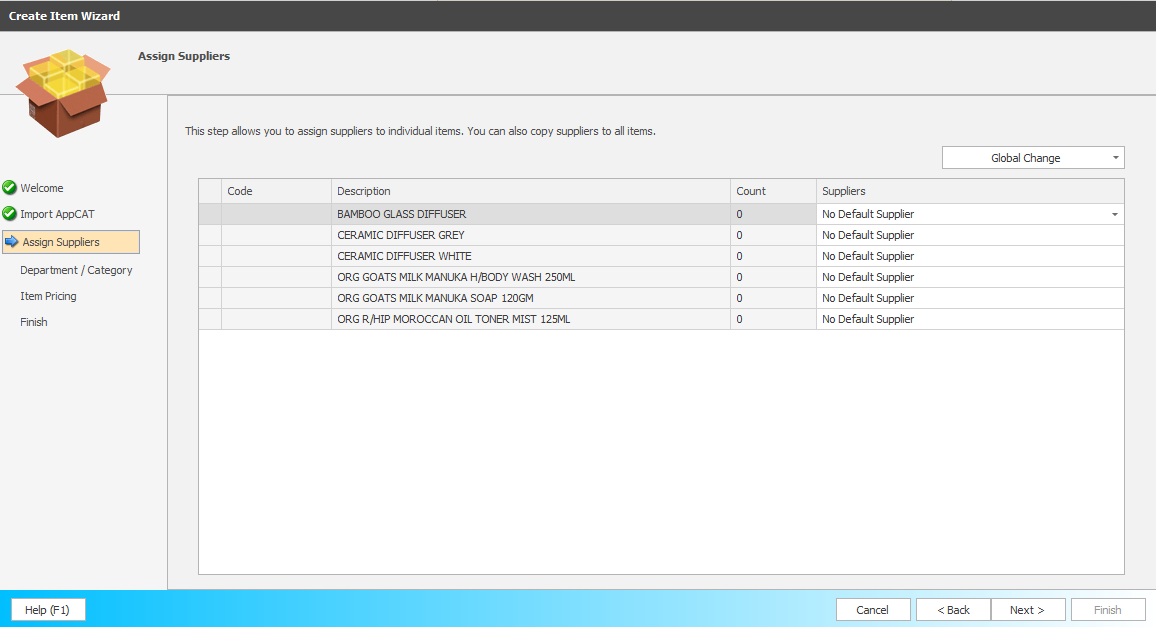
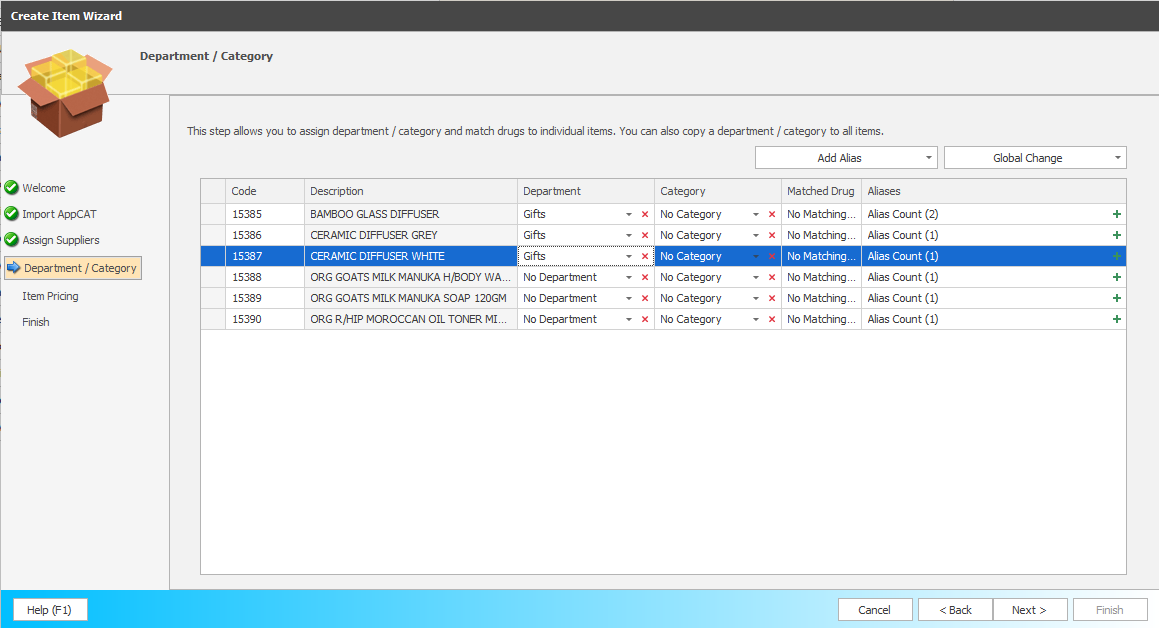
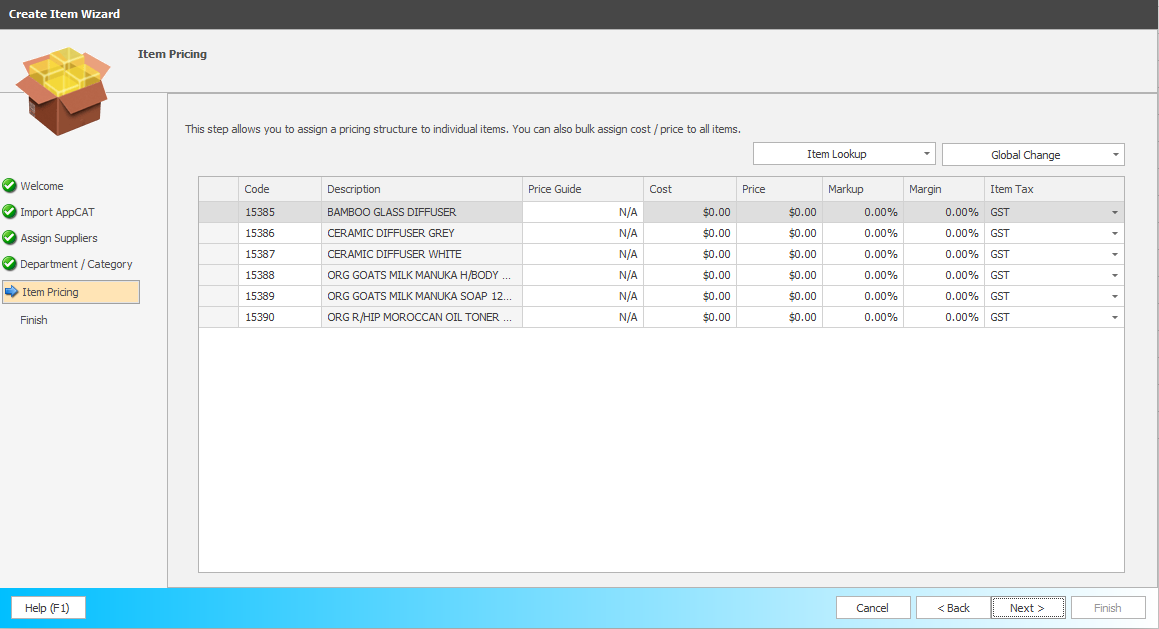
If, at step 12, unmatched items are matched to AppCAT and the items are identified as new in step 20, the Create Item Wizard will display to create these items using the information from Imported file.
-
AppCAT Import with the Matched found in Step 16.
-
Select Next.
-
Select Next.
-
Select Next.
-
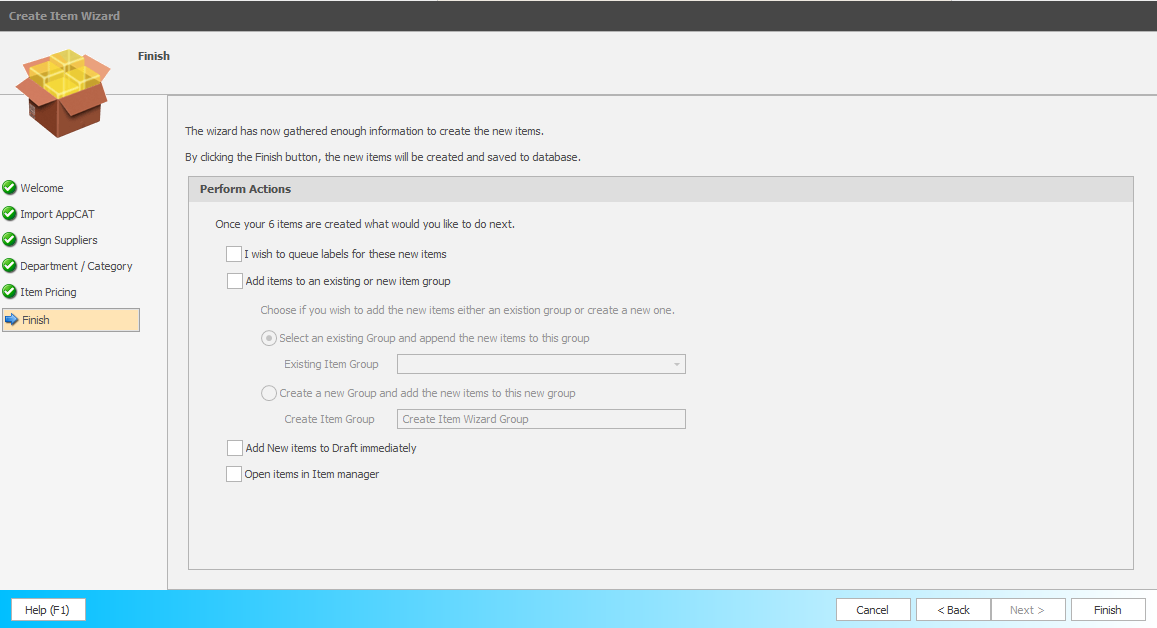
Clear the I wish to queue labels for these new items checkbox and select Finish.
-
Select Save.

Creating Non-AppCAT items
If at step 18 there are remaining unmatched items, the Create Item Wizard will display to create these items using the information from Imported file.
-
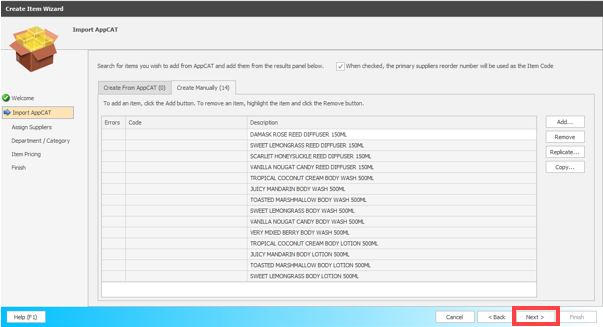
Select Next.
-
If you are not importing supplier information through the worksheet, then update Supplier information. To do this, click the drop down arrow under the Suppliers column then click Add.
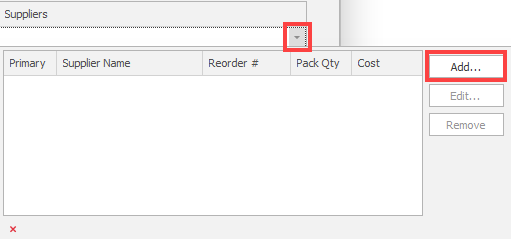
If importing Supplier information such as reorder number and supplier cost price from the imported worksheet there is no need to input supplier information on this page.
-
Click Next.
-
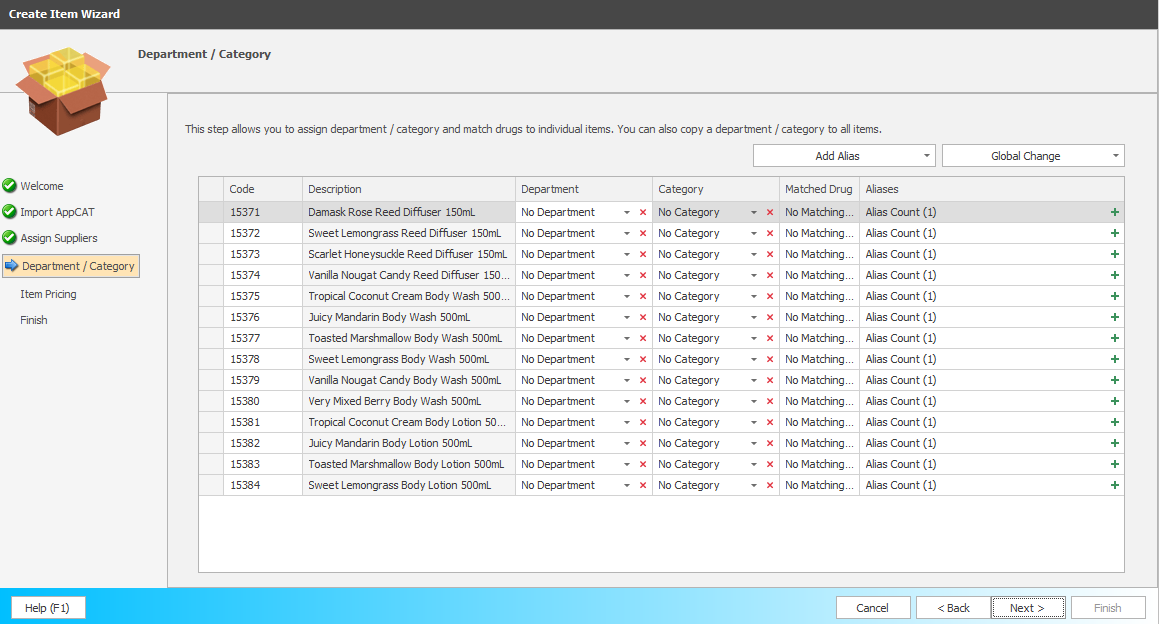
If you are not importing Department and Category information from the worksheet, then update the Department and Category here. Click Next.
5. If not importing the item pricing through the worksheet, the update it here and click Next.

-
Select each of the tabs and review updated item information (appears in bold).

If necessary, details can be updated via the New columns. This can be done by directly typing into it, or via right-click functionality (which includes auto-text updates and ability to apply changes to all items on the worksheet).
-
Select Save.

-
Select Commit.

Commit cannot be undone. If you do not want to proceed, select Cancel. You will then return to the Item Manger screen and can update items.
-
Select OK.

The new changes have now been saved to your system. When looking up or scanning one of the items the new details will display.
If Item Priceis updated in this worksheet, a message will display indicating that the Item(s) have been sent to Pricing Review as shown below.
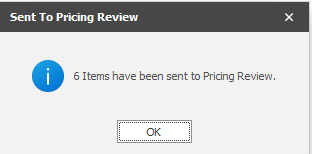
Proceed to Pricing Review to Accept and Commit the pricing.
Item Prices will not update until this Pricing Review has been completed.