Inventory and Purchasing
If the order is received at the store, refer to in Fred NXT Office.
- In Inventory and purchasing on the Fred NXT Head Office Dashboard, click All purchase orders.
- Select the purchase order.
- Click the Receive tab, then Product receipt to display the receipting screen.
- In the Overview tab, enter the Product receipt number.
- Click the Lines tab and enter the Quantity you are receiving for each product line.
- Once complete, click OK.
The Status of the purchase order changes from Open Order to Received.
- In Inventory and purchasing on the Fred NXT Head Office Dashboard, click All purchase orders.
- Select the purchase order.
- Click the Tax Invoice tab, then Tax Invoice.
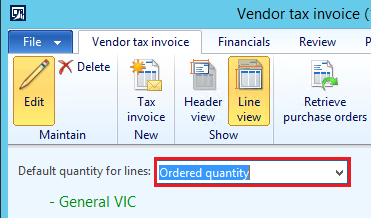
If the purchase order has not been received, you must change Default quantity for lines to Ordered quantity.

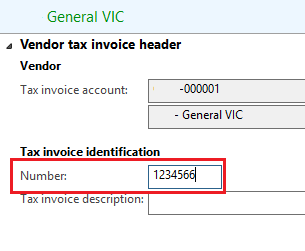
- In Tax invoice identification, enter the Invoice Number.

- Once complete, click Post (twice).
Fred NXT Head Office displays a Confirmation message.
- Click Close.
The purchase order Status has been changed from Received
 Orders have been received by stores. Stores will use Fred NXT Office to receive stock. Orders should be received before they are invoiced. (AX) to Invoiced
 Status of Orders that have been invoiced.(AX).
When this configuration is enabled, invoices sent by PharmX are consolidated into a single invoice, if they share the same Invoice Number and the same Vendor ID.
Typically, API warehouse consolidates multiple Purchase Orders into one Invoice Number. Previously, these Purchase Orders would be found in Fred NXT Head Office and Fred NXT Office as multiple invoices with the same Invoice number.
The consolidated invoices are committed (Posted) using the standard process in the Invoice module.
To enable invoice consolidation, contact Access support via your Fred Help Portal .
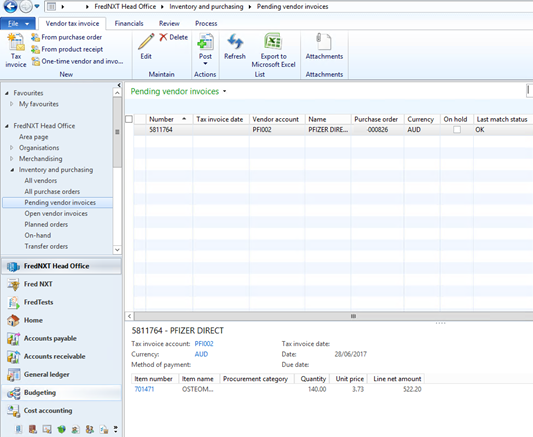
- Go to FredNXT Head Office > Inventory and purchasing, then click Pending vendor invoices.
The pending invoice displays as a single line entry with a unique Invoice Number.
The Purchase order column indicates <multiple> purchase order numbers have been consolidated.

- To view the breakdown of the consolidation, select the line entry, then click Edit.
All the lines included in this consolidate invoice are displayed in a grid with a cross reference to their original Purchase order number.

- Review the line item, then click Post to commit the invoice.
Invoices auto-download from the PharmX gateway between 7am – 8am every day. DHL invoices are available from 3pm.
1. Receipt PharmX Invoices - Unmatched lines
Unmatched line are lines with no correlating link between the item Fred NXT Head Office database and PharmX. Unmatched lines are sometimes created when stores process turn over or portal orders.
If you attempt to post an invoice containing an unmatched line, an error will be returned.
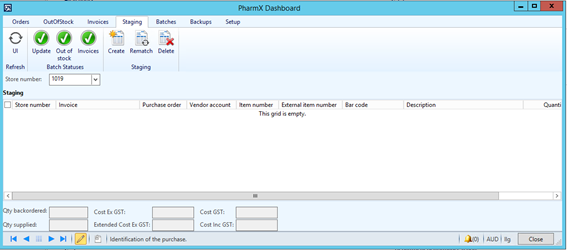
- From the FredNXT HeadOffice area page, navigate to Inventory and Purchasing > PharmX, and click Dashboard.

- Set the relevant Store number.
- In the Staging section, highlight any unmatched line and click Rematch to search for the item within Fred NXT Head Office.
- Do one of the following:
- Item cannot be located: Add the item in individually or using DIEF. See Create products (DIEF)
— or —
- Check the hardcopy invoice: Unmatched lines display with a blank item number, specifically when a new products replaces the ordered item.
PharmX fees (DD, subscription fees) should be created as service lines in Fred NXT Head Office, then matched. Once matched, they no longer display in PharmX staging.
- Item cannot be located: Add the item in individually or using DIEF. See Create products (DIEF)
Depending on your configuration settings, you may be able to automatically receive quantities upon posting the invoice. If you are unsure about your configuration, contact Access support via your Fred Help Portal .
- From the FredNXT HeadOffice area page, navigate to Inventory and Purchasing, then click Pending Vendor Invoices.

-
(Recommended) Right-click any column header and select Personalise.

When dealing with multiple stores, it is recommended to filter line items by store or by Date/Time.
- In the Personalisation screen, expand the Grid hierarchy,
-
Expand the Purchase Order node, then click Add fields.

- In Select fields, click to highlight the required field, then Add.
For example, Created by, Created date and Time and Site.
- Click Save to save your changes.
You must close the Personalisation form AND the Pending Vendor Invoices form before changes can take effect.
- Use the new fields to filter and locate the relevant invoice.
- Highlight the invoice and click Post (twice).

To post multiple invoices, use the check boxes to select the, then Post.
Once posted, the invoice is visible in the grid in Open vendor invoices (although it has been completed).
In Fred NXT Head Office, Purchasing Managers have been granted additional privileges to edit or cancel items that have been incorrectly received against purchase orders.
- From the Dashboard, click Inventory and purchasing then All purchase orders.
- Select a Purchase Order with a receipt.
- In the Receive tab, select Product Receipt.
- Click Correct, then adjust the Quantity.
- Click Close to save your changes
— or —
Click Cancel to cancel the entire receipt.
 Fred Learning Pathways