Set up vouchers in Fred Office Plus
This article explains how to enable and configure vouchers in Fred Office, including setup steps for POS integration and voucher item creation.
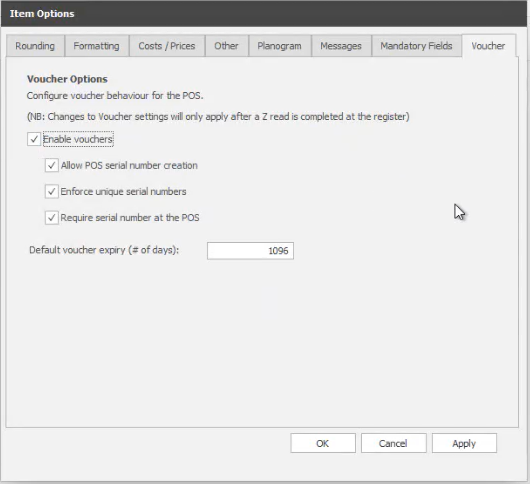
Enable vouchers in Fred Office
- From the Tools menu, select Item Options.
- Select the Voucher tab.
-
Select the Enable Vouchers checkbox. This will automatically select the checkboxes to:
-
Allow POS serial number creation.
-
Enforce unique serial numbers.
-
Require serial number at the POS.
It is recommended that you do not clear these checkboxes.
-
- Click OK.
Enabling vouchers will:
- Set default options required for vouchers to function at POS.
- Set default expiry days (editable).
- Once enabled and saved, Fred Office Plus will automatically create or activate (if it already exists) the voucher tender.
- After a Z-read, the voucher tender becomes visible in the Tender screen at POS.
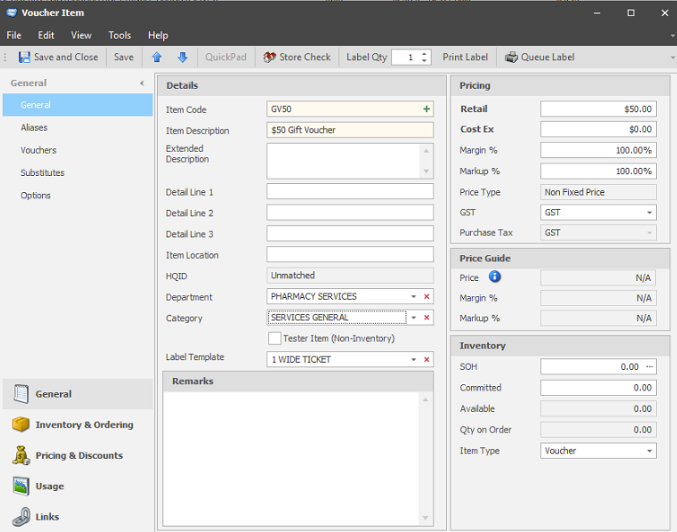
Create a voucher item
- Go to Inventory, then select Items.
- Click the drop down arrow next to New, then select Voucher Item.
-
Update the relevant fields: Item Code, Description, Department and Category.
-
Set voucher pricing:
For a set dollar value, enter the Retail Price. If creating multiple set price vouchers (i.e. $5, $10, $20), a new voucher item must be created for each value.
For variable priced vouchers, where the price is set at time of sale, select Item price must be entered at register checkbox under Options.
-
Click Options, select the Item is not discountable at register and Item cannot be placed on purchase orders checkboxes.
-
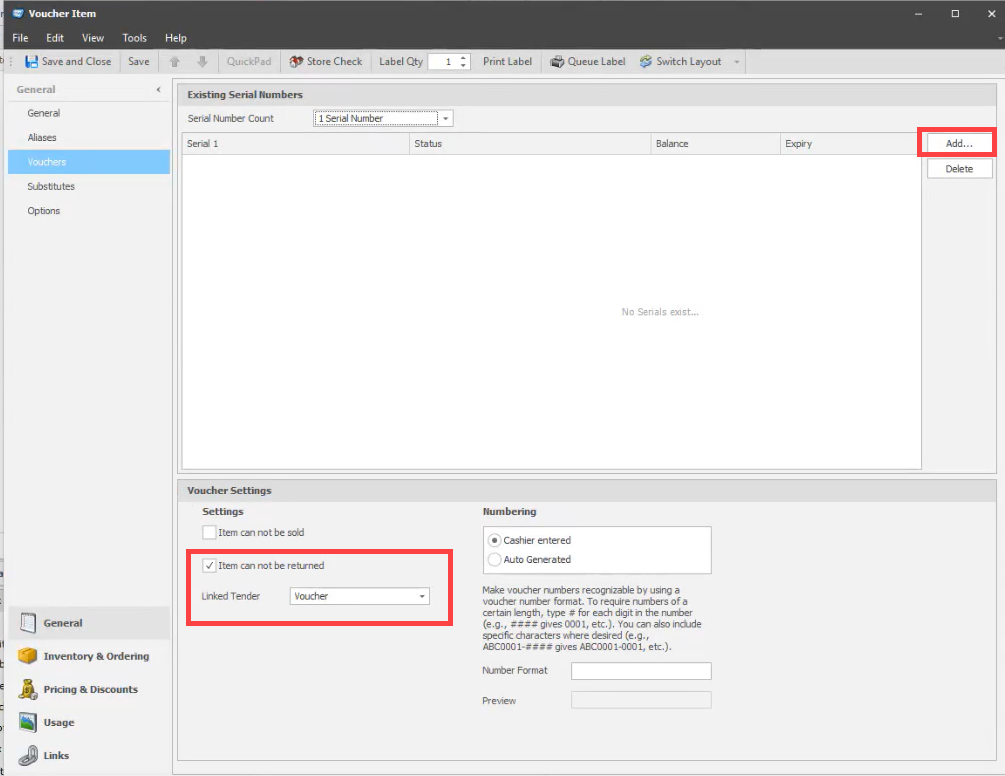
Click Vouchers on the left hand side.
-
Under Voucher Settings, make any adjustments, if required. By default:
- Item can not be returned checkbox is selected.
-
The Voucher tender type at the POS is selected as the Linked Tender. If you have multiple voucher tender types at the POS you may need to change this.
-
There are two options for voucher serial number creation:
Option 1 - Create within Fred Office
Serial numbers can be created within Fred Office prior to selling the vouchers at the POS. When selling the voucher at the POS, a list of available vouchers with serial numbers appear and you select the one you are selling.
-
Set Serial Number Count to 1 Serial Number.

- Click Add.
-
Select Auto Generate Multiple Serials and enter Number of Serials to create. This is the number of vouchers you will have available to sell at the POS.
If you need to manually enter a serial number, select Single Serial.
-
Set a Prefix of the voucher and leave Starting numbering at 0.
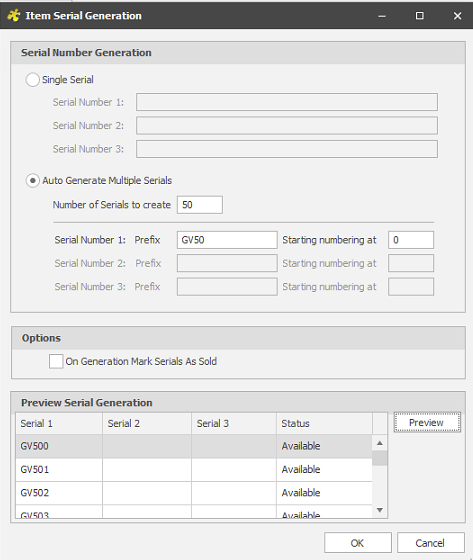
- Ensure On Generation Mark Serials As Sold is not selected, then click OK.
-
Under the Numbering section, ensure Cashier entered is selected, then click Save and Close.
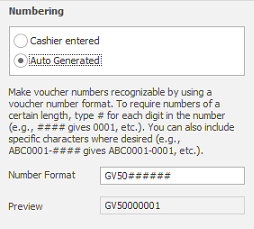
Option 2 - Auto-generation of serial numbers at the POS
At the time of sale, the POS can automatically create a serial number for the voucher based off a specified format. This serial number can then be entered when the voucher is redeemed at the POS.
- Under the Numbering section, select Auto generated.
-
Enter a format you want to follow for the voucher serial number in the Number format box. To require numbers of a certain length, type # for each digit. For example, entering a format of GV50######, will generate serial numbers GV50000001, GV50000002 and so on.
- Click Save and Close.
-
For instructions on how to sell and redeem vouchers at the POS refer to Selling and Redeeming Vouchers.