Add a new supplier
It is recommended all suppliers that can be matched to AppCAT are matched. This ensures that all your items contain the correct supplier information from AppCAT.
- Go to Contacts, then select Suppliers, then New.
- In the AppCAT tab:
- Find/Match supplier.
Click Select All > Apply changes. If an automatic match is not possible, try a manual match. Be aware that the manual search looks for the exact AppCat description, so sometimes entering the first few letters is best when searching. Also, keep in mind of supplier name changes, there may be differences between the supplier name in Fred Office and AppCAT.
If your supplier is not in AppCAT, skip this step.
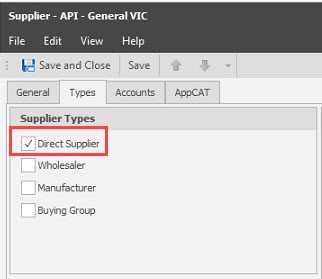
- In the Types tab:
Select the supplier type (as applicable). For example, Direct supplier.

- If this is an Electronic Supplier, click the Accounts tab:
- Click Add and enter the account details provided by your supplier.
Remember to clear the This supplier does not use electronic ordering checkbox.

- Click Save and Close.
Update items overnight:
This process can be left to be run automatically overnight if you have AppCAT Automation enabled for “Add new Suppliers to Items”.
Update items now:
Download items from AppCAT, then add new supplier items in bulk from AppCAT.
- Go to Assistants, then select AppCAT, and then Download Now.
Wait for the download to complete before continuing.
- Go to Assistants, then select AppCAT, then New Supplier Items.
- Click Collapse all, then expand the Supplier hierarchy and select the relevant entry.
- Hold SHIFT and click the first and last item in the list to select all items you want to update.
If you have selected more than 500 items, the performance of Fred Office Plus may be affected temporarily while the changes are processed. In particular, it may slow down the transmission of scripts to the till. It is recommended to update smaller groups OR at a quiet time/outside normal hours to prevent delays.
- Click Update value, then OK to display the Action column.
If required, the above procedure can be used to update the Item Pack Size, New Item Alias and Reorder Number Differences. Be sure to review all changes before applying them.
If you notice any incorrect details in the AppCAT Database, contact products@appcat.com.au
See AppCAT suppliers for a list of AppCAT suppliers.
- Go to Inventory, then select Items and search for item.
- Double-click to open the item stock card.
- Click Inventory & Ordering tab, then click Suppliers.
- Click Add.
- Select the new supplier using the drop down and enter all details.
- Click OK, then Save and Close.
- Repeat for all items as applicable.
Although this can be done in bulk using the Quick Action Wizard, the Quick Action process enters randomly generated PDE Codes for all items. This prevents any PDE searching for these items. For example, when adding items to an order or invoice. It is recommended you add each item’s supplier information required as outlined above.
For items not in AppCAT, you can use Item Manager to create or update existing items using an Excel spreadsheet. If the supplier provides a list of their items with barcodes, cost price, retail prices, and reorder numbers, you can import them. Please refer to Import into Item Manager and Commit the Sheet.