Fred Office Plus and Hire module
Hire is a new module in Fred Office Plus that allows a store to electronically hire and track a hire contract.
It contains two elements
- Management, Configuration and Reporting via Fred Office Plus.
- Hiring, paying and returning via Fred POS Plus.
It is ONLY available as part of the Fred POS Plus version of Fred Office Plus.
As part of the Fred Office Plus and Fred POS Plus install, the necessary components will be installed in both Fred POS Plus and Fred Office Plus.
Configure Hire
Hire consists of 3 components:
- A Hire Group – A collection of like items for hire that share the same pricing plan
- A pricing plan – the prices, deposit and rates that can be used by items in this hire group
- Hire Items – the items that can be hired out in this hire group
- Navigate to the Hire module under the Assistants button.
- Click New to create a new group.
- Name the group something that is relevant to the items in the group to assist POS users in filtering the items at POS.
The pricing plan is used to allow the cashier to quickly price the hire items for the given length.
A Hire group can have multiple pricing plans, or tiers, if required. For example, a general plan and a staff plan.
- Click Add Plan and fill in the pricing plan details. Repeat this if multiple plans are required.
Items will add in with a status of Available, which can be manually changed if required.
- Click Add items to add items to this hire group.
- Locate the items to add and select OK to add them to the hire group.
The same item can be added more than once. If there is only one item, that represents more the one hire item, repeat this process until the required amount have been added.
- Review the items.
- Update the Cost.
This will be the cost used in the transaction for each Hire.
- The Barcode and Description can be changed if required.
- Once complete, click Save and Close to create the Hire Group.
Create a new Hire at POS
The POS provides 3 functions, Create a New Hire, Extend a hire (make a payment) and Return a Hire.
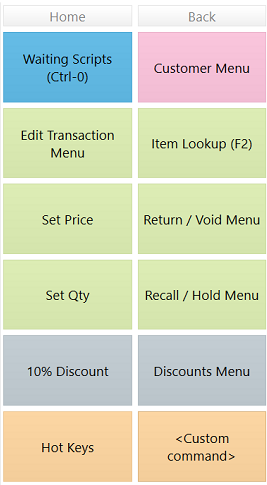
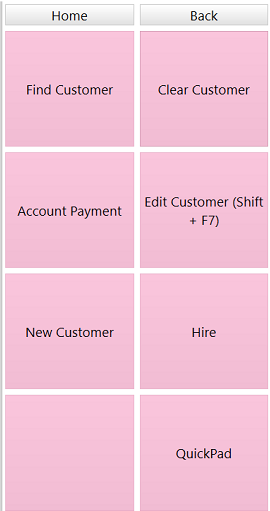
- Open the Customer Menu then select Hire.
- Search for and select a product that is Available.
For example, you can search by Barcode or Description. You can also filter the list by a Hire group.

The Hire contract screen will open.
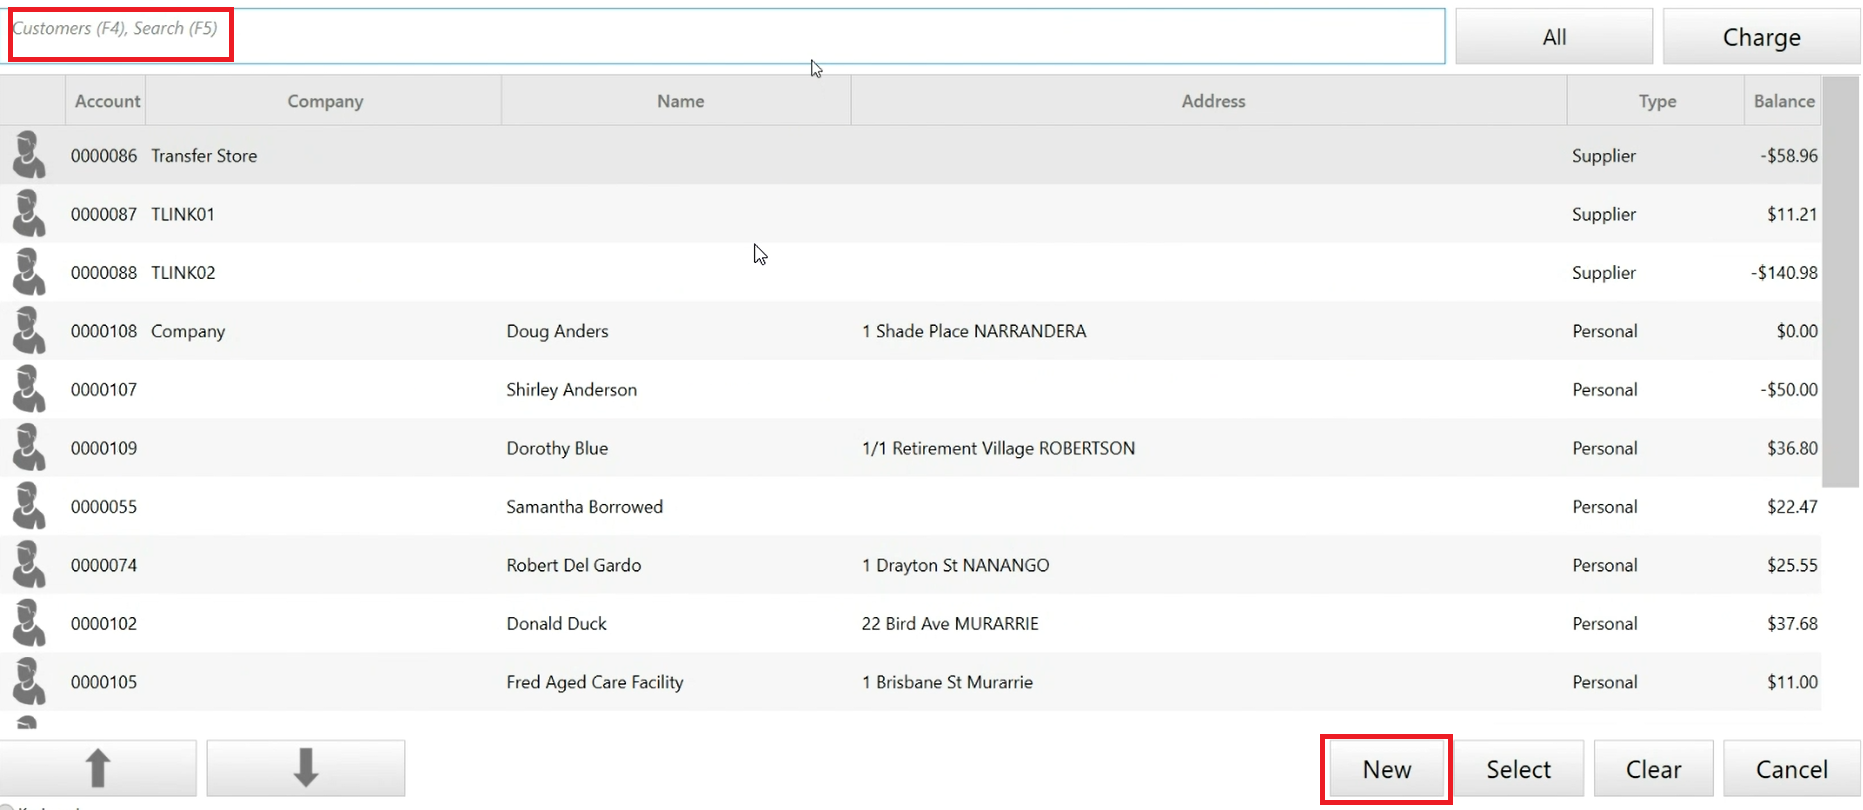
- Click Search to Locate and/or create a new customer to assign this hire to.
If a customer was already selected at the POS , they will be already selected here.
- Enter the Hire Plan and then set the expected return date in the Exp Return field.
This will automatically populate the amount and deposit values.
You can overwrite these values if you need to.
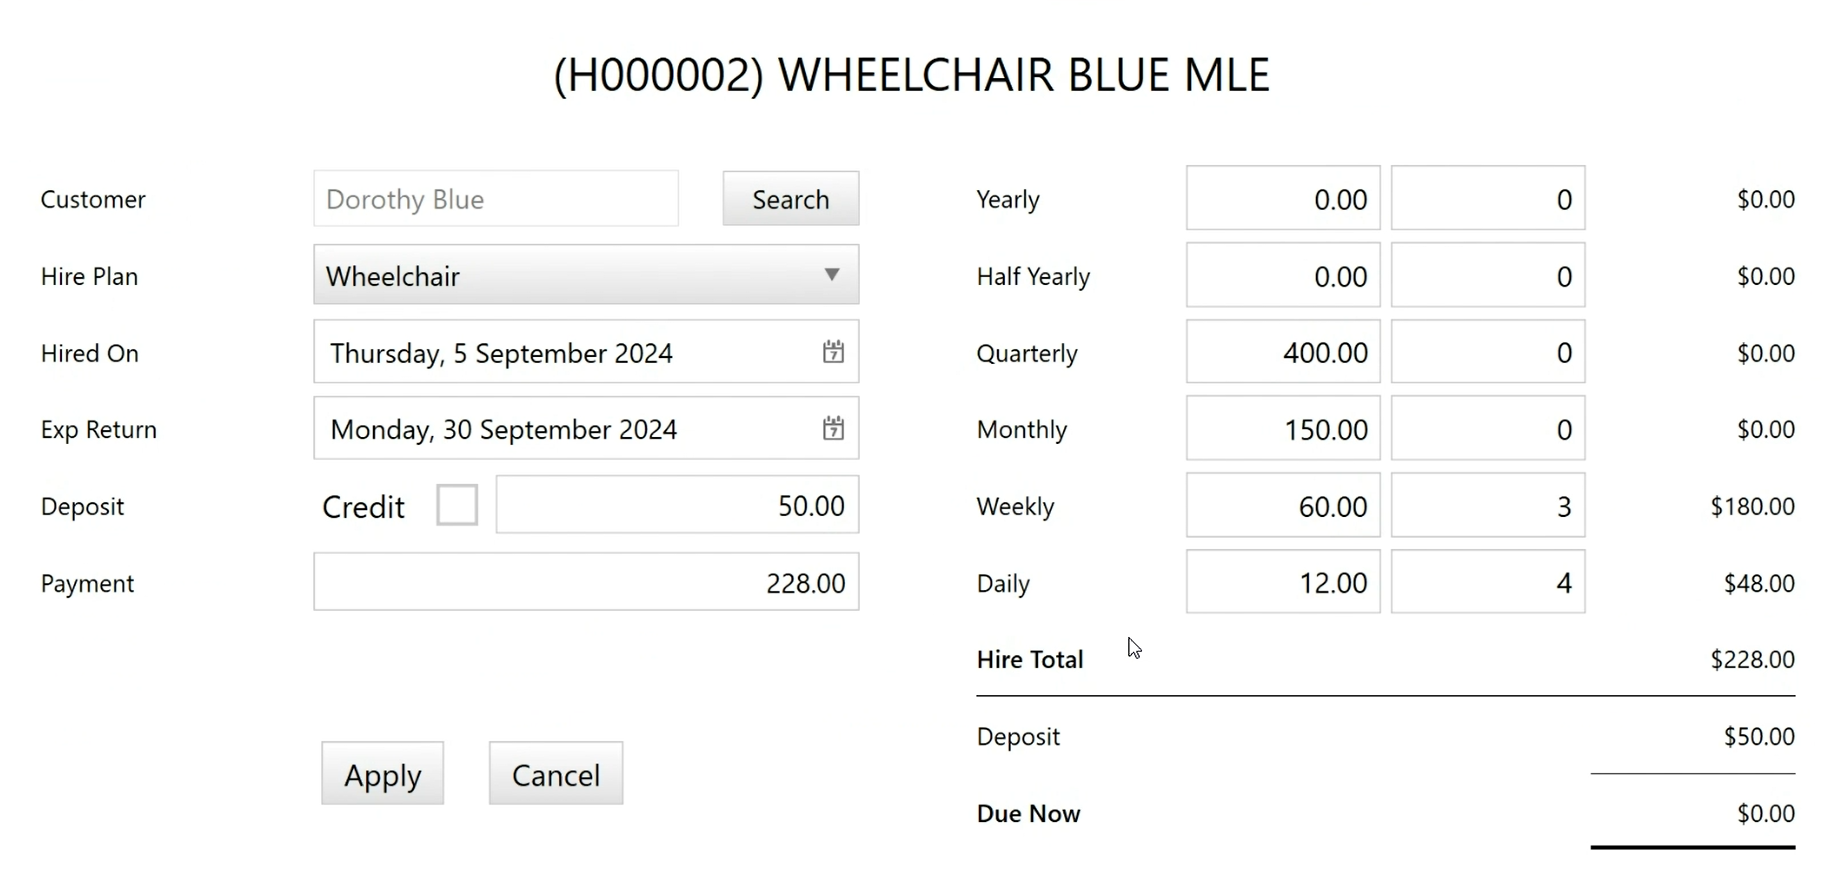
- The Deposit amount will be automatically be populated. If the customer is paying their deposit by Credit card, select the Credit checkbox to remind the staff to return the deposit by Credit card when the hire is returned.
-
If a payment is to be taken at time of creating the new Hire Contract, enter the Payment amount.
When entering a payment amount use the number keys above the letters
- Click OK to create the hire and proceed to POS screen.
- Complete the sale.
This will place the item status as Hired and record the details of the contract.
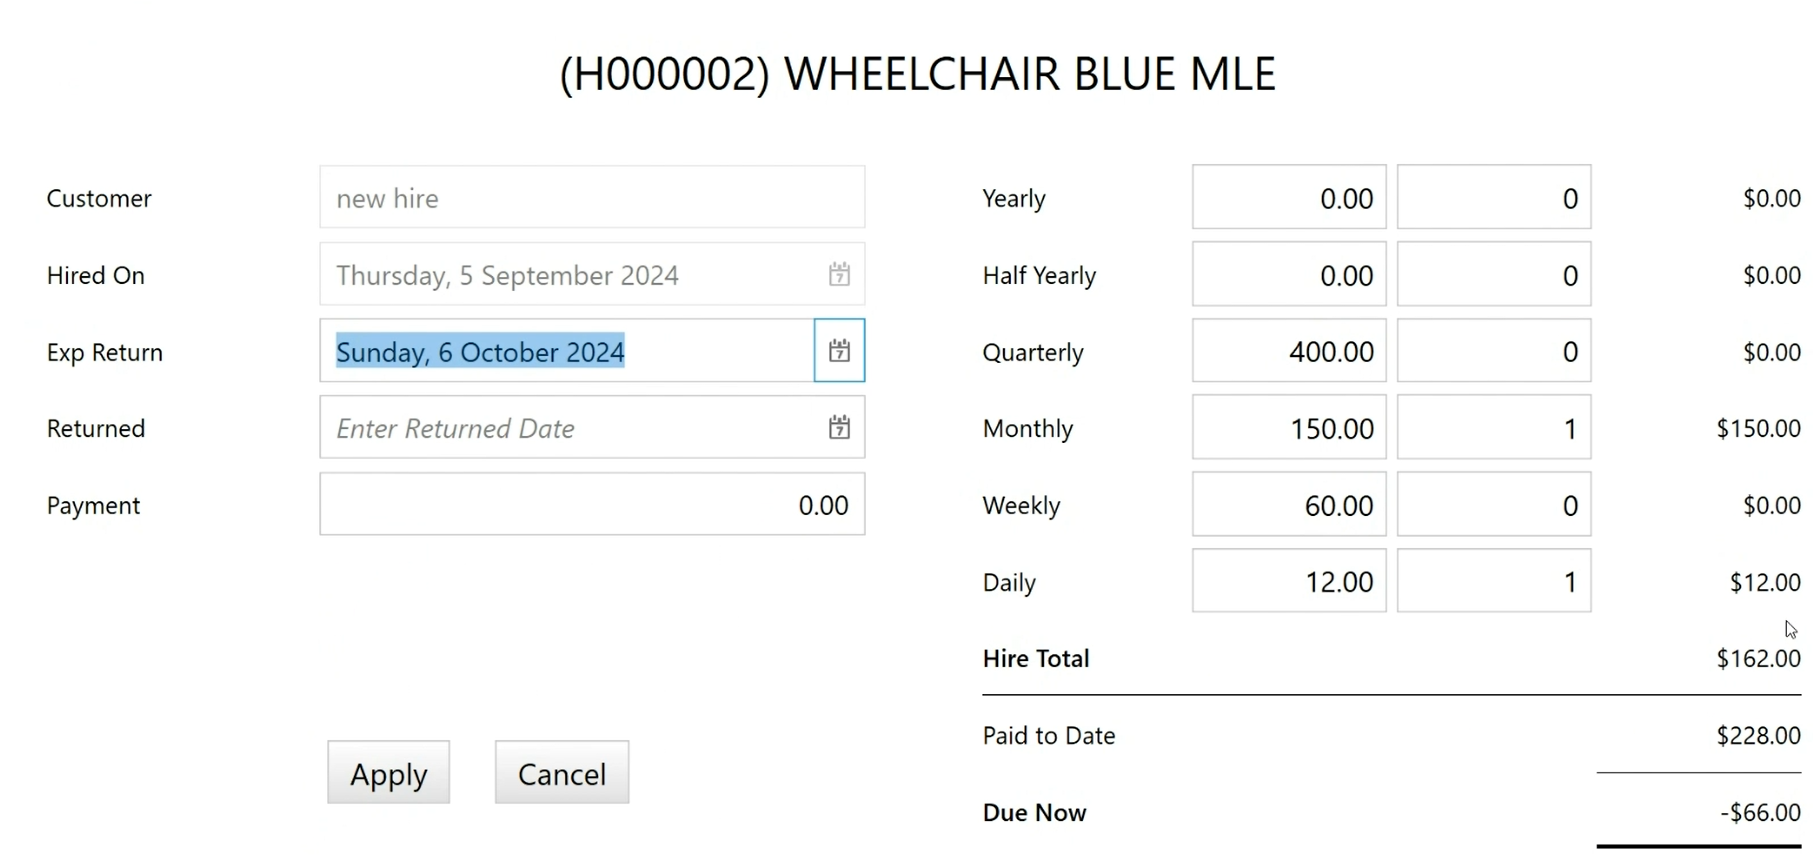
Extending or making a payment
A hire can be recalled to either be extended, or to make a payment against it.
-
Load the Hire taskpad from Customer Menu and locate (or search for) the item / customer from the list of hired items.
Hired Items will be at the bottom of the list.
The Hire contract screen is open.
- Update the Expected Return Date.
-
If relevant, enter a payment amount in the Payment field.
When entering a payment amount use he number keys above the letters.
- Select Apply.
If it was a payment, the transaction will need to be completed.
If it was only an extension (with no payment), then select Apply to extend the contract. There is no need to complete the transaction to extend the hire date.
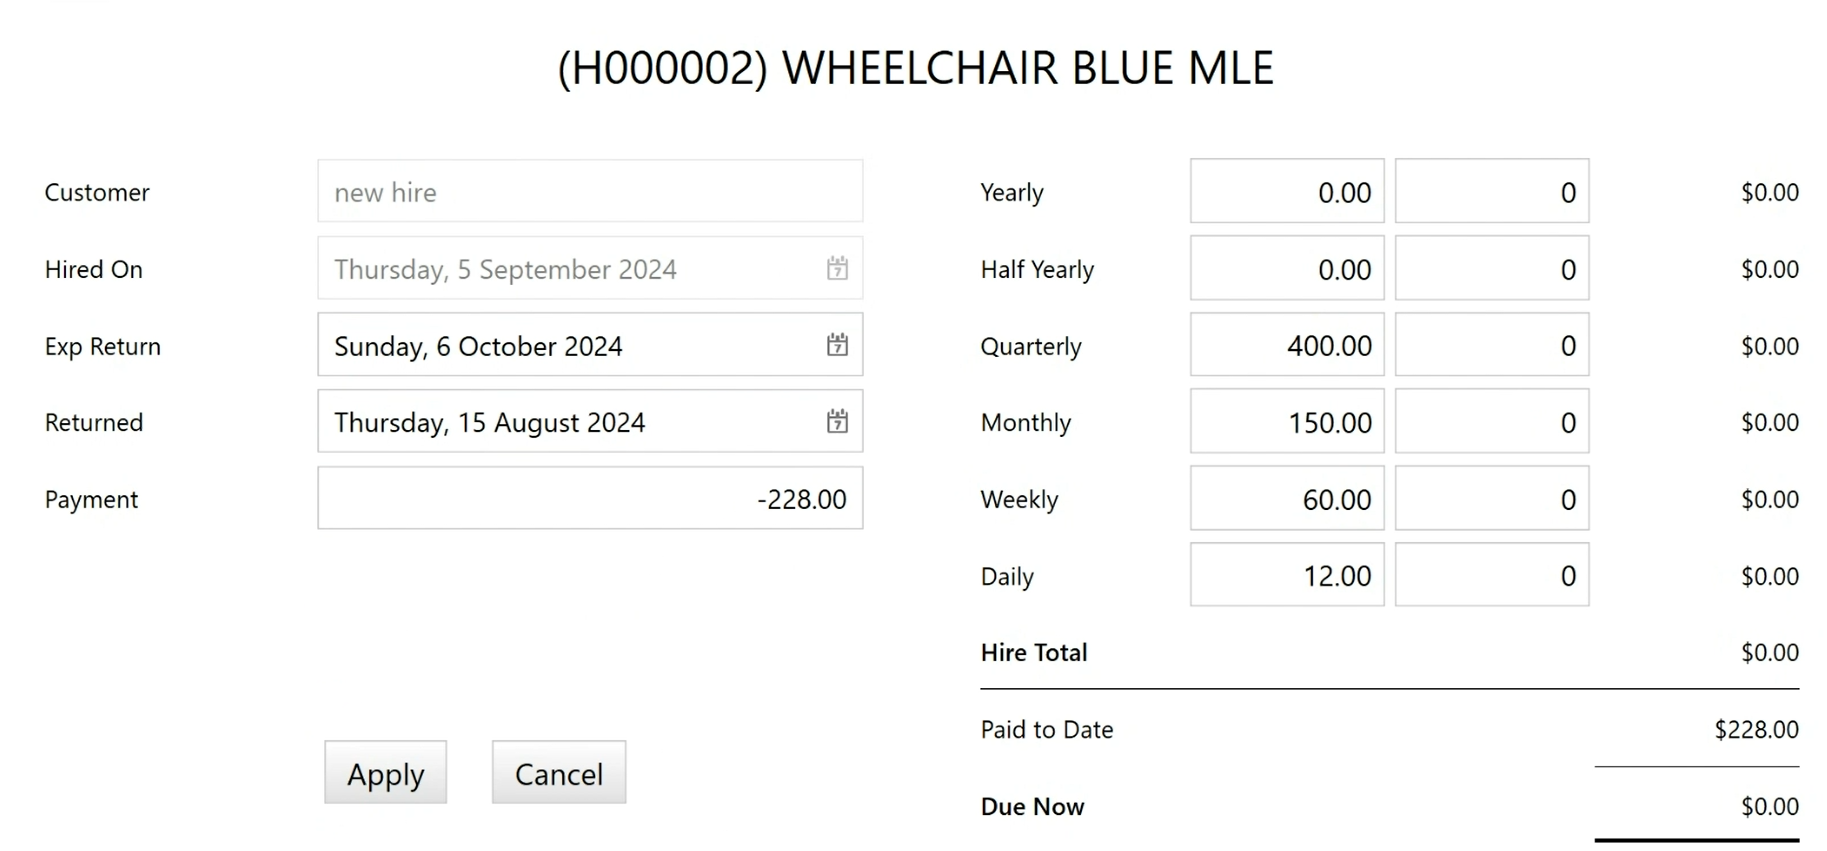
Returning a Hire item
- Load the Hire taskpad from the Customer Menu and locate (or search for) the item / customer from the list of hired items.
Hired Items will be at the bottom of the list.
The Hire contract screen is open.
- In the Returned field, enter a return date in for the hire contract.
This will automatically populate the payment amount based on the length of the contract and the pricing plan used.
-
Press OK to return the POS transaction.
By default, the Deposit will be marked for return and can be used as either a deduction off the final price, or returned to the customer.
- If the customer wants to deduct the deposit off the sale….
- Complete the transaction, as the total price will include the discount.
- If the customer wants to refund the deposit ….
- At the Tender screen enter the deposit amount, as a negative, in the appropriate tender.
- This will add the deposit price to the total amount owed.
- If the customer wants to deduct the deposit off the sale….
- Complete the transaction using the tender they wish to pay the amount owing.
Hire Reports
There are three hire reports in Fred Office Plus which you can find under the Items section of reports:
Active Hire contracts
- A list of contracts currently on hire and whether they are overdue.
Hire history
- An audit report showing a complete hire history.
Hire Summary
- The current summary of hire, total sales, item status, etc ...