Create a return for credit (RFC)
This topic provides step-by-step instructions for creating a return for credit, adding items using a barcode scanner, marking it as sent, and then creating, reviewing, and committing a credit note.
- Click Ordering, then Returns.
- Click New Return for Credit.
The Create Return for Credit Wizard is displayed.
-
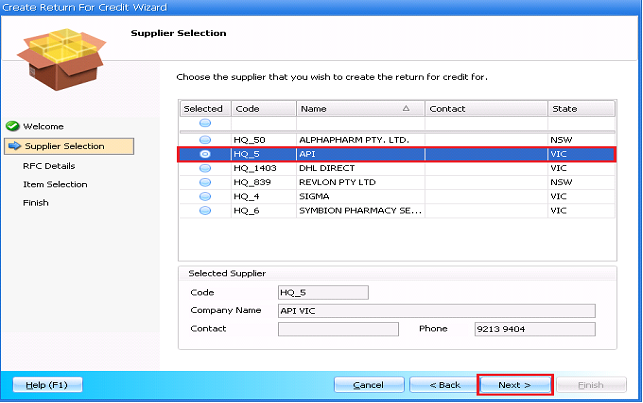
Select the Supplier and click Next.
-
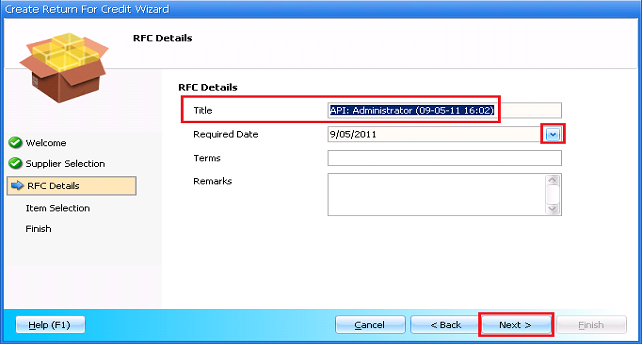
Enter the Title and Required Date (if applicable) and click Next.
-
Keep the Scan items option selected and click Finish.
The Add Items window displays.
- Scan the Barcode of an item you want to add to the RFC.
- Enter the Quantity to add, receive or send, then press [Enter], or click Add.

If the item does not scan you can also press [F5] to manually search for and select the item.
- Repeat until you have added all of the required items to the RFC.
When you enter a quantity, you can continue scanning the next item without moving the cursor back to the Scan Item Barcode field.
Alternatively, instead of entering quantities, you can scan every unit (for example, if there are five units of an item, you can scan the barcode five times).
- Review the RFC Quantity and Reason Codes for each item, and adjust them if required.
- Click Save.
Once one Reason Code as been set this can be updated for all items by right-clicking and selecting CopyReason Code to All.
-
Click Send RFC.

- Click OK.
RFCs can only be sent manually; they cannot be sent using Gateway.
- Click File > Print.
- Select the print options you require, and print your RFC.
- Click File > Exit.
- Send your printed RFC manually.
- Click Ordering, then Returns.
- Click New Credit Note.
The Receive Credit Note window is displayed.
- Select the Supplier.
-
Enter the Credit Note Number, Credit Note Date and Credit Note Value.
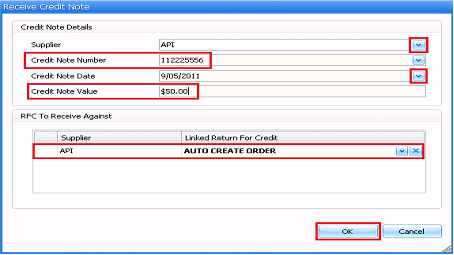
- Leave AUTO CREATE ORDER selected.
- Click OK.
- Click Yes to create the new credit note.
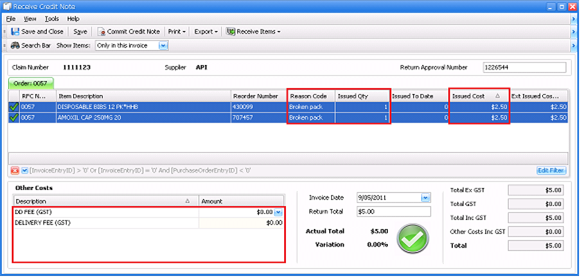
- On the Receive Credit Note screen, adjust the Reason Code, Issued Qty and Issued Cost (if required).
-
Enter any Other Costs (for instance deliver fees, DD fees, or rebates).
- Click Save.
Once all items have been accurately received and other costs entered, the Return Total (calculated based on issued quantities and other costs figures) and the Actual Total (entered from the paper invoice) must be within the allowable variance (this is indicated by a green tick icon).
For more details, see Variance. - Click Commit Credit Note.

The Commit Invoice window is displayed.
If all items from the return were credited, there will be a tick against the return(s) listed. This means the return will be closed when the credit note is committed. If further credit notes are expected for this return, remove the tick.
If you do not want to perform a Pricing Review immediately, un-tick the On Commit show Pricing Review checkbox.
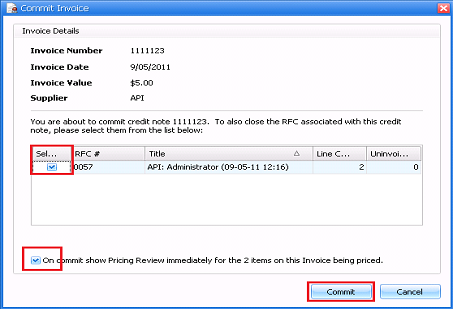
- Click Commit.