Promotions without a catalogue file
You can set up date range promotions without a catalogue file.
-
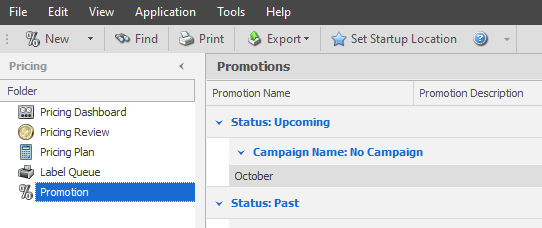
On the Pricing tab, click Promotion, then click New from the toolbar.

- Click New Campaign and enter a Campaign Name (if applicable).
- Enter a Promotion Name, Start and End Date, then click OK.
- Click Add Items from the toolbar to add items to the promotion.
You can add extra items to the promotion by Group, Supplier, Department, or individual items. Add Supplier
- Click the drop down next to Search.
- Click Search by Supplier.
- Click the drop down and select the department (and/or category).
- Click Search.
- Click the double forward arrows to add all items to Selected.
The <CTRL> and <SHIFT> keys can be used to select only some of the items from the group. The single forward arrow can then be used to add only the selected/ highlighted items to Selected.
 Add Department
- Click the drop down next to Search.
- Click Search by Department.
- Click the drop down and select the department (and/or category).
- Click Search.
- Click the double forward arrows to add all items to Selected.
The <CTRL> and <SHIFT> keys can be used to select only some of the items from the group. The single forward arrow can then be used to add only the selected/ highlighted items to Selected.
 Add Individual Item(s)
- Enter an Alias, Code or Description and click Search.
- Highlight the item(s) you want to add and click the single arrow to move the item(s) to Selected.
Alternatively all items returned in the search can be moved to Selected, via the double forward arrow. The single back arrow and double back arrow can be used to remove items from Selected.
- Repeat the search and selections until all items required have been moved to Selected.
- Once complete, click OK.
- Click OK.
- Set the sale price for the items either individually or globally.
 Set Sale Details for an Individual Item
Click Sale Price and enter the price.
— OR —
- Right-click the item and select Set Sale Price by then use the option required and add a tick to apply.
 Set Sale Details Globally
If you only want to apply options to selected items instead of all items, you can use the <CTRL> and <SHIFT> items to select the items and select Selected Promotion Options instead of Global Promotion Options below.
- Click Tools menu, Global Promotion Options.
- Click Set Sale Price by.
- Enter the dollar value or percent to discount.
- Click the corresponding tick to apply.
-
Items added to a promotion are automatically set to Not Discountable which prevents further discounts being applied at the POS.
To allow further discounts on top of the promotional price, uncheck the Not Discountable checkbox.

Alternatively this can be done in bulk by:
-
Click Tools menu, Global Promotion Options, Set item not discountable.
At the end of the promotion period, this flag will automatically be reversed back to the setting of each item prior to the promotion.
-
Click Commit.
-
-
Labels can be queued at this stage.
-
Commit.
The Promotion is active now, and will come into effect at your chosen start date. The promotion window can now be closed.