Patient attributes
You can create attributes and assign them to patients. Patient attributes provide a flexible way to group patients or to store membership number, such as NDSS.
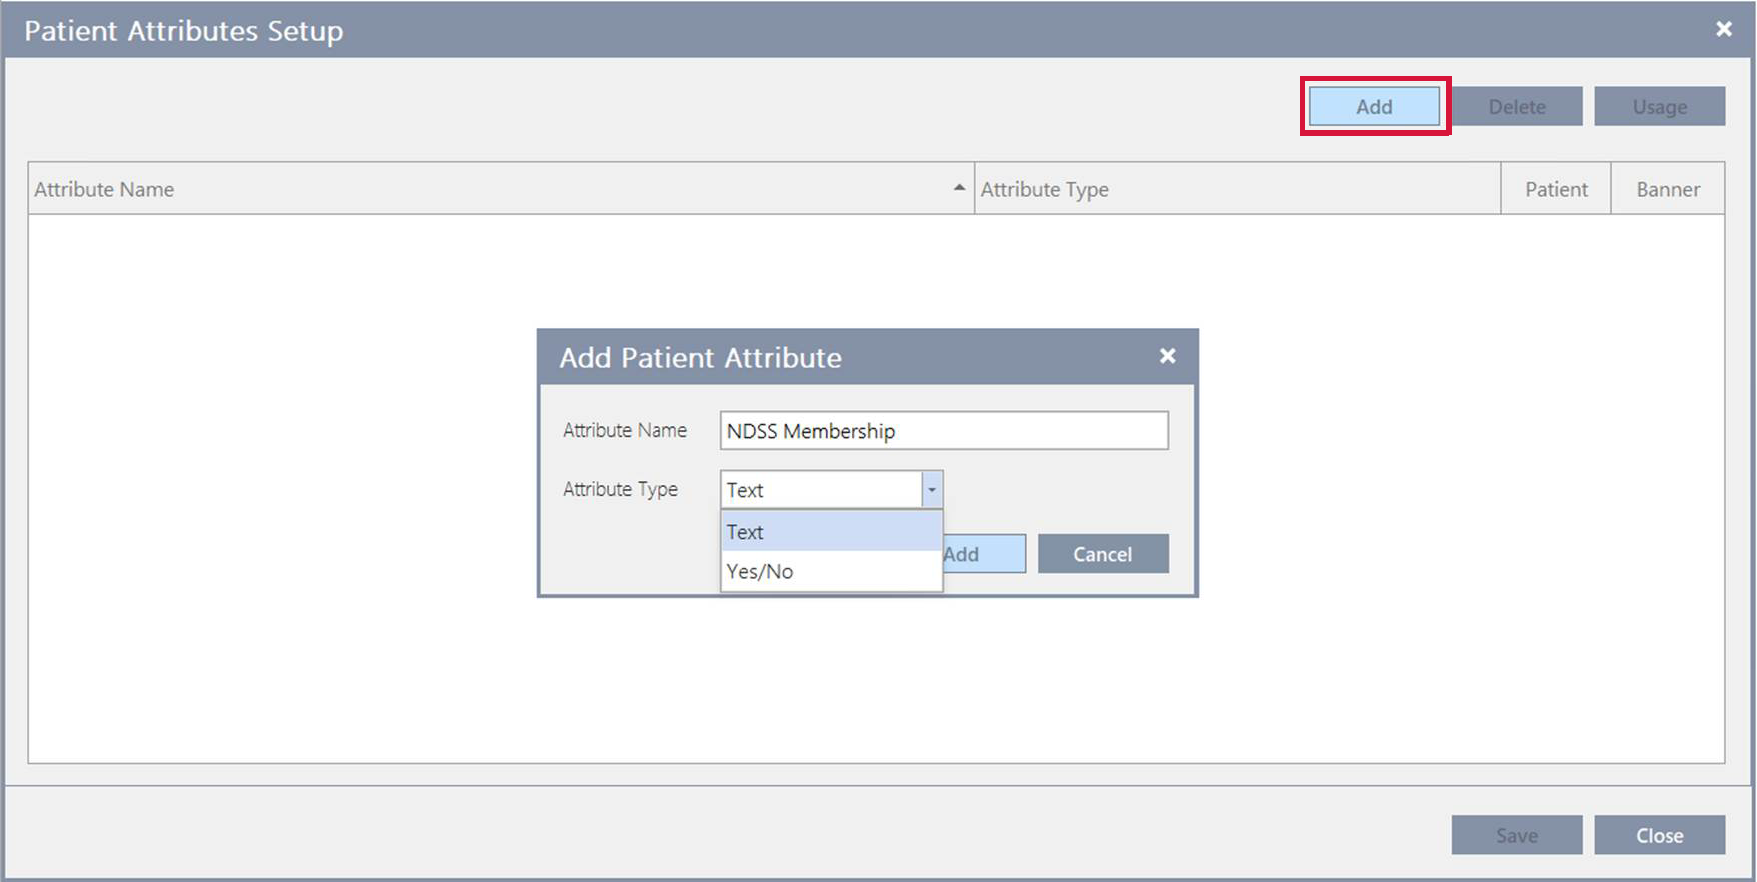
There are two types of patient attributes: text and Yes/No. You can also configure up to two patient attributes to display on the patient banner.
Create patient attributes
-
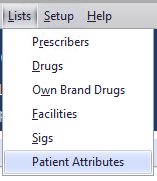
Select Lists > Patient Attributes.

-
In the Patient Attributes Setup popup, click Add.
-
Next, enter an Attribute Name and select the Attribute Type, then click Add.

-
Click Save.
Assign an attribute to a patient
-
Search and select the patient from the Main Dispense screen.
-
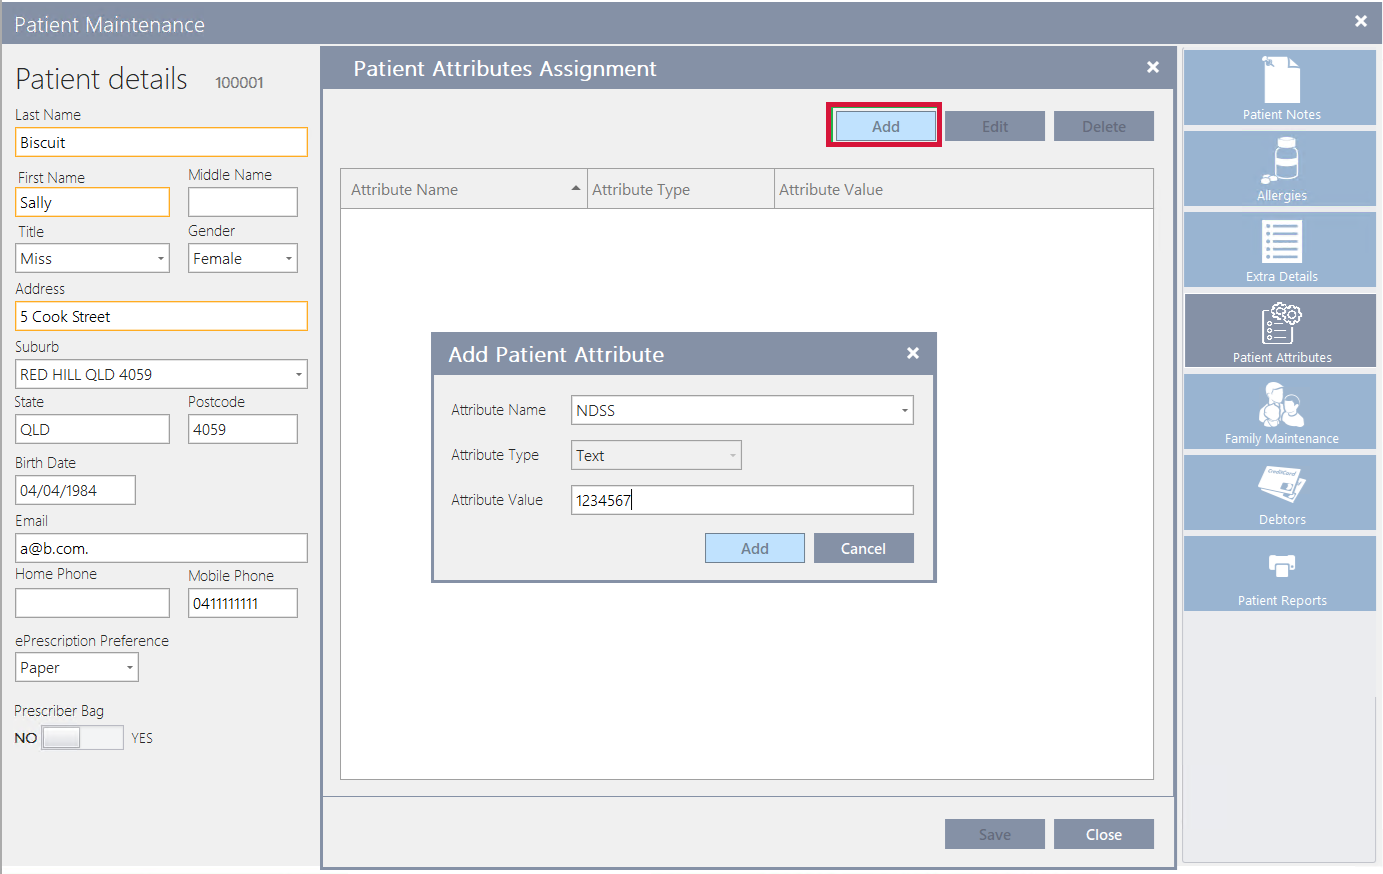
Click the Patient Attributes tile.

-
In the Patient Attributes Assignment popup, click Add.
-
Next, select an Attribute Name, enter an Attribute Value and then click Add.

-
Click Save.
Configure a patient attribute to display in the banner
You can configure up to two patient attributes to display on the patient banner.
-
Select Lists > Patient Attributes.
-
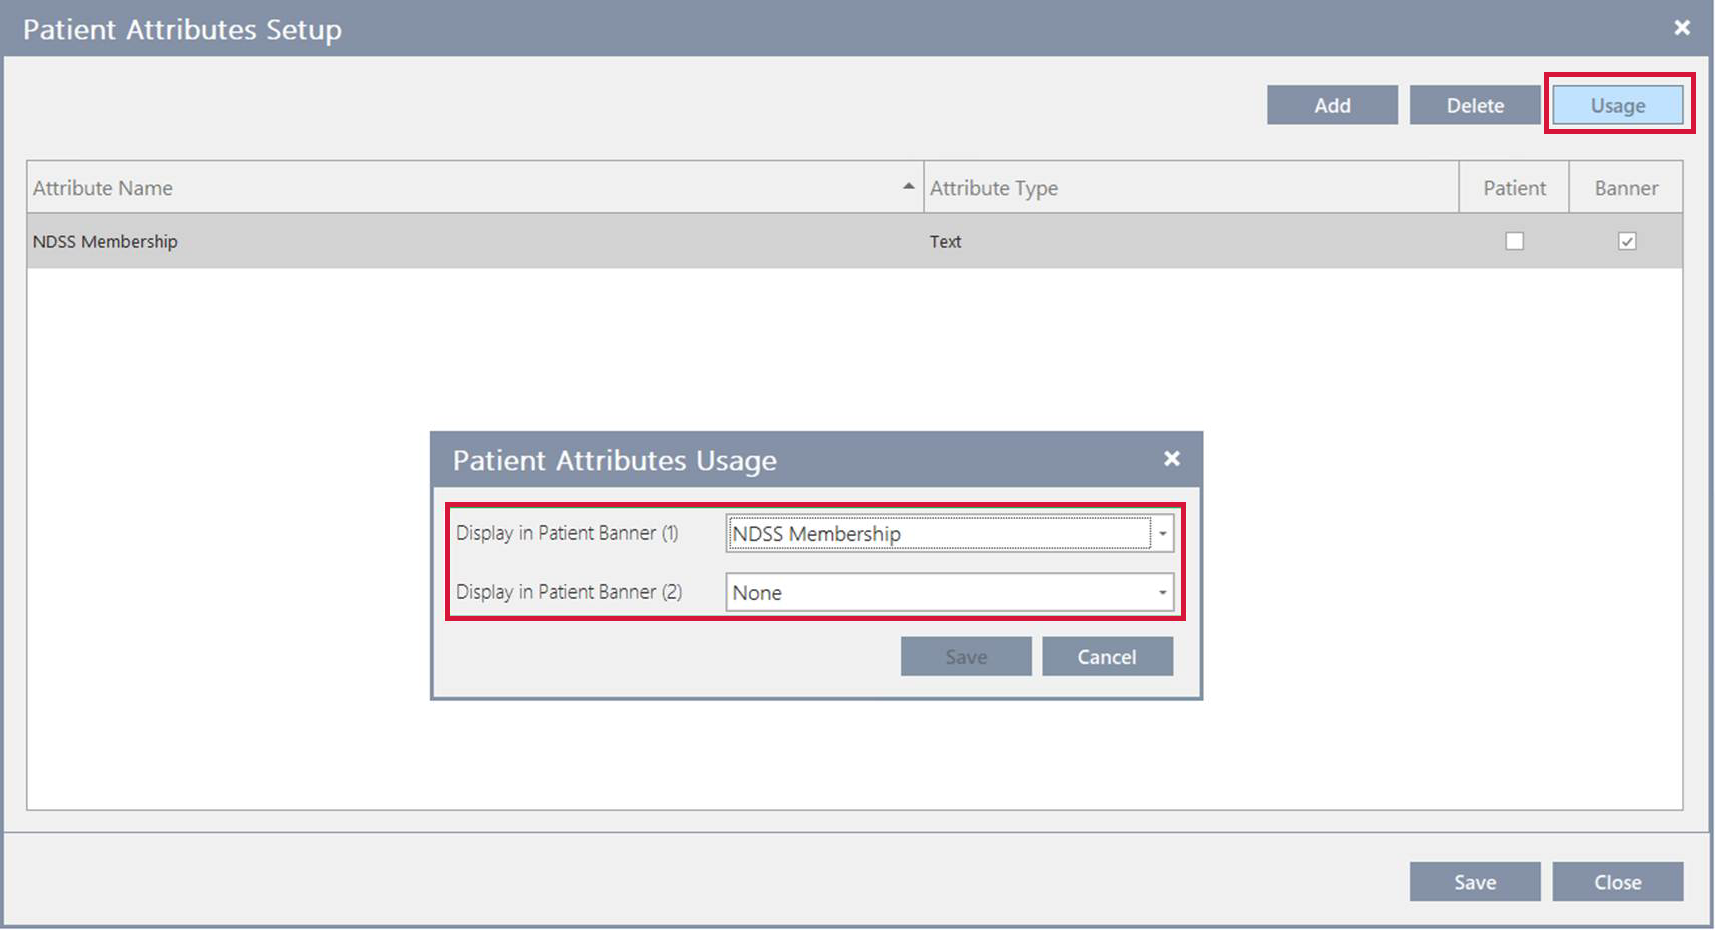
In the Patient Attributes Setup popup, click Usage.
-
Select the attribute(s) you want to display in the patient banner.

Then, when you view a patient that has values assigned to the attribute, you will see this information displayed on the patient banner.

There is a limit of two attributes that you can choose to display on the banner. However, if more attributes are defined, you can hover to display the values for all the attributes.

 Fred Learning Pathways