Regular Batch Stocktakes
If you have a Mobility device, it is easy to complete much smaller stocktakes on sections of your store in a cyclical basis.
This could be one shelf on a gondola, or a particular department, category or range such as just the lipsticks from a cosmetic brand.
Counting smaller sections on a regular basis will ensure your stock levels are accurate and subsequently you can make informed restocking decisions, and prevent over/under stocking. Another advantage of conducting cyclical batch stocktakes is that the process is faster, easier to count, simplifies reviewing discrepancies, and allows for quicker finalisation.
It is important to check that your committed quantities are correct prior to completing a stock-count.
Committed quantities include scripts awaiting collection and payment at the POS, as well as items on layby. Before using your Mobility device to count committed quantities, it’s helpful to print a committed stock report to identify which items to look for.
Print Committed stock report
-
Within Fred Office, go to Reporting, then double-click to open the Committed Stock Report (found under Inventory Reports).
-
Clear the Only show items with stock checkbox.
-
Click Run Report.
-
Click Print Preview, then print.
Count committed stock using the mobility device
-
On the mobility device, from the main menu screen, tap General, then Options.
-
Clear all selected options, then select Quantity Committed.
-
Tap Save.
-
From within the General screen, tap Scan.
-
Scan the item.
-
Enter the committed quantity and tap Enter
-
Repeat for all committed items.
-
Login to Fred Mobility using the default login
-
On the home screen, tap Stocktake.
-
Tap Batch.
-
Tap the + on the top right hand side of the screen to create a new stocktake batch.
-
Enter a name and (optional) a description.
-
Tap the down arrow to hide the on screen keyboard, then tap Save. Your stocktake batch has now been created and you can start counting.
-
Go to Assistants, then select Stocktake.
-
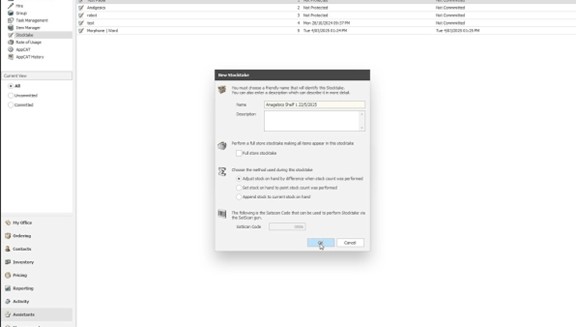
Click on New.
-
Enter the name for the stocktake batch, and a description (optional). Ensure Adjust stock on hand by difference when stock count was performed is selected.
-
Click Ok.
-
Click Save and Close.
As you are counting true stock on hand, do not forget to include your committed items (scripts waiting, and laybys), when performing your counts.
-
On your Mobility tap Stocktake then tap Batch .
-
From the drop down menu, select the batch you created.
-
Tap Next.
-
Scan the barcode of an item or enter the item lookup code.
-
Enter the stock count and tap Next or Enter.
-
Repeat the process until you have counted all items in the shelf bay/section/department you want to count.
If an item is scanned and counted multiple times, the counted values will be added together. This is useful when you have excess stock out the back, or have multiple facings on the shelf of an item.
-
Within Fred Office, go to Assistants, then Stocktake.
-
Double click the stocktake batch to open it.
-
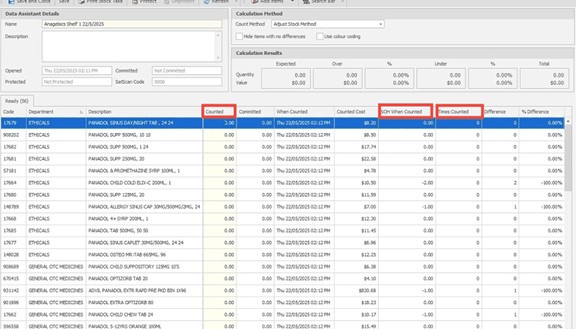
Review discrepancies.
-
Counted: What you have counted using the mobility or manually updated.
-
SOH When Counted: The quantity that Fred expects you to have.
-
Times Counted: Will update if the item is counted multiple times (this is not the stock on hand).
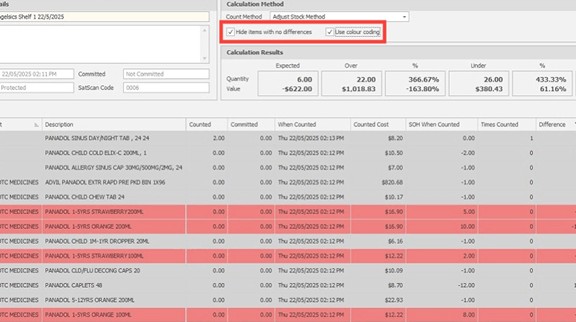
Once the stock had been counted you can use two additional features; Use Colour Coding or Hide items with no differences.
Hide items with no differences: When selected, if the counted quantity and the SOH when counted match, the item will be hidden from view.
Use colour coding: When selected, Use Colour Coding will highlight variances.
-
Grey - Your count is higher than what Fred expected you to have on hand. (Example reasons why this could occur: invoice/transfer of stock not entered into Fred Office, use of a miscellaneous item hotkey at the POS, and drugs not linked to items)
-
Red - Your counted quantity is less than what Fred expected you should have on hand. (Example reason why this could occur: stock that was received in on an invoice that hasn't been put on the shelf or vice versa).
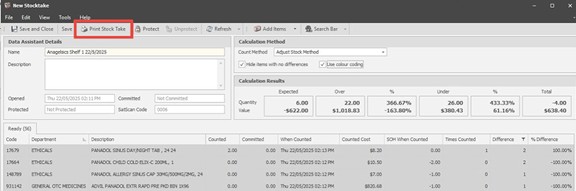
If you would like to investigate your discrepancies further, then with the Hide items with no difference checkbox selected, print a stocktake sheet, then go and recount your items. Amend any items by updating the quantity in the Counted column prior to finalising.
-
-
Once you have reviewed all discrepancies and entered the correct stock on hand in the Counted column, click Protect, then Calculate. The Data Assistant Stock Take Discrepancy window shows the final outcomes from the stock count, and provides a link to the Stock Take Details report.
-
Click Commit to finalise your stocktake. Once you commit your stocktake, the item counts are adjusted, and Fred Office will record the date and time of the last stocktake against the items.
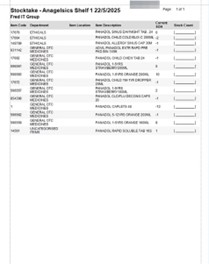
When performing regular batch stocktakes across your store, it is important to run a stock valuation report to capture any items you may have missed when counting, and to keep track of which sections have not been counted for some time.
-
Go to Reporting, expand inventory reports, and double-click to open the Stock Valuation Report.
-
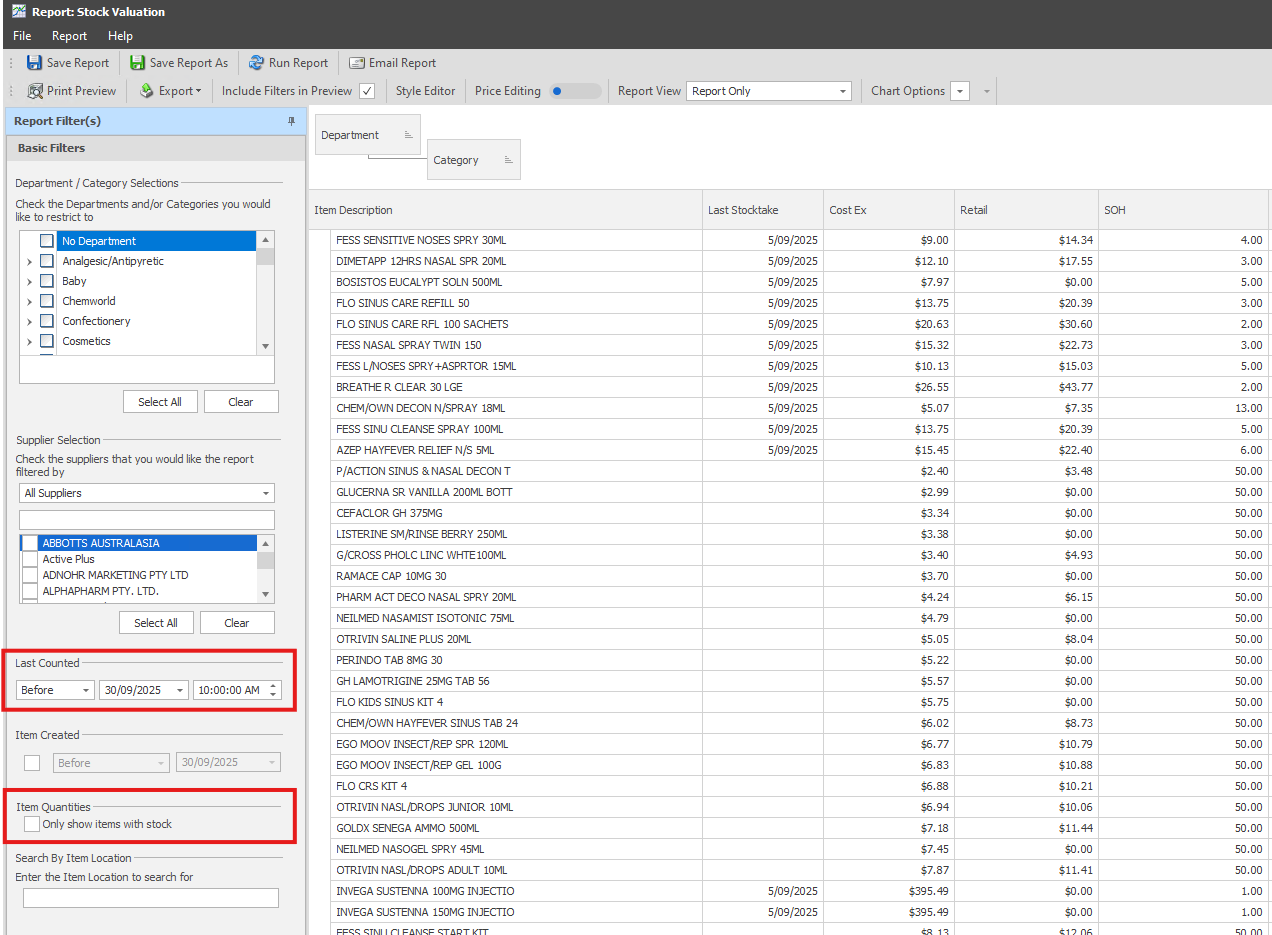
From the filters panel, set the Last Counted to Before, and set the date and time to the date and time you started counting the first section of your store.
-
Clear the Only show items with stock checkbox.
-
Right click one of the column headings, and select column chooser. Click on the column name from within the customisation window, and holding down your mouse button drag it to the top of the report where the column headings are and drop it when two blue arrows appear.
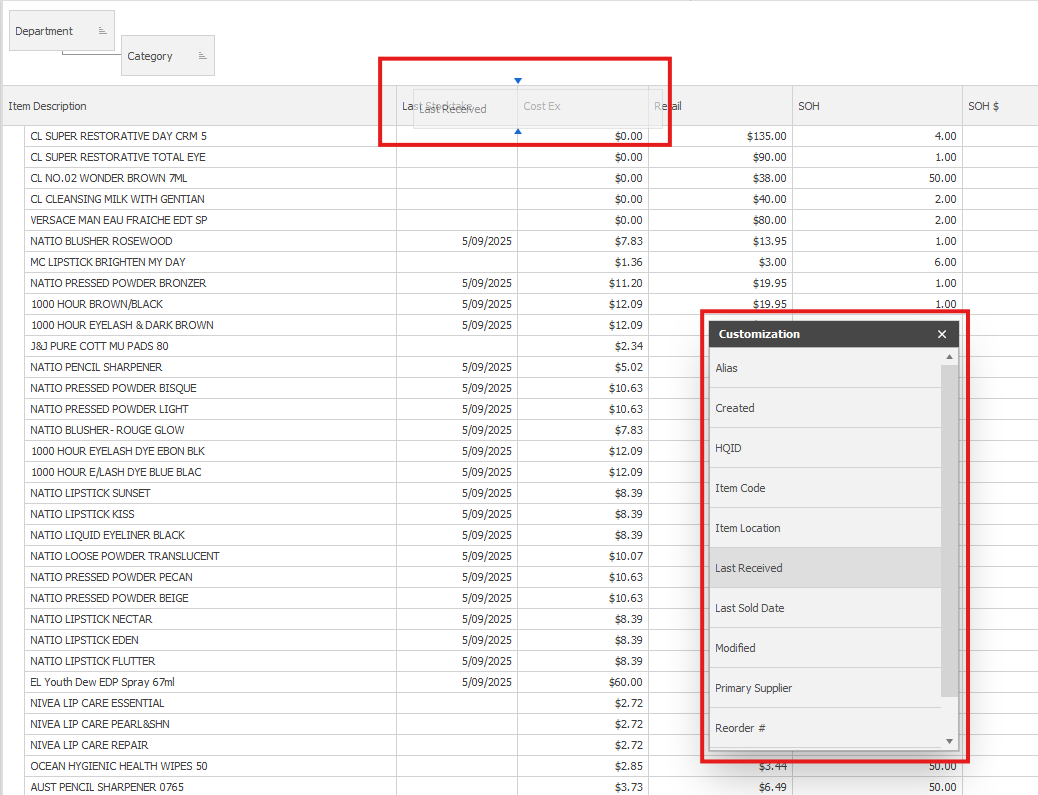
Complete this step to add Last Stocktake,Last Received and Last Sold Date columns. If the Last Stocktake Date column is blank for an item, this indicates that the item has never been counted.
-
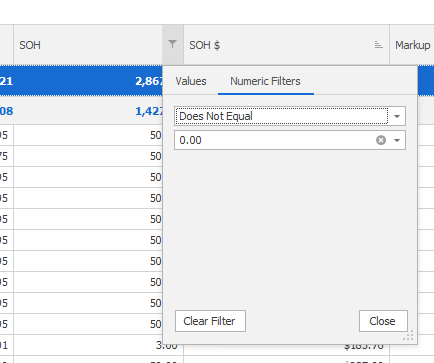
Click on the filter icon on the SOH column, then click the Numeric Filters tab. Select Does Not Equal and enter a value of 0. The report will then display items which have not been counted recently, which have SOH greater zero, as well as items with have negative SOH.
These items which have not been counted, can be added to an item group, that can then be added to a Stocktake Batch file. Print the Stocktake Sheet as a guide and use the mobility to complete the count. Refer to this page for further information on Counting Item Groups.