Robot Stocktake - After Hours
Follow the steps below to carry out a robot stocktake after business hours.
-
Extract report to Excel
-
Save the file to a local location.

-
Select File > Save as and give the file a new name.
Example: Stocktake-2023-05-01-Modified.xls
This is the copy of the Original
-
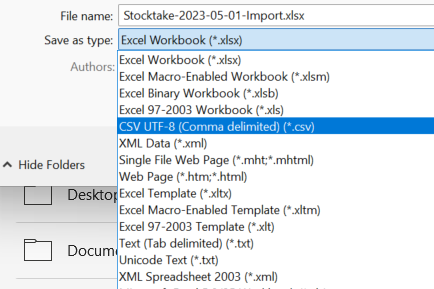
Then again, select File > Save as and change the file type to a .CSV file. This will ensure it is in the correct format for Importing.
Example: Stocktake-2023-05-01-Import.csv
-
In Fred Office, go to Assistants, then Stocktake, then click New.
-
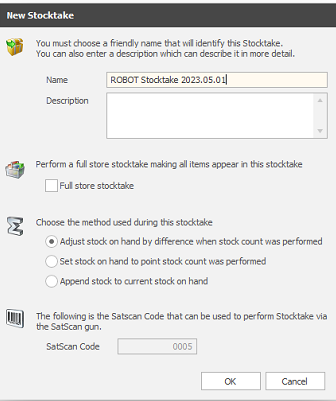
Enter a name for the stocktake and select Adjust stock on hand by difference when stock count was performed, then click OK.
Example: ROBOT Stocktake 2023.05.01
-
Select Add items > Data Import Templates, then select the saved template.
If you see No Valid Template Found, refer to Create or Edit a Template below.
-
Select the location and then OK.
-
Select Data Import Wizard.
-
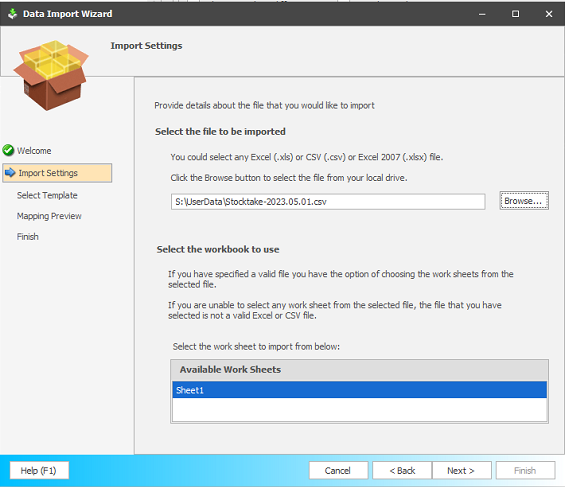
Select Browse.
-
Navigate to the location of the file you want to import.
-
Double-click the file to be imported.
If your file does not display you may need to click the drop down and select a different file type.

-
Click Next.
-
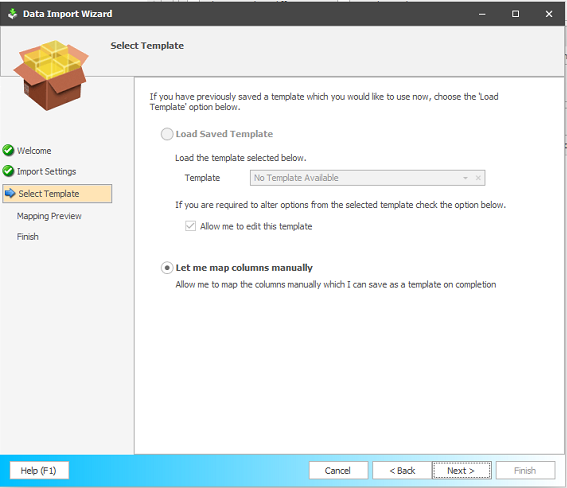
Select one of the following options and then follow the relevant steps below.
-
Load Saved Template, to edit an existing template
-
Let me map columns manually, to create a new template
-
-
Select Load Saved Template. If you don't have a template, select Let me map columns.
-
Select Template from the drop down.
-
Select Next.
-
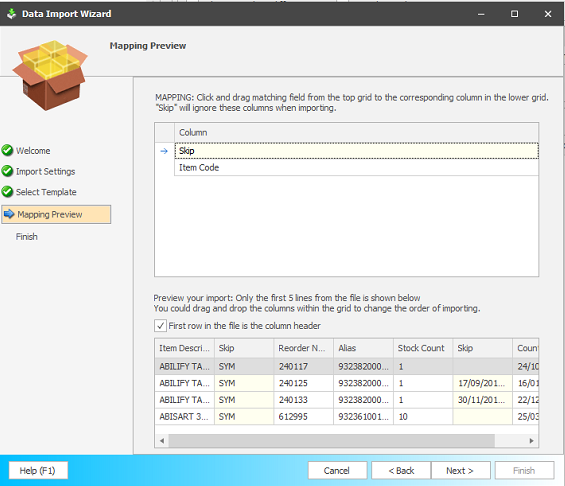
Confirm that the column headers match the data displayed.
If you need to manually match columns, click and hold your mouse on a field from the Column section at the top of the screen. While still holding, move your mouse onto the header line of the column with the relative information in your data preview displayed below. When your mouse is over the correct column heading, release the mouse button. This will slot the column heading into the correct position.
-
After you have confirmed the column headers match the data, select Next.
-
Select Let me map columns manually, then click Next.
-
In the Column section at the top of the screen, click and drag a field into the bottom section.
-
When your mouse is over the correct column heading, release the mouse button. The column heading slots into the correct position.
-
Repeat steps 2 to 3 until you have mapped all the required columns in the worksheet.
-
Select the First row in the file is the column header checkbox, then click Next.
-
If required, select Check this box to allow saving of this template and click Finish.
The Excel file will now load into Fred Office.
-
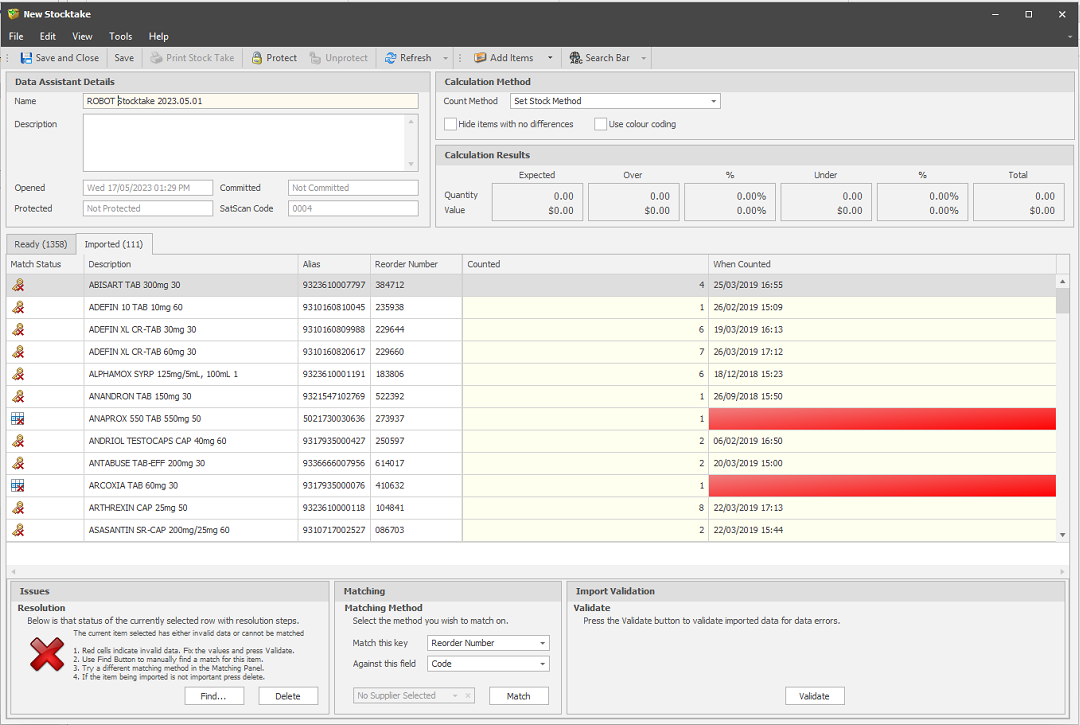
Fix any Imported items that have been unable to match using the Barcode using the table below.
Ensure the Imported tab does not exist before moving onto the next step.
-
You can resolve the unmatched items using one or more of the following:
-
Delete the unmatched line
-
Use Matching Method
-
Use the Find Button to manually find the matches using description.
-
The table gives you some tips for each option.
|
Action |
Description |
|---|---|
|
Attempt to match spreadsheet Alias field to Alias in your Database. |
This will move any matched items to the Ready tab |
|
Attempt to match spreadsheet Reorder Number field to Reorder Numbers in your Database. |
This will move any matched items to the Ready tab |
|
Directly match spreadsheet item to an item in your Database by searching. |
Repeat the above steps for all items remaining on the imported tab. |
|
Resolve red fields. |
This applies to all items where information in the spreadsheet was missing or invalid (wrong format). These items appear with a grid cross icon. 1. Tap in the red field(s) displayed and type the correct value. 2. Repeat for all items with red fields. 3. Tap Validate. |
|
Remove rows or items. |
1. Select the item you want to remove . 2. Tap Delete. |
Key points to check for:
-
Check for items in both Robot and OTC/Shop Floor. Either remove or manually check the SOH of the 2nd location therefore ensuring correct figures.
-
Check for large changes between Counted and SOH when Counted.
-
Check for items with SOH when counted as negative. (This may already be on order or special orders - awaiting on stock).
To update/finalise SOH figures
-
Select Protect.
-
Select Calculate via Adjust and then click Commit.