Emailed and scheduled reports
In Fred Office Plus, you can schedule reports to be automatically run whenever you need them.
When reports are run, they can be shared between Fred Office Plus users with particular security roles, and can also be sent to any email address (for example, to your accountant).
When you are viewing a report, you can email it at any time. It will be emailed with the current filters, columns, and style you are using at the time that you send it.
- Run the report you want to email.
- Configure the view of the report you want (for example, use the filters to show, hide, or sort data).
-
On the Report screen, click Email Report.
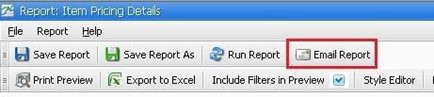
The Email Report window is displayed.
-
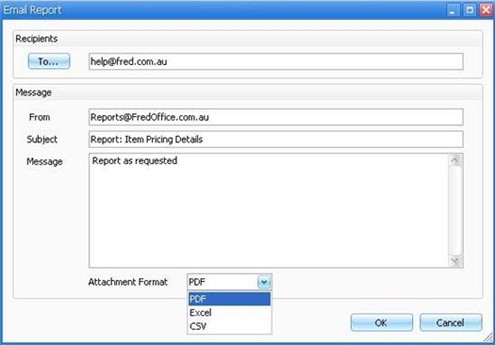
In the Recipients field, enter the email addresses the report will be sent to.
Alternatively, to select other Fred Office Plus users at your pharmacy, click To

- In the From field, if required, you can change the email address to send the email from.
-
In the Subject field, edit the email subject line, if required.
- In the Message field, edit the email content, if required.
-
From the Attachment Format drop-down list, select the format to send the report in.
A report in PDF format will look similar to what you see in Fred Office Plus, but is difficult to edit. Some recipients might require Excel or CSV format so they can manipulate or extract the report data.
-
To send the email, click OK.
The email is sent, with your report attached.
- Run the report you want to save.
- Configure the view of the report you want (for example, use the filters to show, hide, or sort data).
-
On the Report screen, click Save Report.
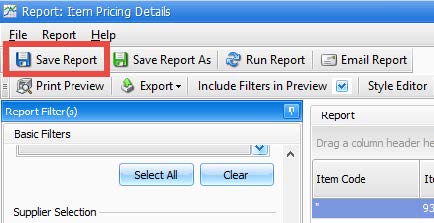
The Save Report window is displayed.

- Enter the Name and Description.
-
Click Set Sharing Options.
The Report Sharing window is displayed.
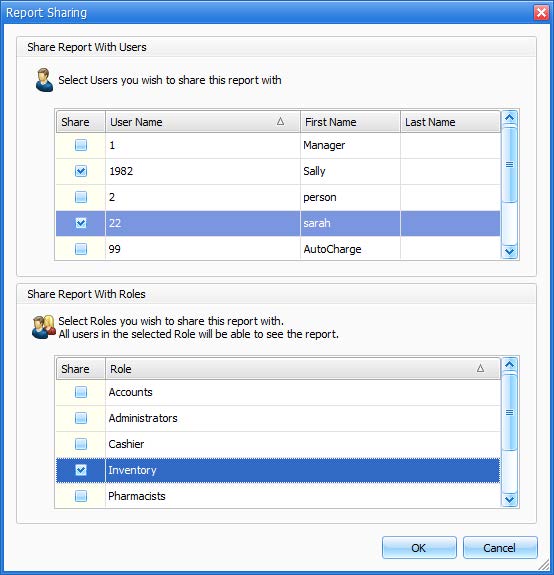
- Select the Users and/or Roles you want to be able to view the report.
- Click OK, to save your changes and return to the Save Report window.
- Click OK, to finish saving your report and return to the Report screen.
-
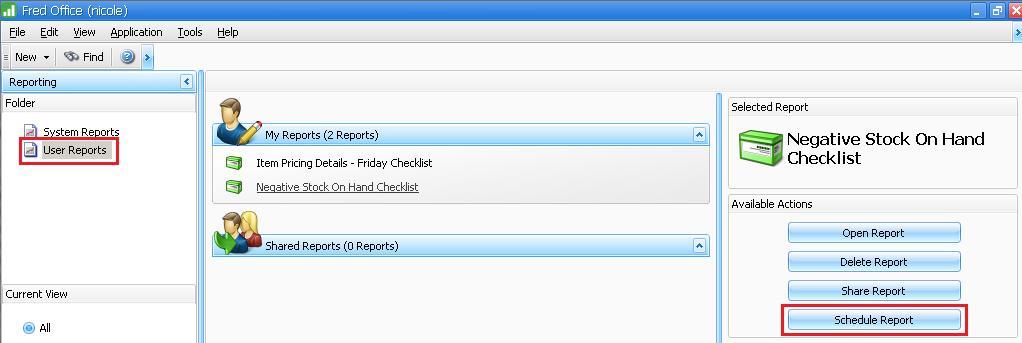
On the Reporting menu on the left-hand side of the screen, click User Reports. The report you previously saved is listed under My Reports.
-
Click the report you want to schedule, then click Schedule Report.
The Report Schedule window is displayed, with the Schedule tab active.
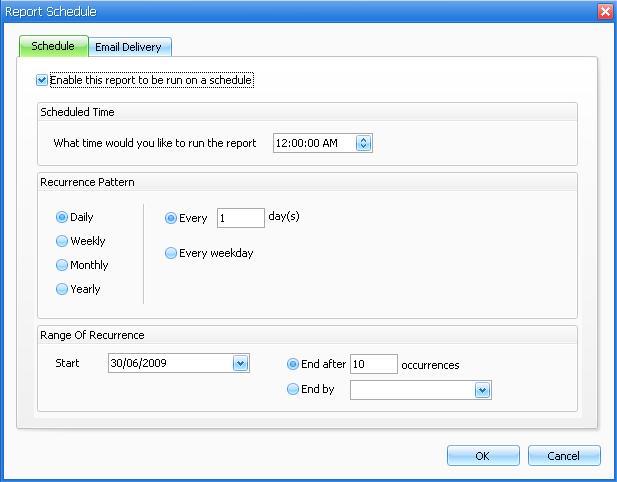
- Tick the Enable this report to be run on a schedule checkbox.
- In the Scheduled Time section, select the time of day to run the report.
- In the Recurrence Pattern section, select the frequency with which to run the report.
- In the Range of Recurrence section, select the date to start running the report, and either the number of occurrences of the report, or the date to end the scheduled runs of the report.
-
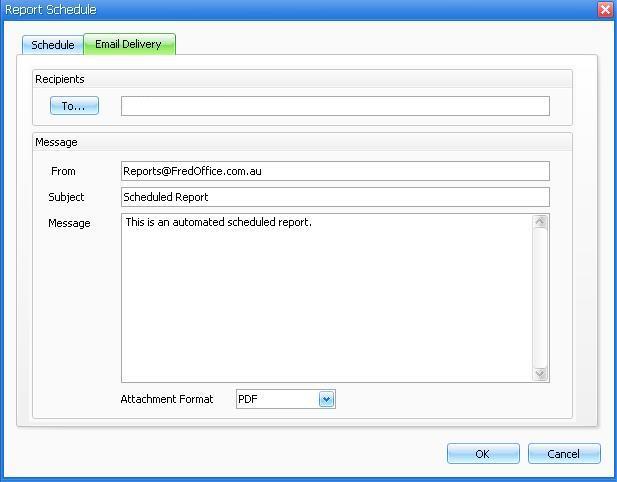
Click the Email Delivery tab.
-
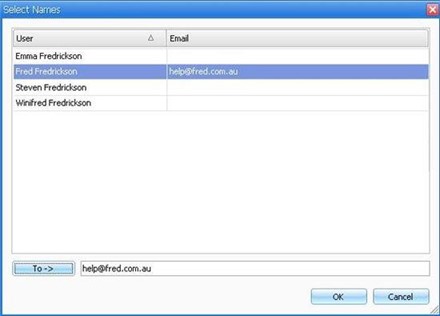
In the Recipients field, enter the email addresses the report will be sent to. Alternatively, to select other Fred Office Plus users at your pharmacy, click To...
- In the From field, if required, you can change the email address to send the email from.
- In the Subject field, edit the email subject line, if required.
- In the Message field, edit the email content, if required.
-
From the Attachment Format drop-down list, select the format to send the report in.
A report in PDF format will look similar to what you see in Fred Office Plus, but is difficult to edit. Some recipients might require Excel or CSV format so they can manipulate or extract the report data.
-
To save the schedule, click OK.
The report will be run and emailed according to the schedule you set.
On the left-hand navigation menu, click Reporting, then click User Reports. The reports you have saved are displayed under My Reports.
Edit the report settings
- Click to select the report you want to edit.
-
Click Open Report.
The Reporting screen is displayed.
- Make the required changes, then click Save.
Edit the schedule
- Click to select the report whose schedule you want to edit.
-
Click Schedule Report. The Report Schedule window is displayed.
For details on using this window, see Schedule a saved report to be run and emailed automatically.
-
On the left-hand navigation menu, click Reporting, then click User Reports.
The reports you have saved are displayed under My Reports.
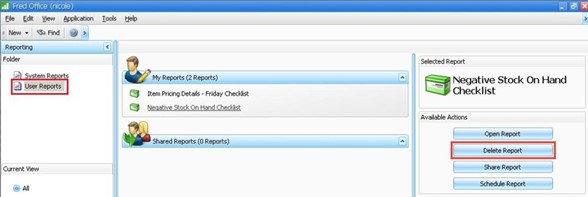
- Click to select the report you want to delete.
- Click Delete Report. The Delete User Report prompt is displayed.
- To delete the report, click Yes.