Export a Report and Import into Excel
This article details how to export a Fred Dispense report and then import it into Microsoft Excel.
Part 1: Export a Report from Fred Dispense
- In Fred Dispense, generate the report that you want to import into an Excel spreadsheet.
- Close the report.
-
Select Reports > Last Run Report to ASCII.
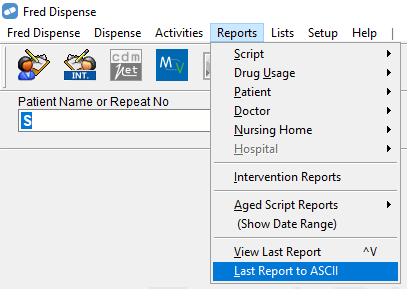
The report is saved to
C:\fredhealth\fred\reps\fredrep.rep.
Part 2: Launch the Text Import Wizard
How you launch the Text Import Wizard varies depending on the version of Excel you use. Follow the relevant instructions below.
Enable the legacy Text Import Wizard (Once off)
If you have already enabled the legacy Text Import Wizard, then skip to Launch the Legacy Wizard.
- In Excel, open a blank workbook.
-
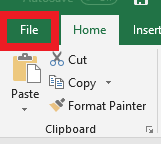
Click the File tab.
-
Click Options.

-
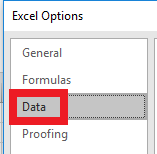
Click Data.
-
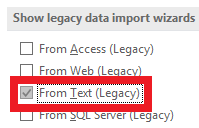
Under Show legacy data import wizards, select the From Text (Legacy) checkbox.
- Click OK.
Launch the Legacy Wizard
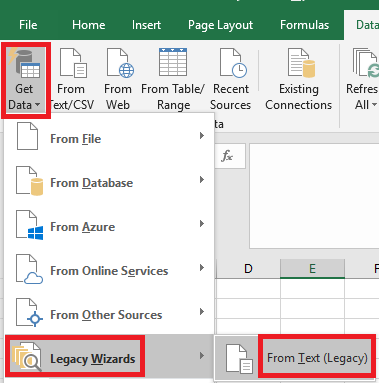
- Click the Data tab.
-
Select Get Data > Legacy Wizards > From Text (Legacy).
-
Browse for the relevant file and click Import.
If you don't see your report in the
C:\fredhealth\fred\repsfolder, then change the file type to display All Files (*.*).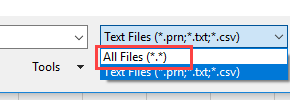
- For the remaining steps, refer to Part 3: Use the Wizard to Import the Report.
- In Excel, open a blank workbook.
- Do one of the following, depending on your version of Excel:
- Select Data > Import External Data > Import Data.
- Select Data > From Text.
-
Browse for the relevant file and click Import or Open, depending on your version of Excel.
- For the remaining steps, refer to Part 3: Use the Wizard to Import the Report.
If you don't see your report in the C:\fredhealth\fred\reps folder, then change the file type to display All Files (*.*).
Part 3: Use the Wizard to Import the Report
-
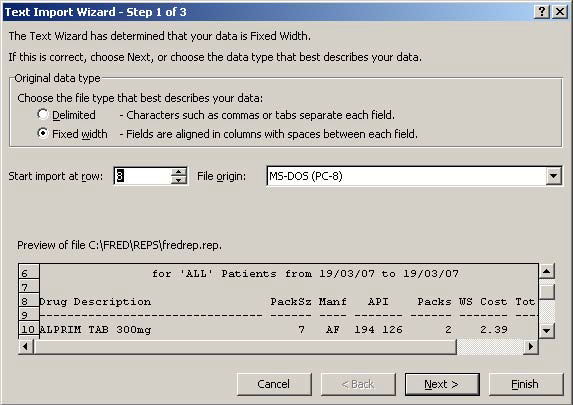
On the Wizard, under Original data type, select Fixed width.
-
For Start import at row: change the number to correspond with the row that contains the column headings. In the example below, row 8 contains the headings Drug Descriptions, PackSz and so on.
- Click Next.
- On the next screen, adjust the column breaks (vertical lines) to fit the data in the preview window. You can:
- Move a line by dragging it
- Delete a line by double clicking on it
Add a line by clicking where you want to add it.

- Click Next.
-
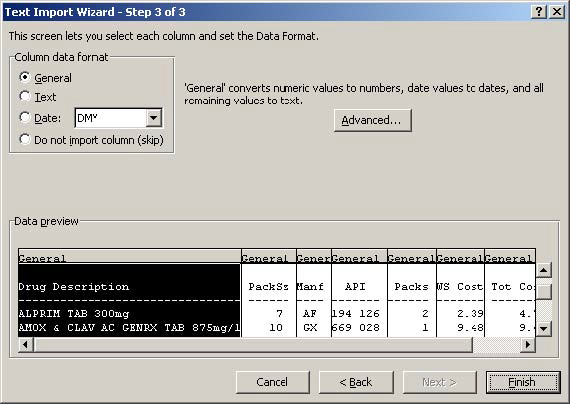
On the next screen, review the preview. You can select a column and change its data format or choose not to import it.
-
Click Finish.
The Import Data popup displays.
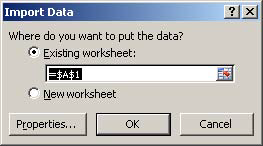
-
Click OK.
The report is imported into Excel. You may need to adjust the formatting of the report or edit the text to clean it up.
