Fred Pak
Install Printer Driver for Laser Seal Medicopak, Persopak and Websterpak
For heat seal printer driver installation, please contact support 1300 73 1888.
Fred Health supports Kyocera printers with PCL6 emulation for Laser seal foils printing. It is a requirement that Laser Seal foils be printed through the Multi Purpose (MP) tray. Using the cassette trays will void the manufacturer‟s warranty.
It is encouraged that you use a printer that is compatible with a separate output tray (for example a Kyocera PT-310 output tray) to allow for straight through label printing. The Kyocera models that support this output tray are C5015N C5030N and FS3900.
The WebsterCare Cold Seal Laser Labels (A5 Laser Sheet) format requires a HP Laserjet 6P printer driver.
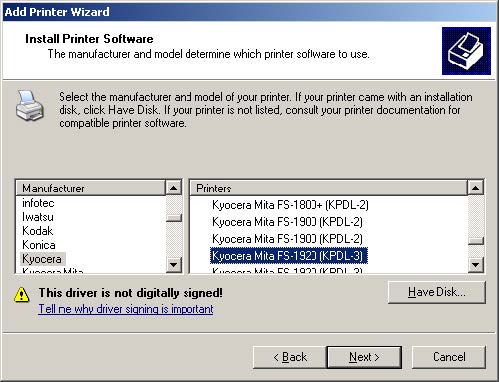
In this example we are installing a FS1920 Driver. The steps to install a printer driver will be similar for most Kyocera printers.
Make sure you install the printer driver designed for the model of printer you are using.
- From the Windows Start menu, select Settings > Printers & Faxes.
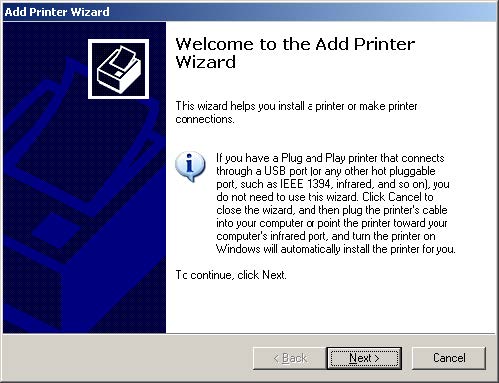
- Double-click Add Printer.
-
Click Next.
-
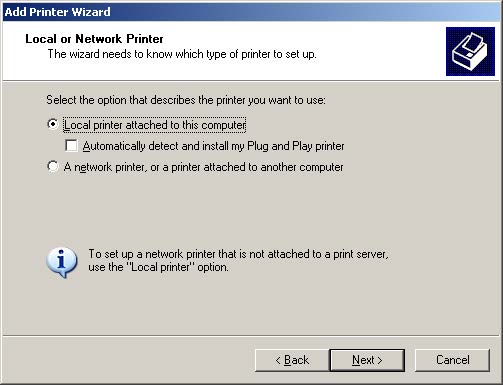
Make sure that Local printer attached to this computer is selected and click Next.
-
Select the printer port that the printer is connected to.
-
Select the Manufacturer and Printer for the printer you are using.
-
If prompted with a message that a driver already exists, choose to keep the existing driver as shown below. Click Next.
-
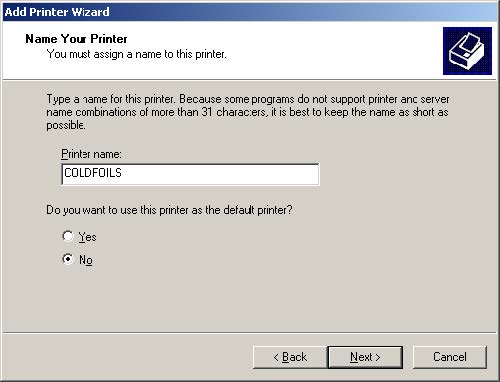
By default, the name of the printer will be listed as the name of the driver. Change this to something more meaningful such as Medicofoils or Websterfoils. In this example the printer will be called COLDFOILS.
- Select No to the question that asks if you would like this printer to be the default printer and click Next.
-
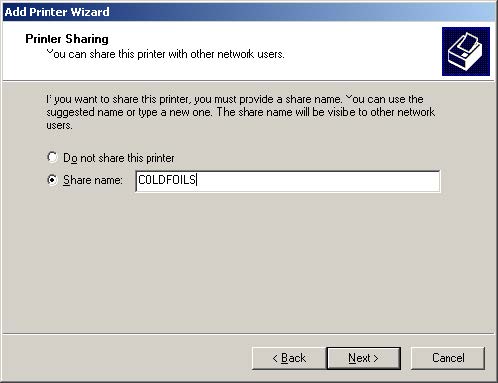
Choose to share the printer and change the Share name to be the same as the printer driver name. Click Next.
-
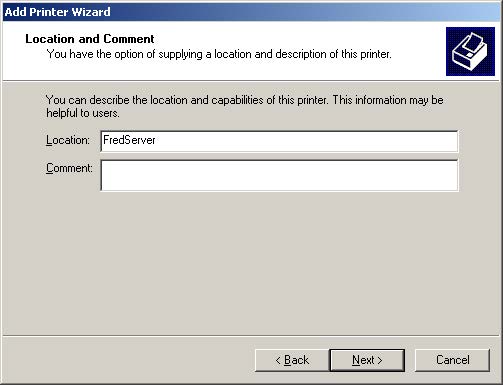
If you know the name of the computer the printer is plugged into, you can type this name into the Location field. In our example the computer name is Fredserver. This is optional. If you do not know the computer name leave the Location and Comment fields blank and click Next.
-
Choose No to printing a test page and click Next.
-
The installation of the driver is now complete. Click Finish.
- From the Windows Start menu, select Settings > Printers & Faxes.
- Right-click on the COLDFOILS driver and select Properties.
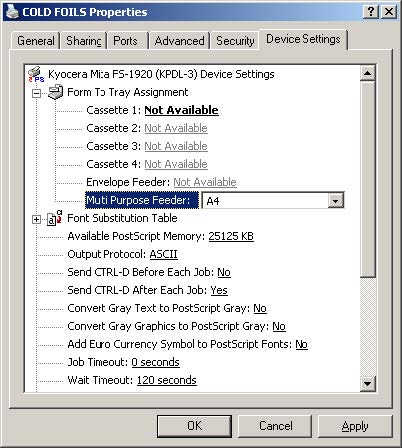
- Click the Device Settings tab.
- Change all the Cassettes to Not Available.
- Change the Multi Purpose Feeder to A4 as shown in the screen shot below.
- Click Apply when finished.:
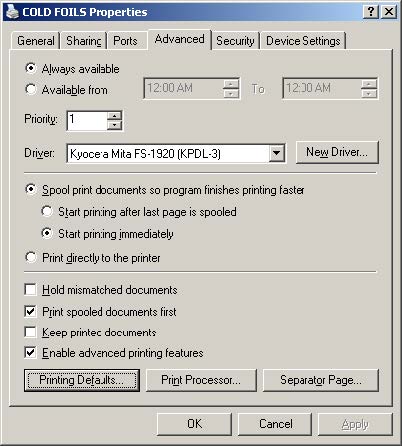
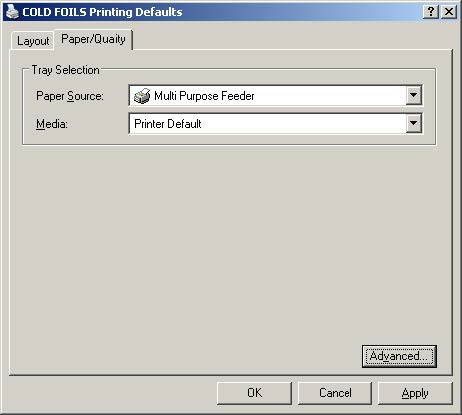
- Click the Advanced tab.
Click Printing Defaults.
- Click on the Paper/Quality tab and change the Paper Source to Multi Purpose Feeder.
Click Apply when finished.
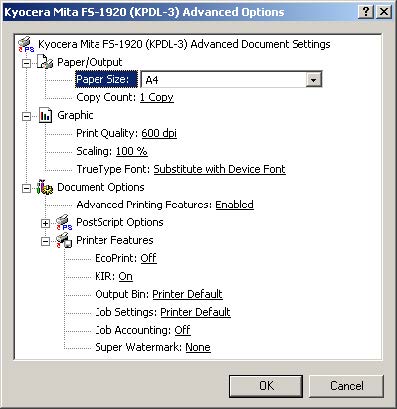
- Click on the Advanced Button. Set the Paper Size to A4.
Click OK and then click OK again on the Paper/Quality screen.
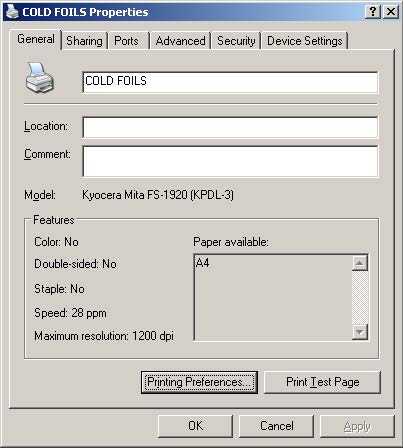
- Click the General tab.
Click Printing Preferences.
- Change the Paper Source to Multi Purpose Feeder.
Click Apply when finished.
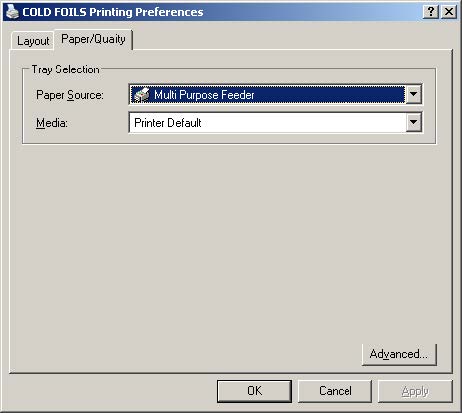
- Click on the Advanced button
Set the Paper Size to A4.
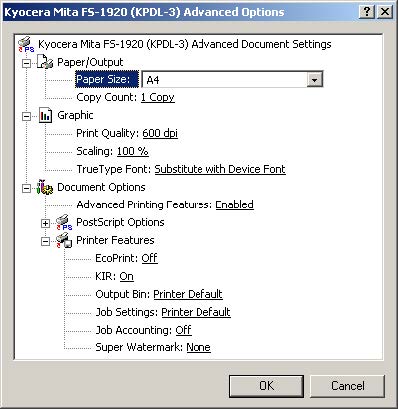
- Click OK and then click OK on the Paper/Quality screen
- Click OK on the General tab to exit the Printer Properties.
There are 3 settings on the Kyocera Printer which help control where a print job feeds from. To configure these settings best for MP tray printing, follow these steps:
Step 1 - MP Tray Mode
- Press the Menu/ Mode button on the printer.
- Down arrow until you get to Paper Handling.
- Right arrow to access the Paper Handling Menu.
- Down arrow until you get to MP Tray Mode.
- If MP Tray Mode is set to Cassette
- Press Enter.
- Up arrow once so the setting displays First.
- Press Enter again to save this setting.
- If MP Tray Mode is already set to First continue on to Step 2.
Step 2 - Feed Select
- Down arrow until you get to the setting for Feed Select.
- If Feed Select is set to Cassette 1 or MP Tray.
- Press Enter.
- Up arrow until the setting shows Cassette 2.
- Press Enter.
- If Feed Select is already set to Cassette 2 continue on to Step 3.
Step 3 Override A4/LT
- Down arrow until you get to Override A4/LT.
- If Override A4/LT is set to OFF.
- Press Enter.
- Up arrow once so the setting shows to be ON.
- Press Enter to save this setting.
- Once this is saved or if Override A4/LT is already set to ON.
- Press the left arrow button to return to the Paper Handling Menu.
- Press the menu button to exit the Paper Handling Menu and exit the Menu Mode.
If you are using an Output Tray
- Down arrow until you get to Paper Handling.
- Right arrow to access the Paper Handling Menu.
- Down arrow until you get to Stack Select.
- If Stack Select is set to TopTray FaceDn
- Press Enter.
- Down arrow to display RearTray FaceUp.
- Press Enter again to save the selection.
- Press the left arrow button to return to the Paper Handling Menu.
- Press the menu button to exit the Paper Handling Menu and exit the Menu Mode.
